

Manual
New version: Change the chip in a few seconds without any hassle.
These ink cartridges work with a chip. The chip allows the printer to recognise and regulate the ink level. The chip
from an empty ink cartridge can easily be transferred to a new ink cartridge. You can save by availing of these
cartridges as you will only need to purchase the ink cartridge with the chip once, per colour.
The 123ink compatible branded ink cartridges without a chip are not ready for use immediately. You will
first need to take the chip from the empty 123ink branded ink cartridge with a chip and move it to the
new 123ink compatible branded ink cartridge without a chip. Follow the steps below carefully.
Manual for 123ink compatible branded ink cartridges for Canon
PGI-5BK, CLI-8 series, PGI-520BK and CLI-521 series
Transferring the chip:
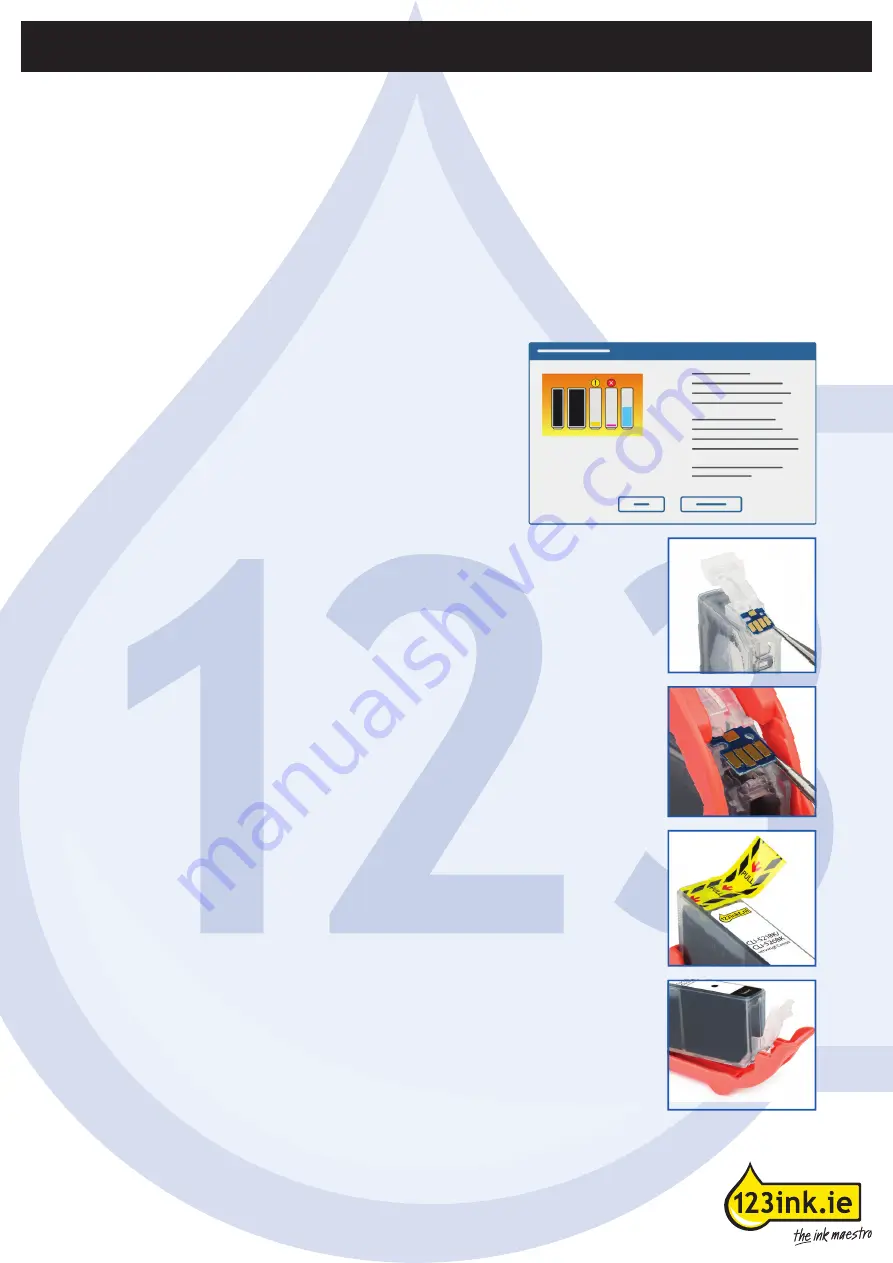
1.
Your computer will notify you: "The ink is empty."
2.
Remove the empty ink cartridge from the printer.
3.
Remove the chip from the empty ink cartridge. This can be done by gently
prying the chip from the bottom right or left with a sharp knife or tweezers.
Please note: don't touch the golden contact points with your fingers!
4.
With the inlet on the left, click the chip behind the attachment points on the
new ink cartridge. First at the top, then the bottom.
5.
Now remove the yellow sticker on the top of the ink cartridge.
6.
Only now remove the orange clip at the bottom of the ink cartridge.
7.
Place the ink cartridge in the printer.


