15 of 17
Saving Footage To A Hard Drive
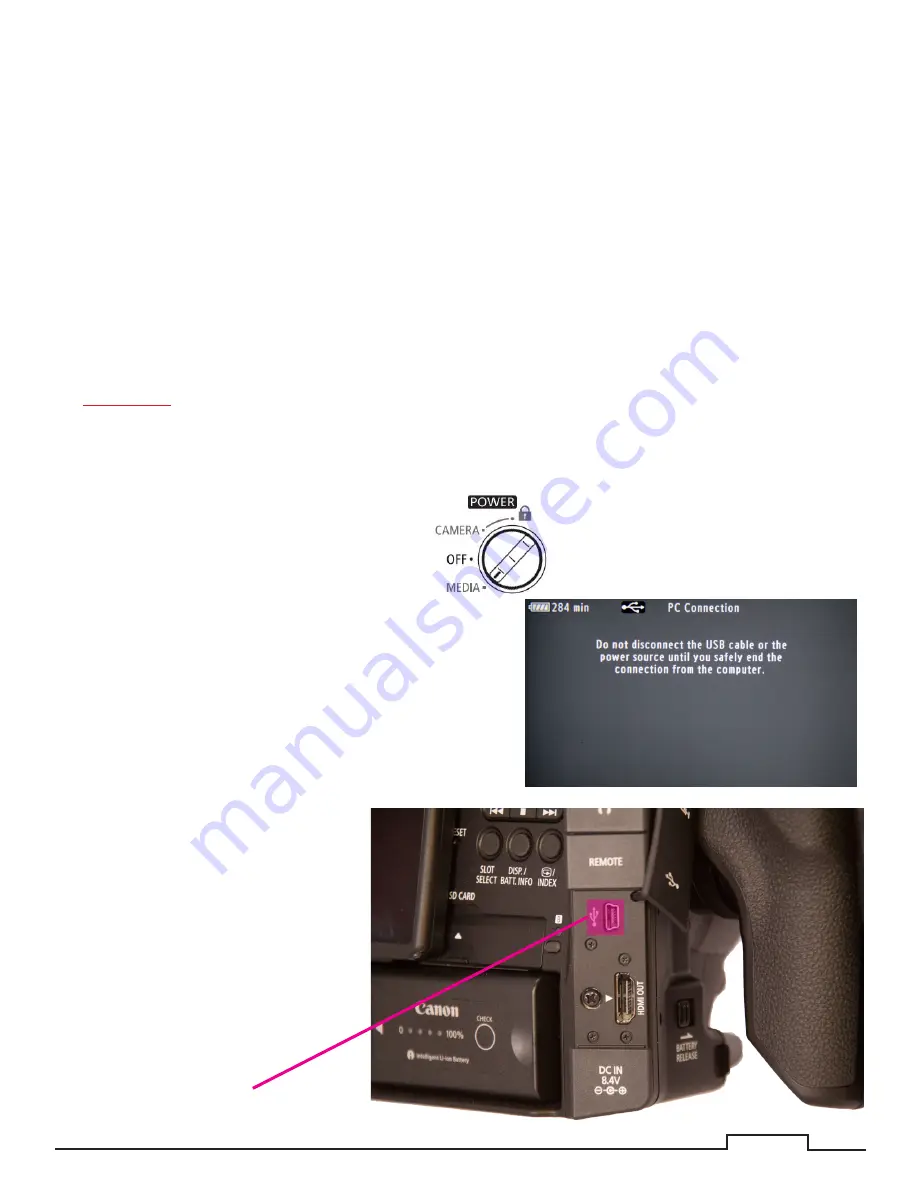
1. Turn on the video camera to Media.
2. Plug in a USB cable into the
camera’s USB2 slot.
3. While USB2 cable is plugged in the
camera there will a PC Connection
message.
4. A new drive, called “CANON_DC”,
should appear on the desktop.
5. Open the drive called “CANON_
DC”.
6. Copy the file named “PRIVATE” to
the drive and folder where you will
be editing your project.
7. Eject the drive called “CANON_
DC.”
8. Remove the USB2 cable.
The following steps detail how to remove the footage, using the camera as a SD Card reader.
After filming your subject, you will need to transfer the footage to a separate hard drive to store the your
footage.
To do this you ether:
• Use the camera as a SD Card reader to transfer your footage.
• Remove the SD Card from the camera and use an external card reader to transfer the footage.
NOTE:
If you use this method proceed to step 11 to remove the footage from the SD Card.
This brings up a problem with the SD Cards and using the computer to delete the files from them. De-
leting the files of an SD Card with the computer can lead to problems with the SD Card in the camera
afterwards. One of the main problems is that the SD Card will not hold as much footage as before, which
is not noticeable until you are filming.
NEVER
delete files from the SD Card with the computer. This reduces the avaliabe recording time of
the card. Always use the camera to reformat the SD Card.
USB Slot
3
1


