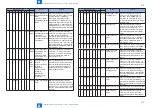
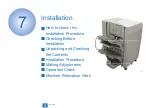
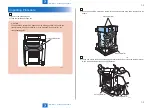


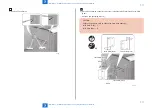


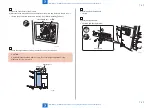

7
7
7-11
7-11
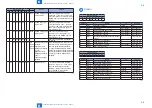
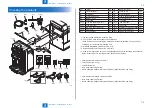
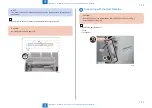
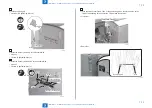
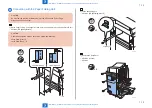
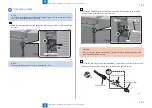
Installation > Installation Procedure > Connecting with the Host Machine
Installation > Installation Procedure > Connecting with the Host Machine
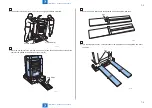
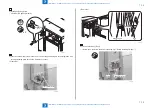
2) Remove 3 Face Plates.
Face Plate
Face Plate
F-7-23
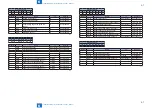
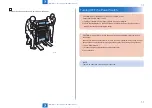
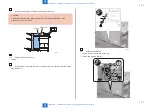
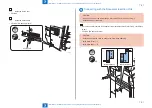
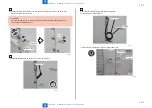
3) On the Host machine's upper left side cover, install the Latch Plate (Front) Latch Plate
(Rear).
• 4 Screws (RS tightening; M4x10)
CAUTION:
Confirm the engraved mark on each Latch Plate when attaching.
Latch Plate (Front) : F
Latch Plate (Rear) : R
x4
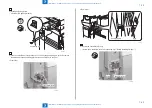
Latch Plate (Rear)
Latch Plate (Front)
Screw
Latch Plate (Rear)
Latch Plate (Front)
Screw
F-7-24
Summary of Contents for Booklet Finisher-D1
Page 12: ... Notes Before Servicing Points to Note at Cleaning Safety Precautions ...
Page 14: ...1 1 Product Outline Product Outline Product Specifications Names of Parts ...
Page 60: ...3 3 Periodic Servicing Periodic Servicing User Maintenance Maintenance and Inspection ...
Page 315: ...6 6 Troubleshooting Troubleshooting Upgrading ...
Page 357: ... Service Tools Solvents and Oils List of Signals General Circuit Diagram Appendix ...


