


111
Shooting
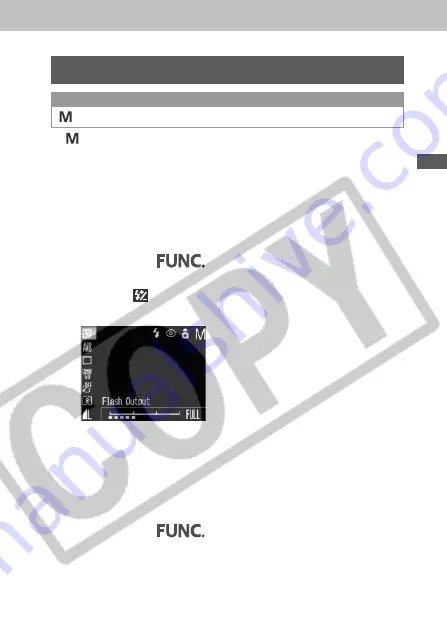
Adjusting the Flash Output
Available in the following modes.
In
mode, the flash output can be controlled in three
steps, starting from FULL, when shooting.
When the flash output is low, less shadow appears in the
image. However, when shooting a wide scene or area, the
image will likely be darker due to insufficient light. When
adjusting the flash output, consider all the shooting
conditions, including the distance to the subject.
1
Press the
button.
2
Select
(Flash Output) using the up or
down button.
3
Adjust the flash output using the left or
right button.
You can shoot the image right after selecting settings by
pressing the shutter button. This screen will appear again,
once the image is shot.
4
Press the
button.
5
Shoot the image.
Summary of Contents for A80 - PowerShot A80 4MP Digital Camera
Page 211: ...207 Appendix ...
Page 217: ...213 60 60 64 65 111 46 84 80 96 114 78 Reference Page ...


