59
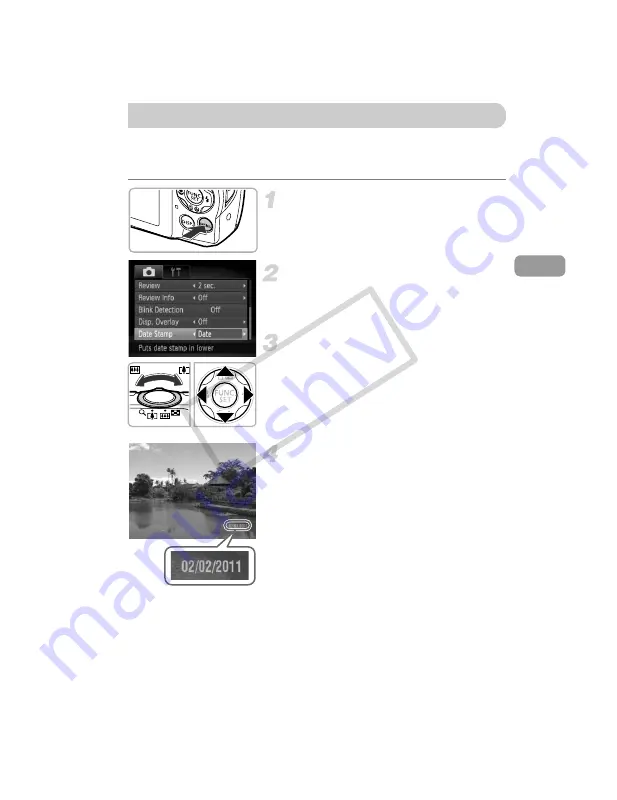
You can insert the shooting date and time in the lower right corner of an
image. Once inserted, however, they cannot be deleted. Be sure to check
beforehand that the date and time are correctly set (p. 19).
Display the menu.
z
Press the
n
button.
Choose [Date Stamp].
z
Move the zoom lever to choose the
4
tab.
z
Press the
op
buttons to choose [Date
Stamp].
Choose the setting.
z
Press the
qr
buttons to choose [Date] or
[Date & Time].
z
Press the
n
button to complete the
setting and restore the shooting screen.
X
Once set, [DATE] will appear on the
screen.
Shoot.
X
The shooting date or time will be recorded
in the image’s lower right corner.
z
To restore to the original setting, choose
[Off] in Step 3.
Inserting the Date and Time
COP
Y
Summary of Contents for 5033B001
Page 66: ...66 COPY ...
Page 82: ...82 COPY ...
Page 104: ...104 COPY ...
Page 136: ...136 COPY ...
Page 162: ...162 COPY ...
Page 185: ...Menus 185 K E w O P t E Selectable or set automatically Not selectable COPY ...
Page 187: ...Menus 187 K E w O P t E Selectable or set automatically Not selectable COPY ...
Page 189: ...Menus 189 K E w O P t E Selectable or set automatically Not selectable COPY ...
Page 191: ...Menus 191 K E w O P t E Selectable or set automatically Not selectable COPY ...
Page 201: ...201 MEMO COPY ...
Page 202: ...202 MEMO COPY ...
Page 203: ...203 MEMO COPY ...


