background image

11

2

1

2

1

U

so

 d

es

de

 o

rd

en

ad

or

es

 a

di

ci

on

al

es

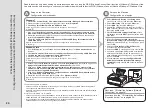
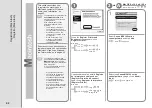
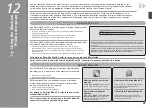
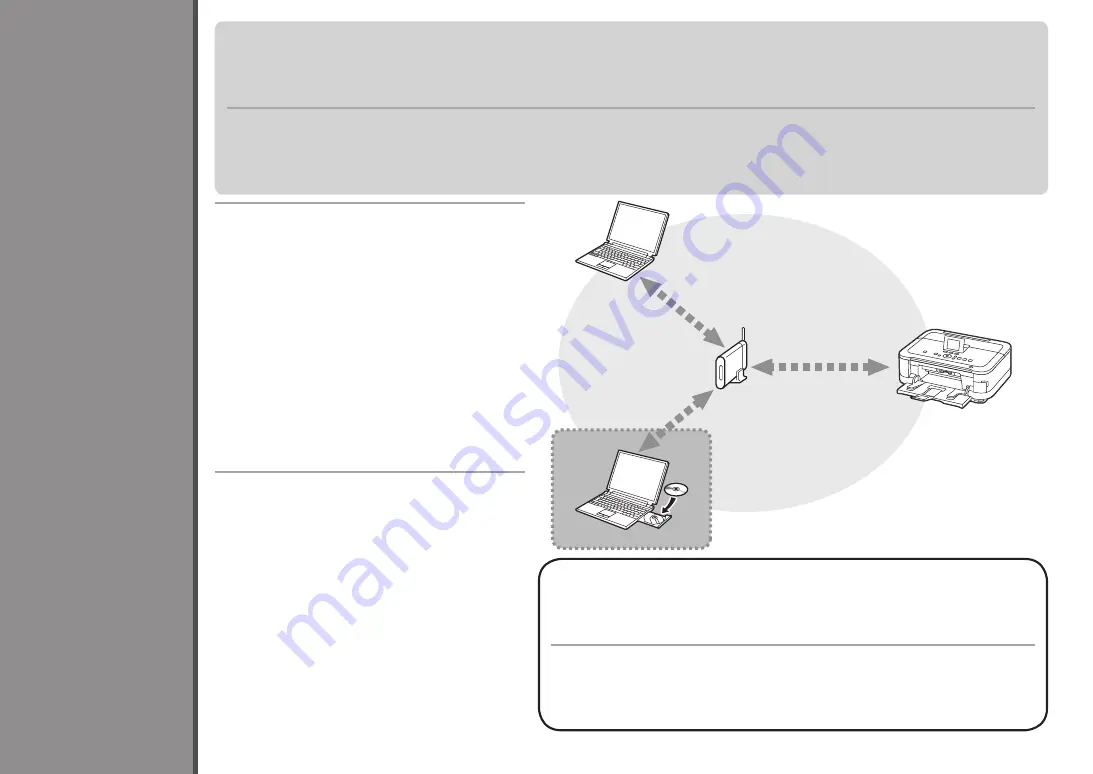
Si el equipo ya está conectado a una conexión inalámbrica/por cable, se puede utilizar desde otros ordenadores de la misma red.

Ordenador desde el que se puede usar el equipo actualmente

Para obtener más información sobre el procedimiento de instalación del software, 

consulte "10 Instalación del software (Conexión de red)" en la página 38.

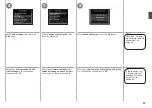
Inserte el 

CD-ROM de instalación (Setup CD-ROM)


en el ordenador desde el que desee utilizar el equipo.

Siga las instrucciones que aparezcan en pantalla para 

instalar el software.

No se necesita establecer ninguna otra configuración.

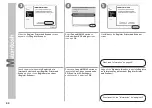
Para utilizar desde ordenadores adicionales

Otros ordenadores de la misma red

Permite que el ordenador utilice el equipo.

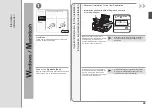
Insert the 

Setup CD-ROM

 into the computer from which 

you want to use the machine.

Follow the on-screen instructions to install the software.

Other settings are not required.

If the machine is already connected to a wireless/wired connection, it can be used from additional computers on the same network.

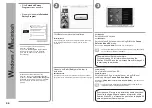
To use from additional computers

Computer from which the machine can be used currently

U

se

 fr

om

 A

dd

iti

on

al

 C

om

pu

te

rs

For details on the software installation procedure, refer to "10 Install the Software 

(Network Connection)" on page 38.

Additional computers on the same network

It enables the computer to use the machine.

Summary of Contents for 4503B002

Page 1: ...po Consérvelo a mano para utilizarlo como referencia en el futuro Equipo multifunción fotográfico Canon Inkjet Léame en primer lugar Getting Started Make sure to read this manual before using the machine Please keep it in hand for future reference Canon Inkjet Photo All In One Read Me First ...

Page 2: ...resión de fotografías desde un ordenador P 55 10 Instalación del software Conexión de red P 38 Instalación del software P 39 Registro Macintosh P 42 Información P 45 12 Pruebe el equipo P 49 4 Alineación del cabezal de impresión P 14 9 Conexión por cable P 35 Instructions including important information Prohibited actions Microsoft is a registered trademark of Microsoft Corporation Windows is a tr...

Page 3: ...el equipo Uso desde ordenadores adicionales cuando el equipo ya está conectado a la red y se quieren añadir ordenadores desde los cuales utilizarlo Network Connection Wireless Connection USB Connection Machine Preparation Software Installation Installation Complete Machine Installation Flow Machine Wired Setup Try Using the Machine Software Installation Software Installation Using from Additional ...

Page 4: ...de problemas Guía básica Describe las operaciones básicas y los soportes y ofrece una introducción a otras funciones disponibles Solución de problemas de configuración de red Getting Started this manual Describes various operating procedures to make full use of machine Describes troubleshooting tips for problems you may encounter when using the machine Advanced Guide Troubleshooting Basic Guide De...

Page 5: ... de acceso o router inalámbrico Router etc Cable Ethernet Se necesita un dispositivo de red router etc y un cable Ethernet disponibles en comercios Devices Required for Wireless Wired Connection Wireless Connection When using the machine over a wireless wired connection the following devices are required depending on the connection method Wired Connection Router etc A commercial access point or ro...

Page 6: ...l interior y el exterior del equipo La forma y la posición de la cinta y los materiales protectores pueden variar respecto a las reales Preparation Do not install the machine where an object may fall on it In addition do not place any object on the top of the machine It may fall into the machine when opening covers resulting in malfunction Paper Output Tray A automatically opens when printing star...

Page 7: ...oladores las aplicaciones y los manuales en pantalla 6 Papel Fotográfico Mate Matte Photo Paper MP 101 para la alineación automática del cabezal de impresión 7 Otros documentos A USB cable is necessary to connect the machine with your computer USB connection only Some accessories 1 are stored within the Paper Output Tray A Open the Paper Output Tray to remove them Make sure all the following items...

Page 8: ...ento Esto es normal Una vez conectado el cable de corriente el botón ACTIVADO ON tarda unos 4 segundos en ponerse en funcionamiento Pulse el botón ACTIVADO ON E Insert the power cord into the connector on the left side at the back of the machine and into the wall outlet firmly Do NOT connect the USB cable or Ethernet cable at this stage Make sure that the Document Cover B is closed Press the LCD o...

Page 9: ... está iluminada o parpadea el cabezal de impresión se podría secar y obstruir teniendo como resultado una impresión de mala calidad Las especificaciones del cable de alimentación varían según el país o la región de uso Use the or button F on the Operation Panel to select the language for the LCD then touch the OK button When the above screen is displayed touch the OK button and go to the next step...

Page 10: ...rte del cabezal de impresión no se desplaza asegúrese de que el equipo esté encendido Para conocer todos los detalles consulte de a en la página 6 de 1 Preparativos Install the Print Head Lift the Scanning Unit Cover A until it stops Close the Document Cover B and lift it with the Scanning Unit Cover The Print Head Holder C moves to the installation position If the Print Head Holder does not move ...

Page 11: ...o de la bolsa en la que viene el cabezal de impresión o dentro de la tapa protectora esto no afecta a la calidad de impresión Tenga cuidado para no mancharse de tinta al manipular estos componentes Firmly lift the part D of the Print Head Lock Lever in the Print Head Holder until it stops The Print Head Lock Lever may feel heavy Do not touch the inside of the Print Head Holder E The machine may no...

Page 12: ...a de bloqueo del cabezal de impresión y bájela por completo Una vez instalado el cabezal de impresión no lo retire si no es necesario Tilt the Print Head forward and set it in place as shown Do not knock the Print Head against the sides of the holder Install in a well lit environment Hold the Print Head Lock Lever firmly and lower it completely Once you have installed the Print Head do not remove ...

Page 13: ...rarla No apriete los laterales del depósito de tinta No toque el interior C de la tapa protectora naranja ni la salida de tinta abierta D Si los toca podría mancharse las manos de tinta Vaya a la siguiente página Install the Ink Tanks 1 Remove the orange tape completely 2 Remove the protective film completely Handle the ink tanks carefully Do not drop or apply excessive pressure to them Be sure to...

Page 14: ...de tinta y a continuación introdúzcalo bajo la etiqueta y contra la parte trasera de la ranura Asegúrese de que el color de la etiqueta coincide con el del depósito de tinta Instálelo en un entorno bien iluminado Press the PUSH mark on the ink tank firmly until it clicks When the installation is completed properly the Ink lamp lights red Install all the other ink tanks in the same way according to...

Page 15: ...los depósitos de tinta estén correctamente instalados No toque todavía el botón OK Cierre la unidad de escaneado cubierta E Asegúrese de que la cubierta interior F esté cerrada Close the Scanning Unit Cover E Make sure the Inner Cover F is closed Make sure that the LCD changes as shown in the illustration and go to the next step It takes about 5 minutes before the LCD changes The machine may make ...

Page 16: ...pel con orientación vertical de manera que la esquina del corte D esté en la parte superior derecha Asegúrese de utilizar el papel MP 101 para la alineación del cabezal de impresión Align the Print Head Prepare the Paper Support A 1 Open it 2 Withdraw it upwards 3 Tilt it back Move the Paper Guides B to both edges Load a sheet of supplied specialty paper Matte Photo Paper MP 101 in the Rear Tray C...

Page 17: ...sa o los colores no son los correctos del manual en pantalla Guía básica El patrón se imprime en negro y azul Si la impresión comienza con la bandeja de salida del papel cerrada se abrirá automáticamente Slide the left and right Paper Guides against both edges of the paper Make sure the Paper Output Tray E is open then open the Output Tray Extension F Print Head Alignment takes about 4 minutes to ...

Page 18: ...te Para obtener más información sobre cómo se carga el papel especial en la bandeja posterior consulte de a de 4 Alineación del cabezal de impresión en la página 14 Carga de papel especial Load Paper 1 Close the Output Tray Extension D 2 Close the Paper Output Tray E With the machine the paper source varies depending on the media type Specialty paper including photo paper Load paper in the Rear Tr...

Page 19: ... se alinee con la marca del tamaño de papel correspondiente Cargue papel normal Cargue el papel con la cara de impresión hacia abajo Pull out the Cassette F Move the left Paper Guide G to the edge Slide the front Paper Guide H to align with the actual size of the paper The front Paper Guide will click and stop when it aligns with the corresponding mark of paper size Load plain paper Load paper wit...

Page 20: ...xcepto el botón ACTIVADO ON Compruebe el mensaje de la pantalla LCD y a continuación toque el botón OK Aparecerá la pantalla INICIO HOME Insert the Cassette slowly into the machine until it clicks into place Align the paper to the right side of the Cassette 1 and slide the left Paper Guide completely against the left edge of the paper 2 Make sure that the height of the paper stack does not exceed ...

Page 21: ... si es compatible con IEEE802 11b g n Si el dispositivo admite una conexión por cable Compruebe si admite la conexión simultánea de varios ordenadores y dispositivos de red Select Connection Method Want to connect to a computer with a USB cable Want to connect to computers without using cables Want to use from multiple computers Wireless Connection USB Connection Intended Use Connection Method Go ...

Page 22: ...s No conecte aún el cable USB Para los usuarios de habla hispana en EE UU Consulte la hoja Información adicional para usuarios españoles para instalar la versión en español del software Install the Software USB Connection To use the machine by connecting it to a computer software including the drivers needs to be copied installed to the computer s hard disk The installation process takes about 20 ...

Page 23: ...ando ruidos de funcionamiento durante hasta 25 segundos NO conecte aún el cable USB al ordenador ni al equipo Si ya lo ha conectado desconéctelo ahora If you connect the machine via USB cable before installing the software For Windows 7 1 Remove the USB cable connected to your computer 2 Proceed to For Windows Vista Windows XP This dialog box may appear If the dialog box closes proceed to 2 Click ...

Page 24: ... y la contraseña a continuación haga clic en OK Si la carpeta del CD ROM no se abre automáticamente haga doble clic en el icono del CD ROM del escritorio Si no sabe su nombre o contraseña de administrador haga clic en el botón de ayuda y a continuación siga las instrucciones que aparezcan en pantalla Turn on the computer then insert the Setup CD ROM into the CD ROM drive If you are using Windows t...

Page 25: ...instrucciones que aparezcan en pantalla para continuar con la instalación del software Seleccione Utilizar la impresora mediante USB Use the printer via USB y a continuación haga clic en Siguiente Next Click Easy Install The drivers application software and on screen manuals are installed If you want to select particular items to install click Custom Install Click Install Follow any on screen inst...

Page 26: ...aga clic en Aceptar Agree Si hace clic en No aceptar Do not agree Extended Survey Program no se instalará Esto no afecta al funcionamiento del equipo Important Information for the Installation When the Printer Connection screen appears connect the machine to the computer with a USB cable After connecting the cable TURN ON THE MACHINE The USB Port is located on the right side at the back of the mac...

Page 27: ...ne Controlador de impresora XPS XPS Printer Driver en la pantalla Instalación personalizada Custom Install Para conocer todos los detalles sobre las prácticas funciones del Controlador de impresora XPS XPS Printer Driver consulte el manual en pantalla Guía avanzada Click Exit to complete the installation For Macintosh It is necessary to restart the computer before scanning using the Operation Pane...

Page 28: ...r o si tiene problemas con la conexión de red consulte el manual impreso Solución de problemas de configuración de red Sitúe el equipo y el ordenador en el mismo segmento de red Wireless Setup Before connecting the machine to the network make sure that the computer and access point or router is connected Add connect the machine to the network Internet Access point or wireless router etc An Ad hoc ...

Page 29: ...no puede recuperar la clave de red u otros ajustes consulte el manual del punto de acceso o del router y póngase en contacto con el fabricante Para obtener información sobre otros métodos de conexión consulte la página 28 Wireless Setup Using Easy Setup Check the Information for Wireless Connection Access Point Name Network Name Also referred to as SSID An identifier to identify the specific acces...

Page 30: ...xión inalámbrica mediante la función WCN Para obtener más información consulte Configuración inalámbrica mediante WCN Windows Connect Now en la página 34 Si utiliza Windows 7 Windows Vista y tiene una unidad flash USB Use the or button A to display Setup then touch the right FUNCTION button B Use the or button C to select Wireless LAN setup then touch the OK button Select Yes then touch the OK but...

Page 31: ...úrese de que aparece una de las pantallas anteriores y a continuación toque el botón FUNCIÓN FUNCTION derecho Si la pantalla anterior no aparece continúe con de la página 30 Select Easy setup then touch the OK button Select the access point name you wrote down on page 27 then touch the OK button Make sure that one of the above screens is displayed then touch the right FUNCTION button If the above ...

Page 32: ...Introduzca la clave de red que anotó en la página 27 a continuación toque el botón FUNCIÓN FUNCTION izquierdo E Toque el botón FUNCIÓN FUNCTION F para cambiar de un modo de introducción de caracteres a otro When the above screen appears touch the OK button Make sure that the network key is correct then touch the OK button Next read 10 Install the Software Network Connection on page 38 If Failed to...

Page 33: ...onexión inalámbrica la luz de Wi Fi D se encenderá en azul Utilice el botón o A para acceder a Configurar Setup a continuación toque el botón FUNCIÓN FUNCTION derecho B Wireless Setup Using WPS Wi Fi Protected Setup Use the or button A to display Setup then touch the right FUNCTION button B Read this section only when setting up a wireless connection by using the WPS Wi Fi Protected Setup Use the ...

Page 34: ...izado la instalación antes de que transcurran 10 minutos seleccione un método distinto al del código PIN para configurar la LAN inalámbrica Si se produce otro error consulte el manual impreso Solución de problemas de configuración de red Select Other setup then touch the OK button Select WPS then touch the OK button Select Push button method then touch the OK button Touch the OK button To use the ...

Page 35: ...error consulte el manual impreso Solución de problemas de configuración de red A continuación lea 10 Instalación del software Conexión de red en la página 38 Press and hold the WPS button on the access point for about 5 seconds then touch the OK button on the machine within 2 minutes For details on the WPS button pressing refer to the manual of your access point The Wi Fi lamp blue flashes while s...

Page 36: ...urar Setup menu de la pantalla LCD A a continuación toque el botón OK 2 Seleccione Otra configuración Other setup a continuación toque el botón OK 3 Seleccione WCN a continuación toque el botón OK 4 Conecte la unidad flash USB al puerto de impresión directa conector USB B que se encuentra en la parte delantera derecha del equipo y a continuación toque el botón OK 5 Cuando aparezca la pantalla Conf...

Page 37: ... mismo tiempo Si aparece un mensaje de error o si tiene problemas con la conexión de red consulte el manual impreso Solución de problemas de configuración de red Before connecting the machine to the network make sure that the computer and router is connected Add connect the machine to the network Internet Router etc Wired Setup Notes on Wired Connection The configuration router functions setup pro...

Page 38: ...toque el botón FUNCIÓN FUNCTION derecho D Utilice el botón o E para seleccionar Configuración de dispositivo Device settings y a continuación toque el botón OK Remove the Cap A then connect a network device router etc with an Ethernet cable B Use the or button C to display Setup then touch the right FUNCTION button D Use the or button E to select Device settings then touch the OK button ...

Page 39: ... botón OK Seleccione LAN cableada activa Wired LAN active y a continuación toque el botón OK A continuación lea 10 Instalación del software Conexión de red en la página 38 Select Change wireless wired then touch the OK button Select LAN settings then touch the OK button Select Wired LAN active touch the OK button Next read 10 Install the Software Network Connection on page 38 ...

Page 40: ...resión para web que se instala en el ordenador al instalar el software incluido Para utilizar este software es necesario Internet Explorer 7 o posterior Para la instalación es necesario estar conectado a Internet Install the Software Network Connection To use the machine by connecting it to a computer software including the drivers needs to be copied installed to the computer s hard disk The insta...

Page 41: ...toPlay y a continuación haga clic en Sí Yes o en Continuar Continue en el cuadro de diálogo Control de cuentas de usuario User Account Control Si vuelve a aparecer el cuadro de diálogo Control de cuentas de usuario User Account Control en los pasos siguientes haga clic en Sí Yes o en Continuar Continue Turn on the computer then insert the Setup CD ROM into the CD ROM drive If you are using Windows...

Page 42: ...d Use the printer on network y a continuación haga clic en Siguiente Next Siga las instrucciones que aparezcan en pantalla para continuar con la instalación del software Haga clic en Instalar Install Click Easy Install The drivers application software and on screen manuals are installed If you want to select particular items to install click Custom Install Click Install Select Use the printer on n...

Page 43: ...figuración de red Compruebe que no haya ningún problema y a continuación vuelva a hacer clic en Siguiente Next en la pantalla de Si el equipo no se detecta consulte el manual impreso Solución de problemas de configuración de red Asegúrese de que no exista ningún problema y luego haga clic en Actualizar Update A continuación lea Información en la página 45 A continuación lea Registro Macintosh en l...

Page 44: ...ha detectado el equipo compruebe lo siguiente Seleccione Canon MG6100 series canonijnetwork y haga clic en Añadir Add Vaya a en la página 44 v 10 6 x v 10 5 x v 10 4 11 Mac OS X Vaya a Vaya a en la página 43 This section describes how to register the machine on a Macintosh computer Windows users read Information on page 45 When the Register Printer and Scanner screen appears click Register Printer...

Page 45: ...menú emergente elija Canon MG6100 series en la lista de impresoras y a continuación haga clic en Añadir Add Asegúrese de que se ha agregado Canon MG6100 series a la lista de impresoras Vaya a en la página 44 When the Printer List window appears click Add Click More Printers in the Printer Browser window When the You have no printers available screen appears click Add Make sure that Canon MG6100 se...

Page 46: ... Settings y a continuación haga clic en OK Haga clic en Siguiente Next en la pantalla Registro de la impresora y del escáner Register Printer and Scanner A continuación lea Información en la página 45 When the Register Printer and Scanner screen appears click Register Scanner Select Canon MG6100 series on the Scan from PC Settings screen then click OK Click Next on the Register Printer and Scanner...

Page 47: ...gar que muestra la ilustración Si está encendido el soporte del cabezal de impresión se desplazará cuando se abra la unidad de escaneado cubierta A Click Next Information Follow any on screen instructions to proceed with the software installation Important Information for the Installation When the serial number is not displayed on the registration screen automatically input the serial number locat...

Page 48: ...abrá finalizado Consulte la página 49 para obtener información sobre Solution Menu EX y el manual en pantalla o la página 50 para empezar a utilizar el equipo If the Extended Survey Program screen appears If you can agree to Extended Survey Program click Agree If you click Do not agree the Extended Survey Program will not be installed This has no effect on the machine s functionality Click Exit to...

Page 49: ...lador de impresora XPS XPS Printer Driver en la pantalla Instalación personalizada Custom Install Para conocer todos los detalles sobre las prácticas funciones del Controlador de impresora XPS XPS Printer Driver consulte el manual en pantalla Guía avanzada Using the Machine from Additional Computers Now that the wireless wired connection of the machine is complete it can be used from additional co...

Page 50: ... establecer ninguna otra configuración Para utilizar desde ordenadores adicionales Otros ordenadores de la misma red Permite que el ordenador utilice el equipo Insert the Setup CD ROM into the computer from which you want to use the machine Follow the on screen instructions to install the software Other settings are not required If the machine is already connected to a wireless wired connection it...

Page 51: ...erramientas se puede utilizar en cualquier momento mientras se esté ejecutando Internet Explorer Para conocer todos los detalles sobre Easy WebPrint EX consulte el manual en pantalla Guía básica Para conocer todos los detalles sobre Solution Menu EX consulte el manual en pantalla Guía básica Try Using the Machine Use the Operation Panel on the machine to print your own items easily Various applica...

Page 52: ...una tarjeta de memoria Introduzca la tarjeta de memoria con la etiqueta mirando hacia la izquierda Introduzca la tarjeta de memoria en la ranura para tarjetas siguiendo la dirección de la flecha de la etiqueta y con dicha etiqueta mirando hacia la izquierda Introduzca exclusivamente una tarjeta de memoria La luz de acceso Access B se iluminará al introducir la tarjeta de memoria Print Photos from ...

Page 53: ...ero de copias Cerciórese de que esté encendida la luz de acceso Access E y a continuación cierre la cubierta de la ranura para tarjetas Para obtener más información consulte 5 Carga del papel en la página 16 Load 4 x 6 10 x 15 cm photo paper in the Rear Tray C in portrait orientation with the printing side facing up Make sure that the Paper Output Tray D is open If printing starts while the Paper ...

Page 54: ...traiga la tarjeta de memoria cuando la luz de acceso Access esté parpadeando Los datos guardados se pueden dañar Cuando el equipo esté preparado para imprimir el botón Color se iluminará 1 Trace along the Scroll Wheel F to display a photo to print 2 Touch the or button to specify the number of copies 3 Touch the Color button G Printing will start After printing open the Card Slot Cover pinch the m...

Page 55: ...ner más información consulte 5 Carga del papel en la página 16 Si la impresión comienza con la bandeja de salida del papel cerrada se abrirá automáticamente Try Copying Load A4 or Letter sized plain paper into the Cassette A This section describes how to perform a standard copy Place the document face down and align it with the Alignment Mark E Do not place objects weighing 4 4 lb 2 0 kg or more o...

Page 56: ... pantalla INICIO HOME utilice el botón o para acceder a Copiar Copy Cuando el equipo esté preparado para copiar el botón Negro Black y el botón Color se iluminarán 1 Close the Document Cover 2 Touch the HOME button G to display Copy on the HOME screen 3 Touch the left FUNCTION button H 4 Touch the Black button I or the Color button J Copying will start Do not open the Document Cover until copying ...

Page 57: ...úmero de copias se establece en 1 Haga clic en Imprimir Print Para obtener más información consulte el manual en pantalla Guía avanzada Si utiliza Windows se iniciará la impresión Si utiliza Macintosh haga clic en Imprimir Print en el cuadro de diálogo Imprimir Print para iniciar la impresión Load 4 x 6 10 x 15 cm photo paper in the Rear Tray A in portrait orientation with the printing side facing...

Page 58: ... GB 64 bit Windows Vista Vista SP1 Vista SP2 1 GHz processor 512 MB Windows XP SP2 SP3 300 MHz processor 128 MB Mac OS X v 10 6 Intel processor 1 GB Mac OS X v 10 5 Intel processor PowerPC G5 PowerPC G4 867 MHz or faster 512 MB Mac OS X v 10 4 11 Intel processor PowerPC G5 PowerPC G4 PowerPC G3 256 MB Browser Internet Explorer 6 or later Safari 3 Hard Disk Space 1 5 GB Note For bundled software in...

Page 59: ...4 bits x64 1 GB 32 bits 2 GB 64 bits Windows Vista Vista SP1 Vista SP2 Procesador a 1 GHz 512 MB Windows XP SP2 SP3 Procesador a 300 MHz 128 MB Mac OS X v 10 6 Procesador Intel 1 GB Mac OS X v 10 5 Procesador Intel PowerPC G5 PowerPC G4 867 MHz o superior 512 MB Mac OS X v 10 4 11 Procesador Intel PowerPC G5 PowerPC G4 PowerPC G3 256 MB Zona de búsqueda Internet Explorer 6 o posterior Safari 3 Esp...

Page 60: ...encia Tenga en cuenta que desde esa página tendrá que seleccionar el producto y a continuación hacer clic en el vínculo Support by Email situado bajo Tech Support Email Tech Support www canontechsupport com Getting Help from Canon This option provides live telephone technical support free of service charges Monday Friday excluding holidays during the warranty period Telephone Device for the Deaf T...

Reviews: