background image

Canmore


Corporation


www.canmore.com.tw


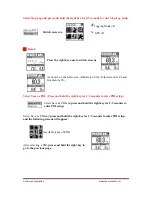
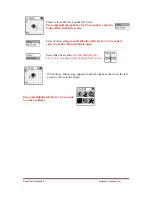
After selecting, 

press and hold the right key to return to the previous page.


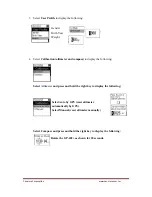
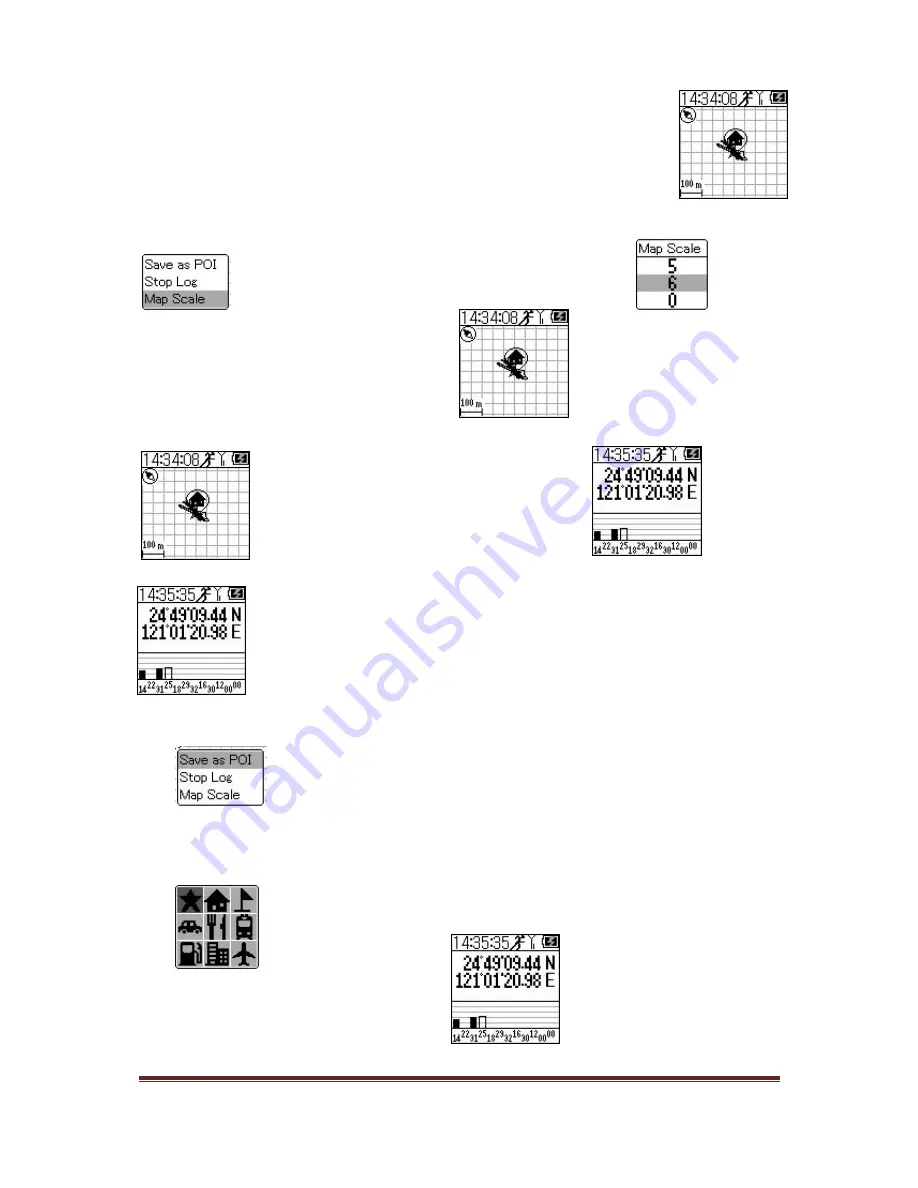
Select Map Scale and press and hold the right key for 2-3 
seconds to enter Map Scale. 


After selecting, press and hold the right 
key to go to the previous page. 


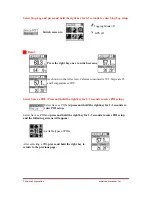
 Data 7 


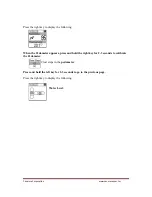
Press the right key once to switch screens.


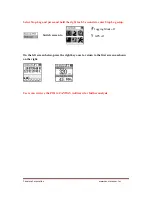
The GPS status is as shown on the left screen. 


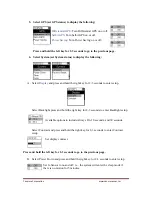
Select Save as POI. (Press and hold the right key for 2-3 seconds to enter POI setup) 


Select Save as POI and 

press and hold the right key for 2-3 seconds to 

enter POI setup. 


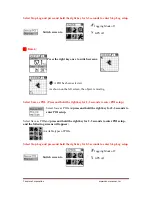
Select Save as POI and 

press and hold the right key for 2-3 seconds to enter POI setup 

and the following screens will appear: 


Available types of POIs. 


After selecting, 

press and hold the right 

key to go to the previous page.


Summary of Contents for GPORTER GP-102+

Page 1: ...Canmore Corporation www canmore com tw G PORTER Portable GPS Tracker GP 102 User s Manual...

Page 2: ...y of sports modes to support analysis with different software analyzers The GP 102 allows users to retrieve previous tracks The GP 102 provides route planning or sports tracking functions The GP 102 c...

Page 3: ...hronization Place the GP 102 in open sky Set time Press and hold the LEFT key for 2 3 seconds to call out Press and hold the RIGHT key for 2 3 seconds to enter Function mode 2 screens Press UP DN Spor...

Page 4: ...mode Data 1 Jogging Mode GPS Signal Meter Charging As shown on the left screen Distance is 320m Average Speed is 4 5km h and the sports Duration is 4 minutes and 14 seconds Select Save as POI Press an...

Page 5: ...km h Average Speed is 8km h and Maximum Speed is 9 2 km h Select Save as POI Press and hold the right key for 2 3 seconds to enter POI setup Select Save as POI and press and hold the right key for 2 3...

Page 6: ...km Average Pace is 7 5 hours km and Minimum Pace is 6 5 hours km Select Save as POI Press and hold the right key for 2 3 seconds to enter POI setup Select Save as POI and press and hold the right key...

Page 7: ...titude is 60 3m Total Ascend is 8 4 and Gradient is 0 Select Save as POI Press and hold the right key for 2 3 seconds to enter POI setup Select Save as POI and press and hold the right key for 2 3 sec...

Page 8: ...consumed is 57 1 Steps are 25 and Temperature is 28 C Select Save as POI Press and hold the right key for 2 3 seconds to enter POI setup Select Save as POI and press and hold the right key for 2 3 se...

Page 9: ...the object is moving Select Save as POI Press and hold the right key for 2 3 seconds to enter POI setup Select Save as POI and press and hold the right key for 2 3 seconds to enter POI setup Select S...

Page 10: ...Press the right key once to switch screens The GPS status is as shown on the left screen Select Save as POI Press and hold the right key for 2 3 seconds to enter POI setup Select Save as POI and press...

Page 11: ...d hold the right for 2 3 seconds to enter Stop Log setup Switch screen to Jogging Mode off GPS off On the left screen below press the right key once to return to the first screen as shown on the right...

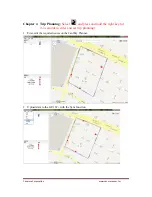
Page 12: ...ore com tw Chapter 4 Trip Planning Select and press and hold the right key for 2 3 seconds to enter and set trip planning 1 First edit the required routes on the CanWay Planner 2 Upload data to the GP...

Page 13: ...ploaded from the PC is shown on the screen as Test 1 5 The GP 102 receives GPS signals in open sky After your position is detected press and hold the right key to enter route Test 1 6 Press and hold t...

Page 14: ...press the left and right keys to adjust the map scale 8 After adjusting the map scale the route planned in Test 1 will be displayed on the map If a POI is set in the CanWay Planner it will be display...

Page 15: ...14 01 on April 11 Select New POI Press and hold the right key for 2 3 seconds to enter POI setup Select POI type Select Press and hold the right key for 2 3 seconds The direction distance and altitud...

Page 16: ...Canmore Corporation www canmore com tw The new POI has been added to the GP 102 Press and hold the left key for 2 3 seconds to return to Home...

Page 17: ...ter Historical Data Mode Select and press and hold the right key for 2 3 seconds to enter the historical data mode Data include Distance Duration Average Speed and Average Pace Press the right key onc...

Page 18: ...mode Select Follow and press and hold the right key for 2 3 seconds to enter the Follow Historical Data mode Select Map Scale and press and hold the right key for 2 3 seconds to enter the Map Scale s...

Page 19: ...conds Press and hold the left key for 2 3 seconds to return to the previous page Press the right key to display the following The atmospheric pressure is shown on the Barometer Press the right key for...

Page 20: ...the following When the Pedometer appears press and hold the right key for 2 3 seconds to calibrate the Pedometer Clear steps in the pedometer Press and hold the left key for 2 3 seconds to go to the p...

Page 21: ...og Rule and press and hold the right key Select Log Rule by Time and by Distance Select Delete All Log to clear all log data Press and hold the left key for 2 3 seconds to go to the previous page 2 Se...

Page 22: ...altimeter and compass to display the following Select Altimeter and press and hold the right key to display the following Select Auto by GPS reset altimeter automatically by GPS Select Manual reset al...

Page 23: ...and hold the right key for 2 3 seconds to enter setup Select Backlight press and hold the right key for 2 3 seconds to enter Backlight setup Available options in include Always On 10 seconds and 30 se...

Page 24: ...left key for 2 3 seconds to go to the previous page D Select Units press and hold the right key for 2 3 seconds to enter setup Options include km m kg and mi ft lb Press and hold the left key for 2 3...

Page 25: ...rts that may come off the unit and cause suffocation Follow all safety regulations for electronic devices and turn off electrical devices or RF products when requested This product uses a lithium batt...

Page 26: ...ni USB connector of the USB cable to the USB port on the GP 102 Next connect the end of the USB cable to an adaptor or the USB port of your PC or laptop When charging is in progress the charging indic...

Page 27: ...ge or other damage 1 Operating temperature 20 C to 60 C 4 F to 140 F Charging temperature 0 C to 45 C 32 F to 113 F using GP 101 2 Storage temperature 10 C to 45 C 14 F 113 F Charging Power Supply To...

Page 28: ...on incorrect inside a slowly moving car A4 When the speed is below 10km h the GP 102 will calculate the direction of the destination with the built in digital compass If you are inside a car the metal...

Page 29: ...rbed Covers above GPS signal are blocked Inside forests or too many covers GPS signal is low or disturbed Inside buildings GPS signal is blocked If you use the USB GPS Receiver inside the car some ant...

Page 30: ...l protection regulations You should return it to your reseller or dispose of it in an approved recycling centre DECLARATION We hereby declare that this product complies with essential requirements and...

Page 31: ...intenance service as of the date of purchase for product failures from normal use 2 The exceptions of the warranty shall include A Force majeure such as natural disasters fire earthquake etc and human...

Reviews: