background image

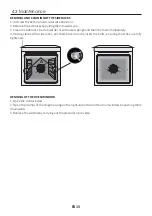
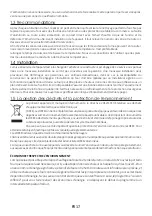
REMOVAL AND CLEANING OF THE SIDE RACKS

1. Unscrew the bolt in an anti-clockwise direction.
2. Remove the side racks by pulling them towards you.
3. Clean the side racks in a dishwasher or with a wet sponge and then dry them immediately.
4. Having cleaned the side racks, put them back in and reinsert the bolts, ensuring that they are fully
tightened.

4.3 Maintenance

A

REMOVAL OF THE OVEN WINDOW

1. Open the front window.
2. Open the clamps of the hinge housing on the right and left side of the front window by pushing them
downwards.
3. Replace the window by carrying out the procedure in reverse.

EN 10

Summary of Contents for 42826724

Page 1: ... WRITTEN CONSENT IS FORBIDDEN ALL RIGHTS RESERVED THE REPRODUCTION OF ANY PART OF EU DIRECTIVE 2002 95 CE AMENDMENTS MATERIALS IN COMPLIANCE WITH REQUIREMENTS A4 16 05 2018 KULLANMA KILAVUZU C HNMEE02 CL 51457 16 05 2018 C FİDANCI K ÖZGÜR USER MANUAL C HNMEE02 CANDY HOB GENERAL TOLERANCE ISO 2768 m SC 000 000 PRODUCTION RELEASED A B C D E 4 2 8 2 6 7 2 4 51457 16 05 18 Kullanma kılavuzunda bütün s...

Page 2: ...CANDY HOOVER GROUP S R L Via Privata Eden Fumagalli 20047 Brugherio Milano Italy USER INSTRUCTIONS OVENS EN FR NOTICE D EMPLOI ET D INSTALLATION DES FOURS ENCASTRABLES 02 13 ...

Page 3: ...fe distance from the appliance if notcontinuouslysupervised Children must not play with the appliance The appliance can be used by those aged 8 or over and by those with limited physical sensorial or mental capacities without experience or knowledge of the product onlyifsupervisedorprovidedwithinstructionastotheoperationofthe appliance inasafewaywithawarenessofthepossiblerisks Cleaning and mainten...

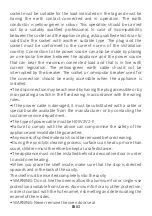
Page 4: ...ievedbyhavingtheplugaccessibleorby incorporating a switch in the fixed wiring in accordance with the wiring rules If the power cable is damaged it must be substituted with a cable or special bundle available from the manufacturer or by contacting the customerservicedepartment ThetypeofpowercablemustbeH05V2V2 F Failure to comply with the above can compromise the safety of the applianceandinvalidate...

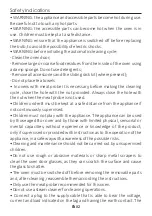
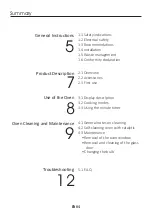
Page 5: ... Conformity declaration 2 1 Overview 2 2 Accessories 2 3 First use Product Description 7 3 1 Display description 3 2 Cooking modes 3 3 Using the minute timer Use of the Oven 8 4 1 General notes on cleaning 4 2 Self cleaning oven with catalytic 4 3 Maintenance Removal of the oven window Removal and cleaning of the glass door Changing the bulb 9 5 1 F A Q Troubleshooting 12 ...

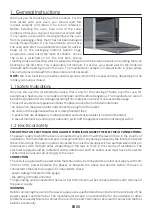
Page 6: ...fundamentalrules donotpullonthepowercabletodisconnecttheplugfromthesocket donottouchtheappliancewithwetordamphandsorfeet ingeneraltheuseofadaptors multiplesocketsandextensioncablesisnotrecommended incaseofmalfunctionand orpooroperation switchofftheapplianceanddonottamperwithit 1 2 Electrical Safety ENSURE THAT AN ELECTRICIAN OR QUALIFIED TECHNICIAN MAKES THE ELECTRICAL CONNECTIONS The power supply...

Page 7: ...and environmental protection This appliance is labelled in accordance with European Directive 2012 19 EU regarding electric and electronic appliances WEEE The WEEE contain both polluting substances that can have a negative effect on the environment and base elements that can be reused ItisimportantthattheWEEEundergospecifictreatmentstocorrectlyremoveand dispose of the pollutants and recover all th...

Page 8: ...tal grill 2 Holds baking trays and plates 2 3 First Use PRELIMINARYCLEANING Clean the oven before using for the first time Wipe over external surfaces with a damp soft cloth Wash all accessories and wipe inside the oven with a solution of hot water and washing up liquid Set the empty oven to the maximum temperature and leave on for about 1 hour this will remove any lingering smellsofnewness EN 07 ...

Page 9: ... moisture content of the food preservingthenutritionalvaluesandensuringarapiduniformcookingprocess Try all your recipes and reduce the amount of dressing you usually use and experience thelightnessofthisnewfunction 190 180 200 40 40 L1 L5 GRILL usethegrillwiththedoorclosed The top heating element is used alone and you can adjust the temperature Five minutes preheating is required to get the elemen...

Page 10: ...eaning panels covered in a micro porous coating are available as optional extras for all models Iftheyarefitted theovennolongerneedstobecleanedbyhand The fat that is splattered onto the sides of the oven during roasting is eliminated by the microporous coatingwhichbreaksthefatdownbycatalysisandtransformsitintogas Excessive splattering may nevertheless block the pores and therefore hinder self clea...

Page 11: ...eandthendrythemimmediately 4 Having cleaned the side racks put them back in and reinsert the bolts ensuring that they are fully tightened 4 3 Maintenance A REMOVALOFTHEOVENWINDOW 1 Openthefrontwindow 2 Open the clamps of the hinge housing on the right and left side of the front window by pushing them downwards 3 Replacethewindowbycarryingouttheprocedureinreverse EN 10 ...

Page 12: ...ve the glass carefully extracting it from the oven door NB in pyrolytic ovens also remove thesecondandthirdglass ifpresent 7 Attheendofcleaningorsubstitution reassemblethepartsinreverseorder Onallglass theindication Pyro mustbelegibleandpositionedontheleftsideofthedoor closetothe left handlateralhinge Inthisway theprintedlabelofthefirstglasswillbeinsidethedoor EN 11 ...

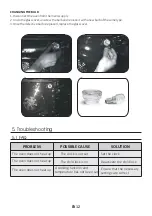
Page 13: ...replaced replacetheglasscover 5 Troubleshooting 5 1 FAQ EN 12 PROBLEM POSSIBLE CAUSE SOLUTION The oven does not heat up The clock is not set Set the clock The child lock is on A cooking function and temperature has not been set Deactivate the child lock Ensure that the necessary settings are correct The oven does not heat up The oven does not heat up ...

Page 14: ...ISSEMENT Les parties accessibles peuvent devenir chaudes pendantl utilisation Lesjeunesenfantsdoiventêtretenusàl écart Ne pas utiliser de nettoyants abrasifs ou de racloirs métalliques tranchantspournettoyerlavitredelaportedufourcarilspeuventrayer lasurface entrainantdesrisquesd explosion Le four doit être éteint avant d enlever la protection et après le nettoyage laprotectiondoitêtrereplacéeenres...

Page 15: ...re remplacé par un câble ou un faisceau de câbles spécial disponible auprès du fabriquant ouencontactantleserviceaprès vente Lecâbled alimentationrequisestleH05V2V2 F Le non respect des consignes ci dessus peut compromettre la sécuritédel appareiletannulerlagarantie Toutproduitdéverséenquantitédoitêtreéliminéavantlenettoyage Pendant le nettoyage à pyrolyse les surfaces peuvent devenir beaucoup plu...

Page 16: ...2 Accessoires 2 3 Première utilisation Description du produit 18 3 1 Description de l affichage 3 2 Mode de cuisson 3 3 Utilisation du minuteur sonore Utilisation du Four 19 4 1 Remarques générales concernant le nettoyage 4 2 Four autonettoyant par catalyse 4 3 Entretien Retrait de la porte du four Retrait et nettoyage des vitres Remplacement de l ampoule Nettoyage du four et maintenance 20 5 1 F ...

Page 17: ...rise Nepastoucherl appareilaveclesmainsoulespiedsmouillésouhumides Engénérall utilisationd adaptateurs deprisesmultiplesetderallongesestdéconseillé Encasdedysfonctionnementet oudemauvaisfonctionnement éteindrel appareiletnepasytoucher 1 2 Sécurité électrique LE BRANCHEMENT ELECTRIQUE DOIT ÊTRE REALISE PAR UN INSTALLATEUR AGREE OU UN TECHNICIEN DE QUALIFICATIONSIMILAIRE L alimentation électrique à ...

Page 18: ...cessaire nousvousdemandonsdefaireréalisercetteopérationparleserviceaprès venteouunepersonnedequalificationsimilaire 1 3 Recommandations Après chaque utilisation du four réaliser un petit entretien qui favorisera le nettoyage parfait du four Ne pas tapisser les parois du four avec des feuilles en aluminium ou des protections jetables du commerce La feuille d aluminium ou toute autre protection en c...

Page 19: ...port aux plats Recueille le jus des grillades Le lèche frite ne doit pasêtreutilisépourlescuissonsautresqueGrillet grill pulsé Il va provoquer un écran de température entre le bas et le haut de la cavité Riennedoitêtreposésurlasoledufour risquede déformation de l émail En cas de non respect de ces conseils nous ne pourrons être tenu pour responsable 2 3 Première Utilisation UN PREMIER NETTOYAGE do...

Page 20: ... sur toutes vos recettes et laissez vous tenter par la COOKLIGHT legeretedecettenouvellefonction 190 180 200 40 40 L1 L5 Gril l utilisation du grilloir se fait porte fermée Un préchauffage de 5 mins est nécessaire pour le rougissement de la résistance Succès assuré pour les grillades les brochettes et les gratins Les viandes blanches doivent être écartées du grilloir le temps de cuisson sera alors...

Page 21: ...ndre soin de reverser les graisses tièdes lêchefrite dans l évier Laver et rincer le plat récolte sauce dans de l eau chaude avec une éponge imbibée de produit lessiviel Si les résidus restent collés le faire tremper dans de l eau et un produit détergent Il peutaussiêtrenettoyédansunlave vaisselleouavecunproduitducommerce Nejamaisreplacerleplatrécolte sauceencrassédansunfour FR 20 4 2 Four autonet...

Page 22: ...selle ou avec une éponge humide puis séchez les gradins fils immédiatement 4 Aprèsavoirnettoyéles lesremettredanslefour etrevisserlesécrousmoletés gradinsfils 4 3 Entretien A RETRAITDELAPORTEDUFOUR 1 Ouvrezlaporte 2 Ouvrez les pinces du boîtier de charnière sur le côté droit et gauche de la fenêtre avant en les poussantverslebas 3 Replacezlaporteenprocédantensensinverse FR 21 ...

Page 23: ...nt de la porte du four NB dans les fours de pyrolyse retirez l extraire égalementlesdeuxièmeettroisièmeverre lecaséchéant 7 Alafindunettoyage remonterlespiècesdansl ordreinverse Sur toutes les vitres l indication Pyro doit être lisible et positionnée sur le côté gauche de la porte à proximité de la charnière latérale gauche De cette manière l étiquette imprimée du premier verre sera àl intérieurde...

Page 24: ... remettrelecouvercleenverre 5 Dépannage 5 1 FAQ PROBLEMES CAUSE POSSIBLE SOLUTION Le four ne chauffe pas L horloge n est pas réglée Réglez l horloge La sécurité enfant est activée Les réglages nécessaires ne sont pas imposés Désactiver la sécurité enfant Assurez vous que les paramètres nécessaires sont corrects Le four ne chauffe pas Le four ne chauffe pas FR 23 ...

Page 25: ...fier les produits en cas de nécessité même dans l intérêtdel utilisation sanscauserdepréjudicesauxcaractéristiquesdefonctionnementdesécuritédesappareils FR 590 mm 560 mm 560 mm 600 mm 560 mm 560 mm 595 mm 595 mm 545 mm 22 mm 580 mm 550 mm 560 mm x 45 mm 500 mm x 10 mm GB FR Opening Ouverture 560 mm x 45 mm Opening Ouverture 500 mm x 10 mm Opening Ouverture 460 mm x 15 mm GB FR If the oven does not...

Reviews: