


12
LaserLight LT 1550 Technical Manual
3.0
Configuration
Once the
Laser LT
remote display is installed, it may need to be configured. This can be done manually through the
front panel and is explained in Sections 3.2 through 3.6.
Using Auto-Learn (Section 3.1) simplifies installation by automatically detecting the communications format and
data rate used by the indicator and may eliminate the need for configuration.
Use the Revolution Utility to help configure the
Laser LT
using your PC. Revolution can be used to program and
configure the
Laser LT
and is further explained in See Section 3.10 on page 22 of this manual.
3.1
Auto-Learn
The
Laser LT
remote display incorporates a software feature called Auto-Learn. Auto-Learn examines the serial
data stream sent from the attached indicator and attempts to determine the data settings and format used by the
indicator.
Use the following quick steps for Auto-Learn.
1. Ensure that
Lock
in Configuration mode is set to the
Off
position.
LOCK
On
Off
LW POS
000000
NODATA
No Com
Blank
STDSTL
On
Off
On
Off
SCHAR
STX
SOH
CR
LF
FF
ETX
SERIAL
TEST
KEYPAD
DIGIO
VERS
CONFIG
E CHAR
LF
CR
FF
ETX
HOLD WT
SUPP 0
Off
On
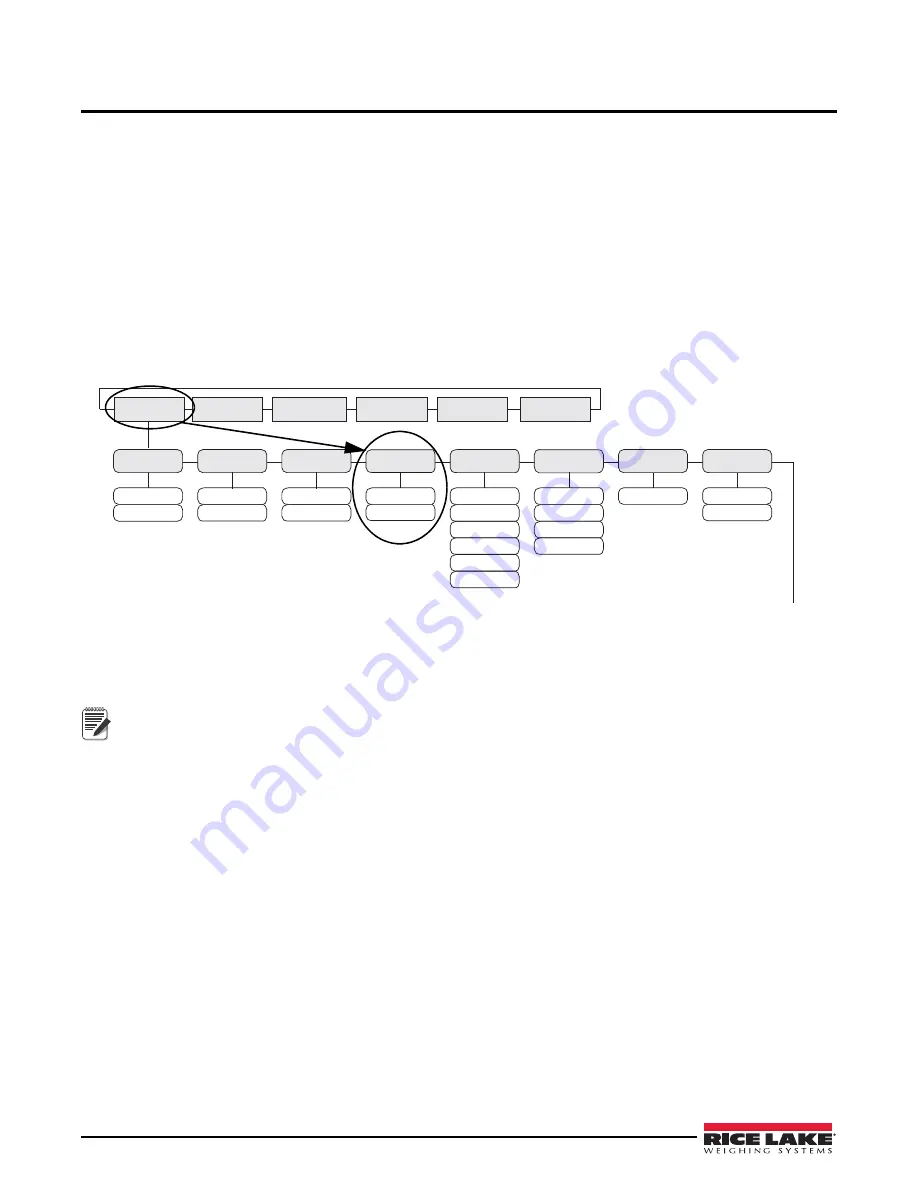
Figure 3-1. Lock Parameter Location
2. Set up the Host Port.
3. Enter the Auto-Learn feature from Run Mode by pressing and holding the
Gross/Net
key for three seconds.
4. If this does not work, and Learn fails, use Revolution Utility software (Section 3.10 on page 22).
Note
•
It is recommended to set the parameter LOCK to the ON position (see Table 3-4), to eliminate any un-intentional
changes from occurring.
•
If the displayed weight is not correctly positioned, press and hold the right (unit) and left (print) buttons for three
seconds then release, to shift the displayed data string. The data will move one position. Repeat this as many
times as necessary to move the data over another position.


