background image


RS02109/0814/CD 

32 

www.cdtechno.com 


Appendix D – Handling and Replacement of Individual Cells 

Figure D1  

A key design feature of the Liberty 2V battery is the provision for servicing 
individual cells. With a minimum amount of handling and downtime, individual 
cells can be changed in the field. In addition, disassembly and re-
assembly of the stack modules may accommodate installation of a new 
battery if necessitated by a hard-to-access location. Once the battery string 
has been removed from service, the technician must use properly insulated 
tools and adhere to all appropriate battery safety methods. 


1.  Remove the connector covers from the subject module. 
2.  Disconnect the system ground connection. 
3.  For each connector attached to the cell, loosen (but do not remove) the 

terminal bolts at either end. 

4.  While holding the connector in one hand, remove the terminal bolts 

completely. Remove the connector and set aside. Repeat for other 
connectors. 

5.  After performing the electrical preparation described above, the steps to 

physically remove the cell or cells can be performed as follows. 

6.  Remove cell retaining bar, shown in Figure D1. 
7.  Attach the “cell puller tool”, part number RE05259. This tool, shown in 

Figure D2, is available from your local C&D Technologies 
Representative or directly  through C&D Customer Service. 
(

[email protected]


8.  Prepare for cell removal by moving a platform lift or equivalent lifting 

apparatus in proximity to the bottom of the stack module from which 
the cell is to be removed. Make sure all exposed metal on the platform 
is insulated. Verify the capacity of the lifting apparatus is sufficient to 
safely lift the cell. IMPORTANT: Before removing the cell, note the 
orientation of the cell in the module, i.e., positive terminal up or down. 

9.  Pull the cell straight out onto the platform, shown in Figure D3. 
10. Follow Steps 2, 3 and 4 in reverse order to physically install the 

replacement cell or reinstall a new disassembled battery. Do not perform 
the electrical connections at this time. 

11. Note: There is also a connection drawing supplied with each battery that 

will aid in cell orientation and installation. When all cells for a given 
module have been installed, reinstall the cell-retaining bar. 

12. Perform terminal and connector preparation. 
13. Perform polarity check. 
14. Reinstall connections. 
15. Re-install connector covers. 
16. Note: Liberty 2V cells should never be lifted by the terminals. Do not use 

the cell puller tool as a lifting device 

17. Never remove more than one cell per tier at a time. 

Figure D2 

Figure D3 


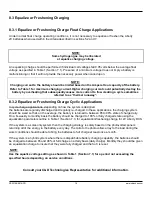
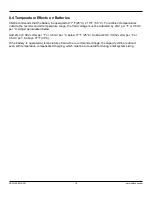
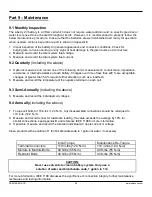
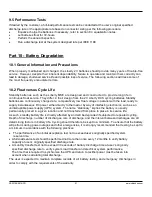
Summary of Contents for Liberty DCS

Page 1: ...RS02109 0814 CD 1 www cdtechno com MSE DCS...

Page 2: ...is the responsibility of the customer to provide adequate ventilation so hydrogen gas accumulation in the battery area does not exceed two percent by volume However normal air circulation in a ventila...

Page 3: ...s and Supplies 8 Part 4 Receiving 8 4 1 Inspection at Time of Delivery 8 4 2 Damage and Shortage Situations 8 Part 5 Storage 9 5 1 Storage Conditions 9 5 2 Storage Temperature and Duration 9 Part 6 In...

Page 4: ...es 19 Part 9 Maintenance 20 9 1 Monthly Inspection 20 9 2 Quarterly 20 9 3 Semi Annually 20 9 5 Performance Tests 21 Part 10 Battery Degradation 21 10 1 General Information and Precautions 21 10 2 Flo...

Page 5: ...essible from the front of the system assembly These cells are not designed for operation in any other orientation The Liberty MSE series is designed for float operation with minimal cycling Typical ap...

Page 6: ...vices and First Aid 29CFR1 910 268 g Telecommunications 29CFR1910 305 j Wiring Methods Components and Equipment STD 1 8 2 e OSHA Standing Directive The following references to IEEE documents contain r...

Page 7: ...jar or cover Failure to follow this warning may result in damage to the container and will void the warranty As a notice to all technicians and personnel in the near proximity of the batteries a BCI w...

Page 8: ...acid stains are present make a notation on the delivery receipt before you accept the shipment delivery NOTE Freight Carriers generally require that the carriers representative inspect concealed damag...

Page 9: ...battery and can cause potentially hazardous leakage Higher than normal storage temperature 77 F 25 C nominal will accelerate internal self discharge of a cell by a factor of two for each 15 F 10 C ov...

Page 10: ...ction equipment 2 Allow a minimum of 4 00 between systems side to side where no side termination is being used Reference supplied C D connection diagram for additional details 3 Allow a minimum of 6 0...

Page 11: ...ngs for reference which is supplied with every shipment The Liberty 2V floor mounting base has provisions for floor anchoring Consult the applicable building codes and regulations for specific require...

Page 12: ...of the battery and follow the electrical circuit with succeeding numbers on the cell covers 6 8 Interconnection Cell series connection is made from the of one cell to the of the next sequential cell...

Page 13: ...or corroded connections When checking connections disconnect the battery from the load and the charging equipment and follow all the precautionary measures outlined above and in the general safety ref...

Page 14: ...charger The recommended method of providing an initial freshening charge section 5 2 and section 7 1 7 2 is to first determine the maximum allowable voltage that may be applied by the connected equipm...

Page 15: ...t at Table 1 average cell voltage multiplied by the number of cells in the battery string Individual cell float voltages may vary by 0 10 0 05 volts from the average in a single string b Average strin...

Page 16: ...an If you observe any unusual readings or visual indications consult your C D Technologies Representative and send a copy of your latest maintenance report to your local C D Representative or the tech...

Page 17: ...system cannot achieve a full charge between discharging cycles or if the system is being utilized in a PSoC operation then additional charging needs to be employed to bring it back to full charge at...

Page 18: ...ending on how the system is designed the batteries are regularly discharged and regularly re charged In these applications the charging system should be sized so that on the average the battery is ret...

Page 19: ...the float voltage must be adjusted by 2mV per F or 3 6mV per C Adjust as indicated below Add 2mV 0 002 volts per F or 3 6mV per C below 77 F 25 C Subtract 2mV 0 002 volts per F or 3 6mV per C above 77...

Page 20: ...er than 50 require further attention such as a load test 5 Measure and record the temperature of the negative terminal on each cell 9 3 Semi Annually including the above 6 Measure and record the indiv...

Page 21: ...to the load or by way of interfacing electronics such as an uninterruptible power supply UPS system The name stationary implies the battery is usually permanently placed in a given location and not tr...

Page 22: ...to the observer the plates will become sulfated If you suspect sulfated plates contact the C D Technical Services Department 1 800 543 8630 or 1 215 619 2700 for assistance Sulfated batteries are not...

Page 23: ...leling valve regulated batteries is necessary the external circuit resistance should be matched for each battery A wide variation in battery circuit resistance can result in unbalanced discharge i e e...

Page 24: ...protective honeycomb hood cardboard packaging and shrink wrap See Figure A1 Carefully remove all shipping materials and dispose of properly Once all shipping materials are removed unbolt the system f...

Page 25: ...e base assembly into position and mark the anchor locations using the base as a template See Figure A6 A7 2 Six 13 16 20 6mm holes are provided in the system base for floor anchoring 3 Install floor a...

Page 26: ...while lifting however once released and in position will return to square See Figure A9 2 Battery Lift Table Again prior to hoisting install only the 4 10mm bolts in the rear flanges Verify module or...

Page 27: ...ure proper cell orientation Doing so can save time and effort in the future if a module is installed in the incorrect orientation 2 Once the module is in position and bolt holes are in alignment make...

Page 28: ...the C D layout drawing attach the restraint bar using 4 10mm bolt assemblies See Figure A15 Top Restraint Each system stack will be supplied with one top restraint The top restraint will be installed...

Page 29: ...ing base 4 Be sure the floor mounting base or assembly is in position and level and then torque the floor anchors If the base is not level use shims to level A level base is particularly important for...

Page 30: ...with one gallon of water wipe the cover and terminal seal area with a cloth moistened with the neutralizing solution Do not allow the neutralizing solution to enter the cell Rinse with clear water an...

Page 31: ...www cdtechno com Appendix C MSDS Documentation For the most up to date MSDS information please visit the C D Technologies public website Public Website www cdtechno com MSDS Sheets http cdtechno com...

Page 32: ...RE05259 This tool shown in Figure D2 is available from your local C D Technologies Representative or directly through C D Customer Service customersvc cdtechno com 8 Prepare for cell removal by movin...

Page 33: ...er C D Ship Date Positive Posts Date Installed Battery Model Negative Posts Cells X Strings Application Cell Covers Bus Voltage Portable Meter Bus Voltage Equipment Final Presence of Lubricant on cell...

Page 34: ...TATUS Open Circuit Float Equalize BATTERY BUS VOLTAGE Vdc Vdc Vdc LOCATION Cell Volts 2 000 Serial Connection Resistance Internal Cell Conductance Impedance Resistance Cell Volts 2 000 Serial Connecti...

Page 35: ...ppendix F Recycling Lead acid batteries are recyclable and C D Technologies currently has a low cost convenient and environmentally safe collection and recycling program Visit the C D Web site at www...

Page 36: ...RS02109 0814 CD 36 www cdtechno com...

Page 37: ...RS02109 0814 CD 37 www cdtechno com...

Page 38: ...xpress or implied with regard to the accuracy or completeness of such information Further because the product s featured herein may be used under conditions beyond its control C D Technologies Inc her...

Reviews: