


Setting Up Your Display
VADpro uses an engine code specific
TRX file
to decode your ECU data, in conjunction with ten widget files
or
widget pack
, to configure how your data is displayed on your device.
This data can be displayed in three
different formats and two languages based on your preference:
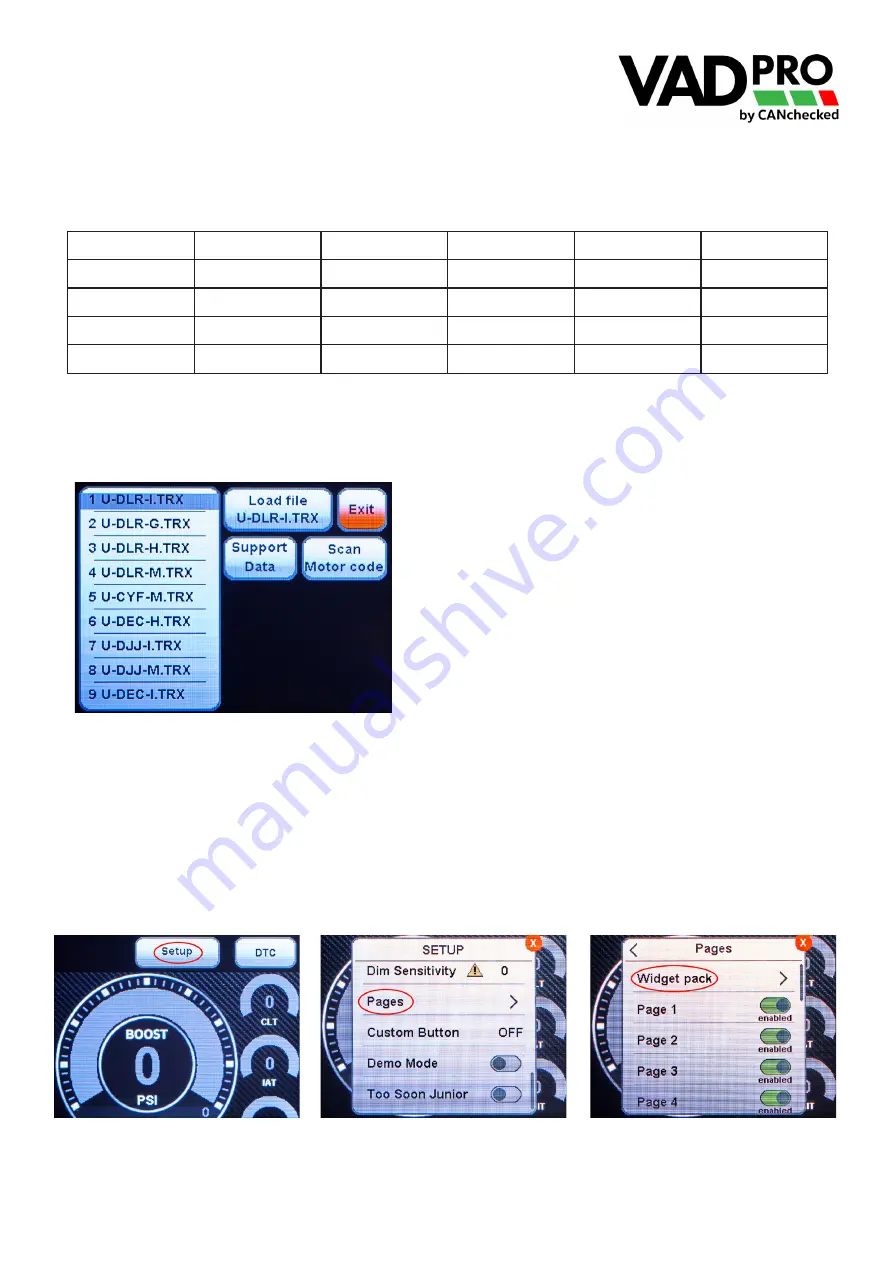
Step 1: Load your vehicle specific TRX file on to the VADpro
When booting the unit for the first time, the screen will display the initial setup page after the splash screen. This is
where you will need to load your vehicle’s specific TRX file.
Our library of supported vehicles is growing, however if your car’s motor code does not show up on the list, press the
“support data” button to generate the car’s support data. Take a photo / make a note of the number generated and
send an email to [email protected] Our team of engineers will be able to work with you to get you a working
TRX file within one to three business days.
Step 2: Load the widget pack
Pull down from the main screen to reveal the Setup and DTC buttons and navigate:
Setup > (scroll down) Pages > Widget Pack > Load the widget pack Imperial, Hybrid or Metric that corresponds with
the TRX file you loaded in Step 1.
i.
Press “Scan Motor Code” to identify your vehicle’s unique
four letter motor code. We will use “DLRA” as an example.
ii.
Make a note of the first three letters of the motor code. In
this example “DLR”
iii.
The file name contains “U-” followed by the first three
letters of your motor code, and the
widget pack
you will
be using: I for Imperial, M for Metric, H for Hybrid, G for
German.
iv.
In this example, a customer in the USA with imperial units
would select the file: U-DLR-
I
.trx. A european customer
would select file: U-DLR-
M
.trx
Type
Pressure
Speed
Temperature
Wideband
Language
Imperial
PSI
mph
°F
AFR
English
Metric
BAR
kmh
°C
λ
English
Hybrid
PSI
kmh
°C
AFR
English
German
BAR
kmh
°C
λ
German


