CamTron CTNC-5353H Instruction Manual Download Page 12

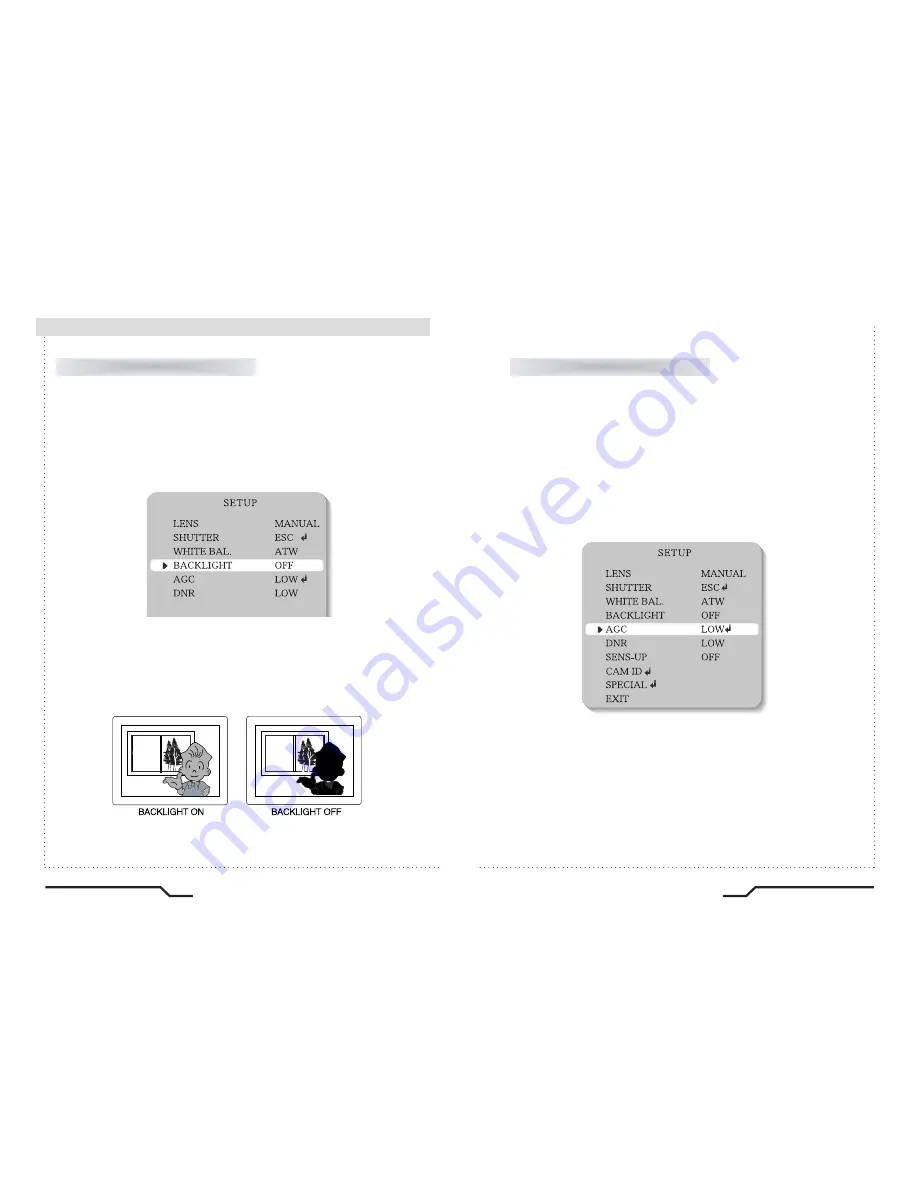
BLC (Back Light Compensation)

AGC (Automatic Gain Control)

H.264 IP Camera Cywatch

H.264 IP Camera Cywatch

22

23

How to Use the Camera

1. Position the cursor to point to 'AGC' on the SETUP menu by using the

UP and DOWN buttons.

2. Select the value required by pressing the LEFT or RIGHT button. As the

level of gain increases the screen gets brighter but the level of noise will

also increase.

HIGH  

: The gain varies between the range of 6dB ~ 42dB.

MIDDLE : The gain varies between the range of 6dB ~ 30dB.

LOW

: The gain varies between the range of 6dB ~ 18dB.

OFF

: The gain is fixed at 6dB.

When there is a strong backlight behind the object, clear images of the

background as well as the object can still be obtained by using the

BACKLIGHT function.
1. Position the cursor to point to 'BACKLIGHT' on the SETUP menu by using

the UP and DOWN buttons.

2. Select the value required by pressing the LEFT or RIGHT button.

HIGH

: The gain increases from 0dB up to 42dB

.

MIDDLE : The gain increases from 0dB up to 30dB

.

LOW

: The gain increases from 0dB up to 18dB

.

OFF

: BACKLIGHT function does not operate.

Summary of Contents for CTNC-5353H

Page 1: ...own expense Do NOT use power sources other than those specified Do NOT expose this appliance to rain or moisture This installation should be made by a qualified service person and should conform to al...

Page 2: ...ris Using a C CS mount lens Connecting to a monitor Connecting to power 12 15 15 Components 08 How to Use the Camera Troubleshooting Function Menu Structure How to Set up the Functions LENS SHUTTER WH...

Page 3: ...in clear and sharp images displayed even in low light Controlled by OSD Menu The camera functions are controlled by selecting text displayed on the monitor screen Additional Functions SENS UP MOTION D...

Page 4: ...mera Be careful not to leave fingerprints on the lens cover Do not install or use the camera in an environment where the humidity is high If the camera is exposed to spotlight or an object reflecting...

Page 5: ...AUTO IRIS LENS CONNECTION PLUG 3 L WRENCH 4 C MOUNT ADAPTOR Front Lens protection cap Cover the lens when not using it CS Mount lens adaptor Attach the CS Mount lens here Back Focus clamp screw Loosen...

Page 6: ......

Page 7: ...the lens clean Any foreign objects and fingermarks on the lens can cause inferior image quality in low light level conditions When using an auto iris lens 3 Remove the cover of the auto iris lens conn...

Page 8: ...lect Av mode if possible when adjusting the automatic light control ALC of an auto lens Use of PK mode may cause hunting When using a CS Mount lens 1 Take off the lens protection cap and attach the C...

Page 9: ...r down by using the UP and DOWN buttons Position the cursor to point to the function requiring adjsutment SETUP menu LENS selection SHUTTER condition and speed control WHITE BALANCE control BACKLIGHT...

Page 10: ...djust the Lens VR to an appropriate brightness Adjust the Lens VR adjust the BRIGHTNESS and then check if the screen brightness changes properly Otherwise adjust the Lens VR again How to Use the Camer...

Page 11: ...nction 1 Position the cursor to point to WHITE BAL on the SETUP menu by using the SHUTTER condition and speed control UP and DOWN buttons 2 Select the mode you wish to adjust by pressing the LEFT or R...

Page 12: ...42dB MIDDLE The gain varies between the range of 6dB 30dB LOW The gain varies between the range of 6dB 18dB OFF The gain is fixed at 6dB When there is a strong backlight behind the object clear image...

Page 13: ...clear screen image by automatically detecting changes in the level of light in low light level conditions When AGC is turned off DNR does not operate Note 1 Position the arrow to point to SENS UP on...

Page 14: ...RIGHT button The available ID number of the Camera is 0 255 1 Position the cursor to point to SPECIAL on the SETUP menu by using the UP and DOWN buttons 2 Select the mode required by pressing the UP o...

Page 15: ...for the camera TITLE Move the cursor to the letter required by using the UP and DOWN button Select an TITLE from A B Y Z a b y z 0 1 8 9 by using the UP DOWN LEFT and RIGHT buttons Lock in the charac...

Page 16: ...DZOOM mode Please press the SET button The available range of level is 10 X1 0 80 X8 0 When the AGC is turned off COLOR does not operate When an infrared light is used there may be a problem with foc...

Page 17: ...utton Please press the SET button to save the changes and complete the setting PRIVACY Thismodeconcealstheareasyoudonotwishtoappearonthescreen OFF Cancels the PRIVACY mode ON Operates the PRIVACY mode...

Page 18: ...ems Nothing appears on the screen The video image is not clear There is a problem with the camera operation The camera surface is too hot and black stripes appear on the screen Check the power connect...

Page 19: ...alance BLC AGC DNR Sense Up Auto 2X 128X Off Special Mode Camera ID Color On Auto SYNC Sharpness 0 31 Privacy Motion Detection 4 Programmable Zone Mirror D Zoom POWER Supply voltage 12V DC 10 Consumpt...

Page 20: ...Printed in KOREA H 264 IP Camera Cywatch H 264 IP Camera Cywatch Instruction Guide...

Reviews: