background image

Visit Us: Camplux.com

[email protected]

3330-A Marathon Ct Charleston, SC 29418

1(844) 538-7475

17

www.camplux.com

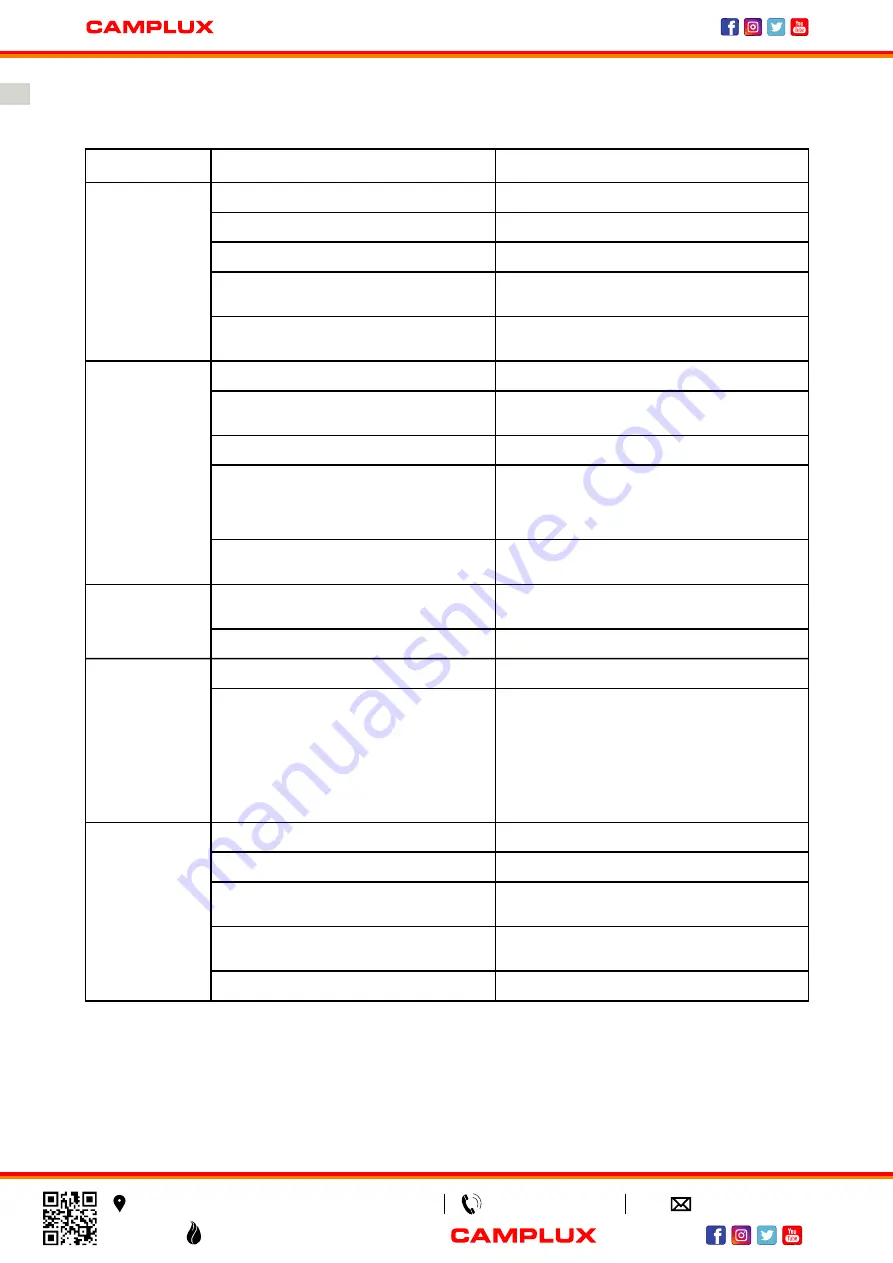
Heating unit 

won’t light

Igniter pin and burner are wet 

Dry off with a soft cloth

Check which direction the battery is inserted
Contact for a replacement part
Reconnect wire to the igniter box located 

inside the table behind the igniter box

Contact for a replacement part

Check that the gas tank isn’t empty

Tighten regulator connection to the gas tank

Check all hoses for kinks and bends

Turn all gas flow connections off. Insert an 

opened paperclip (or similar item) into each 

of the burner ports to clear them out

Check that all burner ports are free of any 

small lava rocks/pumice stones/pieces
Straighten hose of all bends or kinks
Check that the gas tank isn’t empty
Turn the control knob to the ‘off’ position.

Close the tank valve and disconnect propane 

gas tank. Turn the control knob to ‘high’; wait 

1 minute. Turn the control knob back to the 

‘off’ position. Reconnect propane gas tank. 

Light the fire unit as indicated in the ‘To Light’ 

section of this manual
Increase flame to ‘high’
Check that the gas tank isn’t empty

See ‘sudden drop in gas flow’ above

Igniter battery is incorrectly inserted
Igniter pin is broken 

Electrode wire is loose or disconnected

Electrode wire is shorting between valve 

and igniter pin

Excess flow safety valve has been 

activated

High or gusting winds

No gas flow 

No gas flow 
Excess flow safety valve has been 

activated

Use a full cylinder 

Check burner and orifices for blockage

Outdoor temperature is less than 400F 

and tank is less than 1/4 full
Control knob fully ON

No gas flow 

Regulator isn’t connected securely to 

the tank
Gas flow is obstructed

Burner ports are clogged 

Wait until the propane cylinder warms up 

and becomes unfrosted 

Propane cylinder is frosted over 

Flame is obstructed at burner ports 

Regulator hose is kinked 

Burner won’t 

light while using 

a match

Heating unit 

emits a lot of 

black smoke

Sudden drop 

in gas flow

Flame blows 

out easily

Problem

Cause

Solution

Troubleshooting

Summary of Contents for FT30IB

Page 1: ...Visit Us Camplux com support camplux com 3330 A Marathon Ct Charleston SC 29418 1 844 538 7475 Model FT30IB CAMPLUX 30 FIRE TABLE Instruction For Installation And Use...

Page 2: ...A Marathon Ct Charleston SC 29418 1 844 538 7475 1 www camplux com Package Contents 1 5 10 5 3 4 8 5 7 13 6 2 9 12 11 14 OFF P u s h t o t u H r G n I H LO W E T I N G I Parts List Item number Descrip...

Page 3: ...athon Ct Charleston SC 29418 1 844 538 7475 5 4 6 7 8 9 10 12 11 13 14 3 1 1 1 1 1 1 1 1 1 1 box 8 4 LB Side panel Firebowl Door Left front leg Left back leg Right front leg Right back leg Metal stand...

Page 4: ...complies with the ANSI ST Z21 97 2017 Certified to CSA STD 2 41 2017 Outdoor decorative gas appliances The installation must conform to local codes or the absence of local codes to the National Fuel G...

Page 5: ...rticles or unknown chemicals During operation this product can be a source of ignition Keep fire table area clear and free fromcombustible materials gasoline paint thinner cleaning solvents and other...

Page 6: ...is product contain chemicals known to the State of California to cause cancer birth defects and other reproductive harm WARNING Certain materials or items when stored under the fire table will be subj...

Page 7: ...g or damaged do not attempt to assemble the product Contact customer service for replacement parts Estimated Assembly Time 60 minutes Tools Required for Assembly not included Phillips screwdriver w me...

Page 8: ...amplux com 3 Attach the metal stand 11 to the 4 legs with 4 pcs M6x12 screws A Attention CYLINDER PLATE NEAR THE RIGHT FRONT LEG 9 4 Attach the side panel 5 to left back leg 8 and right back leg 10 wi...

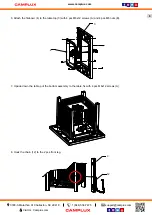
Page 9: ...Attach the firebowl 4 to the table top 3 with 4 pcs M6x12 screws A and 4 pcs M6 nuts B 7 Upside down the table put the bottom assembly to the table fix with 4 pcs M6x12 screws A 8 Hook the chain 12 t...

Page 10: ...and 1 pcs M4 nut D Then connect the front panel with the beam and bottom 10 Put the lid 2 on table 2 1 6 a b LO W Q L 11 Remove the rubber cap on the electronic igniter Q by unscrewing and slide batte...

Page 11: ...r in the absence of local codes with national fuel gas code ANS Z223 1 NFPA54 natural gas and propane Installation Code CSA B149 1 or propane storage and handling code B149 2 Standard 20 lb tank Not i...

Page 12: ...ntains small parts which can be swallowed by children Do not use indoors and inside any enclosure Retain the assembly instruction for future reference Installer Please leave these instruction with the...

Page 13: ...ylinder valve is defective and should be returned to cylinder s place of purchase If NO bubbles appear at any connection the connections are secure Note Whenever gas connections are loosened or remove...

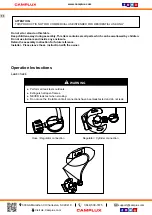
Page 14: ...ditional 5 seconds then release the control knob If you want a lower temperature push in the control knob and turn counterclockwise to the LOW Figure c Note If burner fails to remain lit all valves sh...

Page 15: ...sources Fire table is at least 24 in on rear and at least 7ft6 in on sides from combustible materials Fire table is on a hard and level surface There are no signs of spider or insect nests All burner...

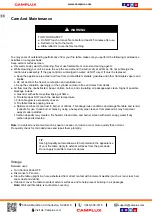
Page 16: ...tion and ventilation air c Keep the ventilation opening s of the cylinder enclosure free and clear from debris Air flow must be unobstructed Keep controls burner and circulating air passageways clean...

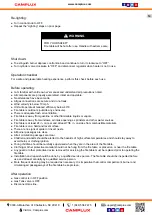
Page 17: ...ht in an area sheltered from direct contact with inclement weather such as rain sleet hail snow dust and debris If desired cover fire table to protect exterior surfaces and to help prevent build up in...

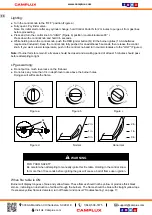
Page 18: ...inute Turn the control knob back to the off position Reconnect propane gas tank Light the fire unit as indicated in the To Light section of this manual Increase flame to high Check that the gas tank i...

Page 19: ......

Page 20: ...Visit Us Camplux com support camplux com 3330 A Marathon Ct Charleston SC 29418 1 844 538 7475...

Reviews: