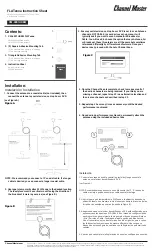
2. Installation
06
07
ENGLISH
ENGLISH
2. Installation
1. Prepare the adhesive for assembly.
2. Now apply the glue on the marked surface in
serpentine lines, so that the glue can harden
well inside.
3. Immediately place the mounting plate on the marked field (within 5 minutes after
application of the adhesive). Press lightly and evenly. After pressing, there must be
at least 2 mm of glue between the mounting plate and the surface. The glue is after
max. Hardened for 48 hours at + 18 ° C and a relative humidity of 50%. If there is low
humidity during the assembly time, after spraying in the area surrounding the anten-
na, always spray some water into the air.
2.3 Gluing instructions
1. Make sure that the roof of your vehicle is sufficiently stable. In the case of insufficient
or doubtful roof stability, a sheet of approx. 2 mm thick with approx. 100 x 100 cm
must be fastened to the roof outer skin. Inquire with your vehicle manufacturer.
2. Check if all parts are present.
3. Place the mounting plate on the later mounting place. Make sure that the mounting
surface is flat and no roof structures are in the way. Please note the mounting dimen-
sions on page 15. The minimum distance to an air conditioner should be 30 cm.
4. Clean the mounting surface with a suitable cleaner and a non-woven cloth to remove
dirt and impurities. Then draw the base of the
antenna with a pen.
5. Lightly roughen the drawn area with 120 grit
sandpaper and clean the surface again with
the cleaner (CAUTION: do not touch the sur-
face afterwards) and allow the cleaner to air
for approx. 10 minutes.
2.2 Installation on the roof
4. Immediately remove any leaked adhesive with a spatula or similar and clean the
contaminated surfaces with the cleaner and a nonwoven cloth.
5. After complete installation and
desiccation
of the adhesive, a silicone joint can be
pulled around the antenna base.
Important:
The antenna must point with the motor unit in the direction of travel!
Important:
Do not glue the connection socket
of the F-plug with the roof. In case of
service, the antenna can no longer be
removed from the roof!
direction of travel
6. Then place the antenna on the moun-
ting plate and fasten it again with the
four Allen screws.
Summary of Contents for Satmex Flat
Page 1: ...Satmex Flat Bedienungsanleitung...
Page 28: ......


