background image

SR50A Sonic Ranging Sensor 


- 35 - 


Figure 10 Remove transducer housing and disconnect wires 


Figure 11 Location of Desiccant in transducer housing assembly 


Summary of Contents for SR50A Series

Page 1: ...INSTRUCTION MANUAL SR50A and SR50AT Sonic Ranging Sensors FCSVBSZ 2016 Copyright 2016 Campbell Scientific Canada Corp...

Page 2: ...brancher le capteur avant de l ouvrir This Device complies with Part 15 of the FCC Rules Operation is subject to the following two conditions 1 This device may not cause harmful interference and 2 Thi...

Page 3: ...neglect accidents of nature or shipping damage This warranty is in lieu of all other warranties expressed or implied including warranties of merchantability or fitness for a particular purpose CSC is...

Page 4: ...3 7 3 1 Measure in Poll Mode 19 3 7 3 2 Auto Measure Auto Output Mode 20 3 7 3 3 Auto Measure Polled Output Mode 20 3 7 4 Distance to Target or Depth 20 3 7 5 Distance to Ground 21 3 7 6 Measurement...

Page 5: ...roduction 54 12 2 Specifications 54 12 2 1 Heating Cable Requirements 54 12 3 Maintenance 55 13 APPENDIX B Optional Open Faced Transducer for Harsh Environments 60 13 1 General 60 14 APPENDIX C SR50A...

Page 6: ...Range 0 5 to 10 meters Accuracy 1 cm or 0 4 of distance to target whichever is greater Excludes temperature compensation errors An external temperature compensation is required for the SR50A Resoluti...

Page 7: ...feet 0 25kg 0 55lbs Temperature Measurement SR50AT 0 C to 50 C 0 2 C 45 C to 0 C 0 75 C IP Rating Electrical Housing IP67 Transducer IP64 Note 1 The quiescent current draw is less than 1 25mA if the B...

Page 8: ...is required to compensate the distance reading for the SR50A A simple calculation is applied to initial readings for this purpose The SR50AT version of sensor comes with a temperature probe that will...

Page 9: ...object to the sensor will be detected if it is within this field of view Unwanted objects must be outside the field of view If a target is in motion the SR50A may reject a reading if the target dista...

Page 10: ...ion of surface density in snow monitoring applications The quality numbers will increase during snowfall events consisting of low density snow 3 2 Temperature Compensation for SR50A version The SR50A...

Page 11: ...re 1 SR50AT CBL Figure 1 SR50AT CBL By default the temperature correction will be on for RS 232 and RS 485 modes For the SDI 12 output mode the datalogger must include a measurement command that has t...

Page 12: ...e sun s radiation can cause large errors in the temperature reading and this will be reflected in the distance measurement 3 4 SDI 12 Operation SDI 12 is a Serial Digital Interface standard that is us...

Page 13: ...default address of 0 to the address of 1 the following command can be sent 0A1 Only one sensor of the same address should be connected when using the change address command 3 4 3 SDI 12 Commands The...

Page 14: ...SR50A Sonic Ranging Sensor 12 command in SDI 12 mode or by using the setup menu in RS 232 or RS 485 modes...

Page 15: ...nature V Supply Voltage Note1 WD Watch Dog Errors aI Send Identification 013CAMPBELLSR50A 2 0SN SN Serial number 5 digits Address Query a aAb Change Address command b is the new address aXM D DDD Exte...

Page 16: ...32 mode Color Function Connection Black Power Ground System Ground and or RS 232 Receiver Ground Pin 5 of a computer DTE DB 9 connector Red 12VDC Power Power Source Green RS 232 SR50A Output Recorder...

Page 17: ...485 communications It is much better to have a master initiate the communications by making use of the Measure On Poll or the Auto Measure Polled Output modes Campbell Scientific s MD485 interface can...

Page 18: ...munications BAUD Rate Current SR50A SettingNote Data Bits 8 Parity None Stop Bits 1 Flow Control None Note The factory default BAUD rate is 9600 BAUD Once the BAUD rate is changed the new BAUD rate mu...

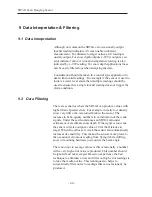
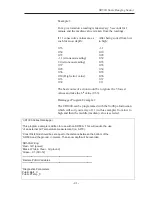
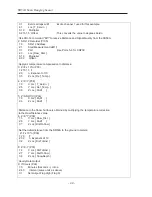
Page 19: ...ed the command SETUP needs to be entered Hitting the Enter will transmit the CR LF characters which are required after the text SETUP The text SETUP is not case sensitive so any combination of upper a...

Page 20: ...t Depth Distance to Target Distance to Ground Decimal Value in Meters 0 0 Measurement Interval Units Seconds Minutes Hours Seconds Measurement Interval Value Integer 1 255 60 Output Unit Meters Centim...

Page 21: ...perational Mode Setting There are 3 different operational mode settings available on the SR50A Overall system design and desired performance determine which mode to select The SR50A operation for each...

Page 22: ...sent until a poll command is received When a poll command is received by the SR50A the output data will typically commence 100ms after the poll command is sent The frequency by which the SR50A will pe...

Page 23: ...This setting is only applicable if either the Auto Measure Polled Output or the Auto Measure Auto Output Modes are used The options for the Measurement Interval Units are Seconds Minutes Hours Once a...

Page 24: ...ally included in the data output string The Temperature Output setting can be set to ON or OFF This setting should only be enabled for the SR50AT version of the sensor 3 7 11 Diagnostics Output The SR...

Page 25: ...o section 3 9 2 The information command consists of the lower case letter i followed by the SR50A address default 33 The command must also terminate with a carriage return character Enter for Hyperter...

Page 26: ...of the sensor The default is 33 Note this is two ASCII characters of 0x33 in Hexidecimal or 51 in decimal D DDD This is the distance to target reading The units depend on the Output Units setting The...

Page 27: ...is set to ON The temperature is displayed with 2 decimal points of precision VVVVV This is the diagnostic output value Each digit represents a pass or a fail on a diagnostic test XVVVV If X is a 1 th...

Page 28: ...aracter 0x03 in hexadecimal or 3 in decimal 3 9 2 Information Message Output The measurement output string for the SR50A is as follows STX aa SSSSS H H F F BBBBB WWWWW CR LF ETX STX is the hex charact...

Page 29: ...exadecimal CR 0X0D Hexadecimal LF 0X0A Hexadecimal ETX 0X03 Hexadecimal The following is a sample packet with proper checksum STX 33 1838 194 11011 2C CR LF ETX SUM 02 33 33 3B 31 38 33 38 3B 31 39 34...

Page 30: ...th the intended target Any unwanted target must be outside the 30 degree beam angle The following formula is used to determine the required clearance for the beam angle By inserting a height value in...

Page 31: ...r edge of the plastic transducer housing see Figure 4 If this edge is used simply add 8mm to the measured distance Figure 4 Distance from edge of transducer housing to grill 4 3 Mounting Options There...

Page 32: ...Nurail The mounting stem is sized to fit a 1 Nurail L1049 This mounting method was used for the SR50 predecessor to the SR50A and the stem can be used to fit the SR50A into existing SR50 mounts Figure...

Page 33: ...SR50A Sonic Ranging Sensor 31 Figure 7 SR50A mounted using Nurail and C2151 mounting stem SR50A with 6 plate gill radiation shield the picture below shows the SR50A stem attachment...

Page 34: ...ure Once the desiccant becomes saturated the color will change from blue to pink If the SR50A is used in humid environments the desiccant should be replaced more frequently To inspect or replace the d...

Page 35: ...cant Before proceeding with any maintenance on a data acquisition system always retrieve the data first It is also recommended that the datalogger program be saved If the sensor is in operation always...

Page 36: ...SR50A Sonic Ranging Sensor 34 Figure 9 Remove 6 screws from the transducer housing Note The screws used on the SR50A have changed from the slotted type to Philips...

Page 37: ...SR50A Sonic Ranging Sensor 35 Figure 10 Remove transducer housing and disconnect wires Figure 11 Location of Desiccant in transducer housing assembly...

Page 38: ...SR50A Sonic Ranging Sensor 36 Figure 12 Remove and Replace Desiccant Figure 13 Remove the 2 flat Philips screws to expose the PCB Carefully reassemble in reverse order...

Page 39: ...n selection headers All 3 jumpers should be placed only on one group at a time Never install more than 3 jumpers and never mix the jumpers amongst the SDI 12 RS 232 or RS 485 locations The other jumpe...

Page 40: ...crews used on the SR50A have changed from the slotted type to Philips oThe transducer housing will separate from the main housing oEnsure that the screws and o rings are kept and set aside oDisconnect...

Page 41: ...xt File x Select the new download text file and the transfer should begin x Initially the LED should remain constantly on When data transfer begins the LED will flash rapidly with each line that is re...

Page 42: ...he SR50A can produce values with higher than expected errors For example in really low density snow very little echo is returned back to the sensor The increase in Echo quality numbers in an indicatio...

Page 43: ...d take the 6th value 0 33 Datalogger Program Example 1 The CR1000 can be programmed with the SortSpa Instruction which will sort your array of 11 in this example from low to high and then the middle m...

Page 44: ...False Minimum 1 PTemp_C FP2 False False EndTable DataTable Hourly True 1 DataInterval 0 60 Min 10 Minimum 1 Batt_V FP2 False False Sample 1 PTemp_C FP2 Sample 1 SnowDepth FP2 EndTable Main Program Beg...

Page 45: ...les and Store Data CallTable Hourly CallTable Daily NextScan EndProg 10 Datalogger Program examples In the following datalogger program examples only the CR1000 and the CR10X dataloggers are used The...

Page 46: ...30 1 273 15 F 2 0 n Exponent of 10 3 5 Z Loc Ref_Temp 4 Z X Y P38 1 9 X Loc T_Kelvin 2 5 Y Loc Ref_Temp 3 6 Z Loc Mult1 5 Z SQRT X P39 1 6 X Loc Mult1 2 6 Z Loc Mult1 Distance to the Snow Surface is o...

Page 47: ...alogger CR10X In this example the SR50AT is mounted 2 5 meters above the ground The CR10X sends an SDI 12 command to the SR50AT which outputs the temperature compensated distance value Meters the sign...

Page 48: ...above 3 10 Set Output Flag High Flag 0 5 Set Active Storage Area P80 1 1 Final Storage Area 1 2 60 Array ID 6 Real Time P77 1 1220 Year Day Hour Minute midnight 2400 7 Sample P70 1 1 Reps 2 6 Loc Sno...

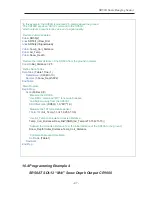
Page 49: ...able1 True 1 DataInterval 0 60 Min 10 Sample 1 Snow_Depth FP2 EndTable Main Program BeginProg Scan 60 Sec 0 0 Measure the SR50A Use SDI12 command M1 to receive Distance and Signal quality from the SR5...

Page 50: ...0AT the SR50AT will store the parameter in EE memory and retain the value even when power is removed Public NewDistanceToGround Public SR50AReturnValues 3 as FLOAT Public XtendedDistValStr as STRING 1...

Page 51: ...ring XM XtendedDistValStr Send out the SDI 12 command to the sensor SDI12Recorder ExtendedCMDResult 1 0 SDI12commandstring 1 0 0 Read back the Distance to Ground value in the SR50A to confirm SDI12Rec...

Page 52: ...s ParseVals 2 Raw_Distance Alias ParseVals 3 SignalQuality Alias ParseVals 4 Diagnostics Alias ParseVals 5 Chcksum Public Temp_Corr_Distance Public Air_Temp Public Snow_Depth Declare the initial dista...

Page 53: ...set The CR1000 sends a serial string to the SR50AT which is in Measure on Poll Mode and then receives a serial string in return which is parsed into different values Wiring Black Power Ground clear P...

Page 54: ...serial command p33 CR SerialOut Com1 p33 chr 13 0 0 Flush the serial buffer SerialFlush Com1 Recieve serial string from SR50A SerialIn SR50AData Com1 200 13 50 SplitStr ParseVals SR50AData 6 0 Subtra...

Page 55: ...g Sensor 53 11 Warnings Cautions Never open the SR50A while the sensor is connected to power or any other device Always disconnect the SR50A via the connector or disconnect the cable wires from their...

Page 56: ...ments The heater power must be turned off when operating at temperatures of 25 C or more 12 2Specifications Heater Resistance 75 Ohms Nominal Operating Voltage 12 Volts AC or DC Note1 Maximum Rated Wa...

Page 57: ...ansducer and desiccant replacement is slightly different for the SR50AH as it is for the SR50A When ordering replacement transducers ensure that the SR50AH part C2370 is ordered The procedure to disas...

Page 58: ...y and disconnect the connector from the transducer to the main sensor body 3 To replace the desiccant remove the desiccant holder plate with the Philips 4 40 screw Cutting the tie strap and will allow...

Page 59: ...ed or replaced step 4 and 5 are not required Steps 4 to 6 are required to replace the transducer only 4 Your transducer kit comes with a replacement for the o ring that seats between the main sensor b...

Page 60: ...g Sensor 58 6 Replace the transducer assembly and the second o ring that seats under the transducer assembly 7 Reassemble the sensor in the reverse order Please observe the orientation of the parts wi...

Page 61: ...SR50A Sonic Ranging Sensor 59 Figure 15 Complete transducer assembly with power connection...

Page 62: ...he gold coating of the foil The outer face of the transducer is coated with parylene which will help prevent the gold from being chemically attacked The wire mesh is removed from this transducer to co...

Page 63: ...ions where corrosion is problematic This is typically a marine environment but it is not limited to this environment The Stainless Steel option will help prevent damage to the chassis of the sensor Tw...

Page 64: ...Campbell Scientific Canada Corp 14532 131 Avenue NW Edmonton AB T5L 4X4 780 454 2505 www campbellsci ca AUSTRALIA BRAZIL CANADA COSTA RICA FRANCE GERMANY SOUTH AFRICA SPAIN UNITED KINGDOM USA...

Reviews: