


04/2021
1. Introduction
This Quick Deploy Guide provides an overview of the steps
used to install and measure the BaroVUE 10 using SDI-12. The
product manual is the definitive source for detailed installation
instructions and information. The manual is available at:
2. Program sensor
1. Connect the data logger to the computer.
2. Open
Short Cut
and click Create New Program.
3. Double-click the data logger model.
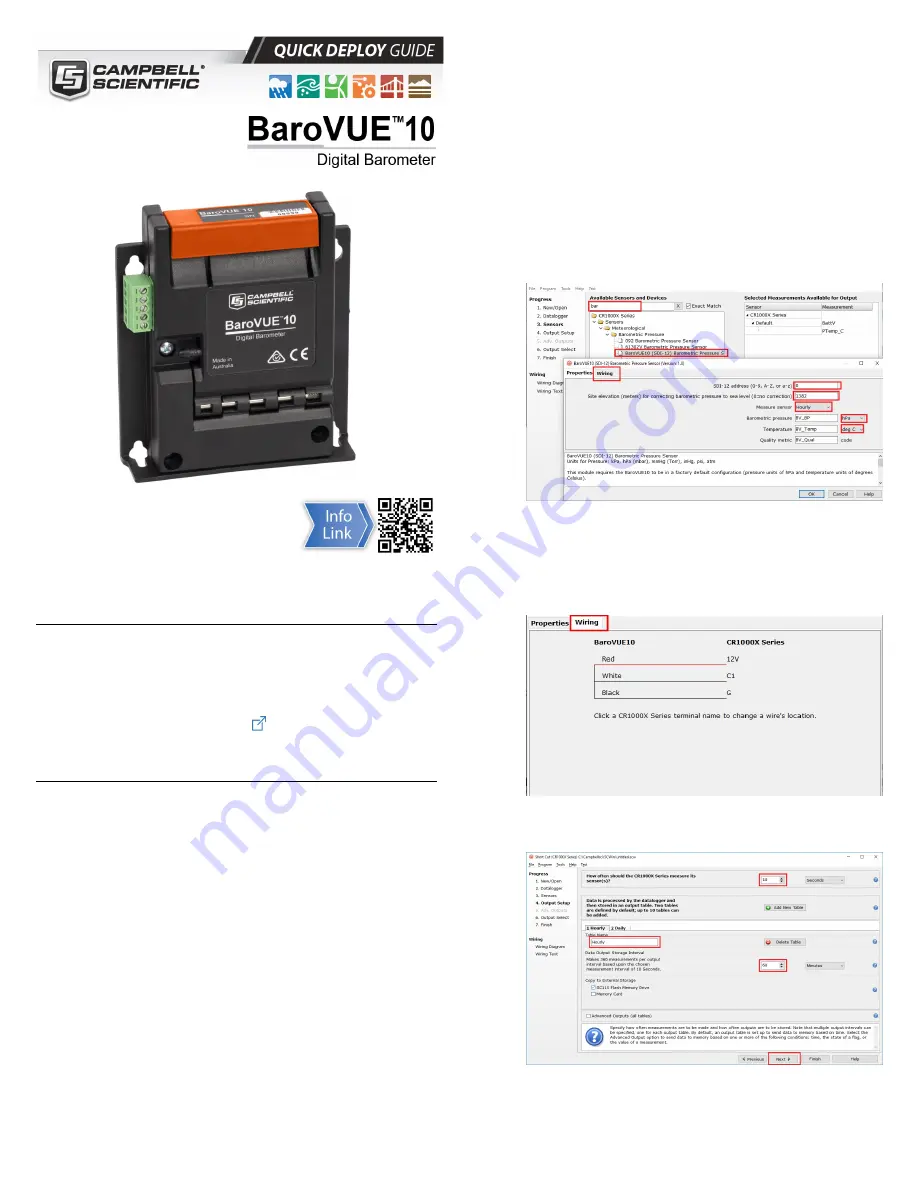
4. In the Available Sensors and Devices box, type
BaroVUE10 or find the sensor in the Sensors >
Meteorological > Barometric Pressure folder, and
double-click BaroVUE10 (SDI-12) Barometric Pressure
Sensor. SDI-12 Address defaults to 0. Enter the correct
SDI-12 Address for the sensor if it has been changed
from the factory default value. Type the elevation in
meters. Choose whether to measure the sensor every
hour or every scan. The Barometric pressure and
Temperature default to hPa and deg C, respectively.
These can be changed by clicking the Barometric
pressure or Temperature box and selecting another
option.
5. Click the Wiring tab to see how the sensor is to be wired
to the data logger. The default control terminal for
SDI-12 is C1. To change to another terminal, click the
terminal name and select another terminal. Click OK
after wiring the sensor.
6. In Output Setup, type the scan rate, a Table Name, and
Data Output Storage Interval. Click Next.


