Pa
ge
11
- M
an
ua
l c
od
e
FA00425-EN
- v
er
.
1
- 0
4/
20
16 - © C
am
e S
.p
.A - T
he c
on
te
nt
s o
f t
hi
s m
an
ua
l a
re s
ub
je
ct t
o c
ha
ng
e a
t a
ny t
im
e w
ith
ou
t p
rio
r n
ot
ic
e.
Pa
ge
10
- M
an
ua
l c
od
e
FA00425-EN
- v
er
.
1
- 0
4/
20
16 - © C
am
e S
.p
.A - T
he c
on
te
nt
s o
f t
hi
s m
an
ua
l a
re s
ub
je
ct t
o c
ha
ng
e a
t a
ny t
im
e w
ith
ou
t p
rio
r n
ot
ic
e.
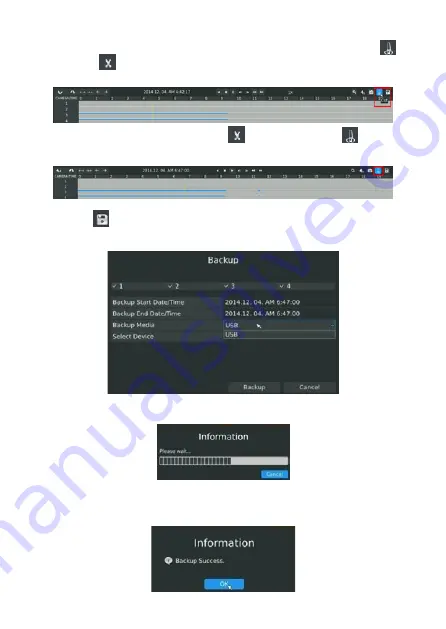
Step 2. Select the recorded files for backup
Select the channel and the date to backup, the start time on the timeline and click
. The
icon changes to
to signify the start of the cut.
Select the end time on the timeline and click
. The icon changes to
to signify the
end of the cut.
Step 3. Click
to access the backup interface. Select the backup media and
click [Backup].
Step 4. The context window invites you to wait: please wait…
Step 5. Once you have exported all the backup files, the message 'Backup Success'
appears.


