background image

P

age 

6

 - Manual 

FA01556-EN

  - 07/2021 - © C

AME S.p.A. - The contents of this manual may be changed at any time and without notice. - T

ranslation of the o

riginal instructions

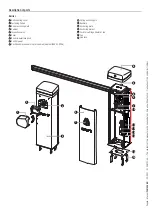
Description of parts

Barrier

1

 Anti-shearing cover

2

 Fastening flange

3

 Boom anchoring plate

4

 Cabinet

5

 Inspection hatch

6

 Cover

7

 Boom release/lock knob

8

 Control panel

9

 Cushioned mechanical stop for boom adjustment (88003-0096)

10

 Spring anchoring pin

11

 Auxiliary

12

 Anchoring plate

13

 Anchoring bracket

14

 Fuse for cartridge heater or fan

15

 Fan

16

 Line fuse

6

8

5

2

1

12

7

9

9

11

7

3

4

10

14

15

16

13

Summary of Contents for GARD GPX40MGC

Page 1: ...Automatic road barriers GARD PX Brushless GPX40MGC INSTALLATION MANUAL FA01556 EN EN English...

Page 2: ...as been damaged or if the boom is no longer intact as the result of an accident or installation error In these cases the tensioned springs no longer guarantee that the boom is balanced The boom may su...

Page 3: ...th the installation rules It should completely cut off the power supply according to category III surcharge conditions Demarcate the entire site properly to prevent unauthorised personnel from enterin...

Page 4: ...uidelines DISPOSING OF THE PACKAGING The packaging materials cardboard plastic etc can be disposed of easily as solid urban waste separated for recycling Before dismantling and disposing of the produc...

Page 5: ...l cabinet Model suitable for areas exposed to high temperatures Intended use The ideal solution for passage ways with heavy transit flows Any installation and or use other than that specified in this...

Page 6: ...rrier 1 Anti shearing cover 2 Fastening flange 3 Boom anchoring plate 4 Cabinet 5 Inspection hatch 6 Cover 7 Boom release lock knob 8 Control panel 9 Cushioned mechanical stop for boom adjustment 8800...

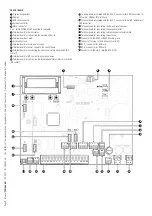
Page 7: ...for connecting the released gearmotor safety microswitch NC contact 15 Terminal board associated with the RSE_2 connector for CRP connection IO 485 card or Modbus RTU interface 16 Terminal board assoc...

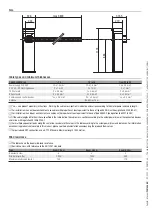
Page 8: ...lent to those of type H05RN F with designation 60245 IEC 57 For installation in an indoor environment use cables with properties at least equivalent to those of type H05VV F designation to 60227 IEC 5...

Page 9: ...conditions When the operator is being fixed in place it may be unstable and overturn Be careful and do not lean on it until it is fully fastened in place Preliminary operations If the flooring does no...

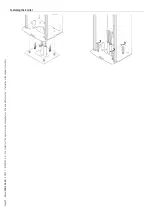
Page 10: ...holes Cast cement into the foundation frame The plate must be perfectly level and the screw threads completely above surface Wait at least 24 hours for the cement to dry Remove the foundation frame F...

Page 11: ...Page 11 Manual FA01556 EN 07 2021 CAME S p A The contents of this manual may be changed at any time and without notice Translation of the original instructions Fastening the barrier...

Page 12: ...pin from the lever arm 2 Release the gearmotor turning the knob clockwise 3 Turn the lever arm by 90 4 Lock the gearmotor turning the knob anticlockwise 5 Fasten the anchoring pin to the opposite hol...

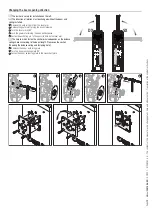
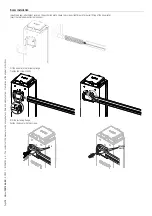
Page 13: ...nal instructions Boom installation Install the boom attachment cover on the anchoring plate Leave the screws slightly loose for easier fitting of the boom later Insert the reinforcement inside the boo...

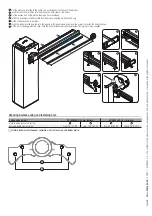
Page 14: ...ve aligning it with the end cap 3 Fit the rubber end cap in position 6 Insert the rubber profile end cap into the groove in the boom closing cap Use the screws to fasten the boom end cap 7 Fit the ant...

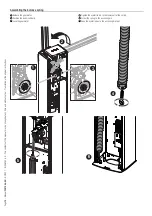
Page 15: ...tice Translation of the original instructions Assembling the balance spring 1 Release the gearmotor 2 Position the boom vertically 3 Lock the gearmotor 4 Tighten the eyelet tie rod to the lower part o...

Page 16: ...Balancing the boom 1 Release the gearmotor 2 Manually turn the spring to increase or reduce the traction The boom should stabilise at 45 3 Fasten the locknut Position the boom vertically 4 Lock the ge...

Page 17: ...limit switches Check that the boom is parallel to the road surface when it is in the closed position and at about 89 when it is in the open position Correct the boom s horizontal position Release the...

Page 18: ...notice Translation of the original instructions Correct the boom s vertical position Release the gearmotor Open the inspection hatch Raise the boom 1 Turn the cushioned mechanical stop until you reac...

Page 19: ...disconnected during all installation procedures Before working on the control panel disconnect the mains power supply and remove the batteries if any Connecting to the electrical network 1 Button for...

Page 20: ...r switch 4 Keypad selector 5 STOP button NC contact This stops the boom and excludes automatic closing Use a control device to resume movement If the contact is not used it must be deactivated during...

Page 21: ...the gearmotor is released or the boom has dropped away A B GND A B GND R G B 2 10 S1GND A B 11 E1 E6 TS 1 2 3 3P 4 5 7 2 CX CY CZ FA FC FCA CM1 FCC CM2 MOTOR BLOCK 1 2 3 4 Safety devices Connect the s...

Page 22: ...pen the gate Wait for the manoeuvre to be completed Press the ESC button or STOP button immediately in the event of any faults malfunctions strange noises or vibrations or unexpected behaviour in the...

Page 23: ...light on Default The light stays on when the boom is moving or open Warning light flashing The warning light flashes every half a second when the boom is opening and remains on when the boom is open...

Page 24: ...serted in the RSE1 connector Configuration RSE communication RSE1 Paired Alternate Off Save data Save user data timings and configurations to the memory device memory roll or USB key The function is d...

Page 25: ...e opening or closing the FCA CM1 or FCC CM2 contact closes and remains closed Custom The FCA CM1 contact is closed with the boom in the open travel end position and during the opening manoeuvre The FC...

Page 26: ...t 57600 bps 115200 bps Create new timer Time one or more types of activation chosen from those available Timer management Create new timer 1 Use the arrows to choose the desired function Opening Parti...

Page 27: ...desired code Change password Change the 4 digit password that protects access to the main menu Password Change password Use the arrows and the Enter button to dial the desired code Remove password Rem...

Page 28: ...s been removed even with boom not in movement R7 Reopening during closure sensitive edges with 8K2 resistor Safety devices test Check that the photocells connected to the inputs are operating correctl...

Page 29: ...r users Remove user Remove one of the registered users Manage users Remove user Confirm NO Confirm YES Use the arrows to choose the number associated with the user you want to remove No 1 250 Alternat...

Page 30: ...n Information Parameter reset Confirm NO Confirm YES Manoeuvre counter View the number of operator manoeuvres Total manoeuvres Manoeuvres carried out since installation Partial manoeuvres Manoeuvres c...

Page 31: ...ss programming 3 Use the arrows to choose the desired function The functions are displayed only when a USB memory stick is inserted Save data Save user data timings and configurations to the memory de...

Page 32: ...Page 32 Manual FA01556 EN 07 2021 CAME S p A The contents of this manual may be changed at any time and without notice Translation of the original instructions FINAL OPERATIONS 4 3 2 1...

Page 33: ...o the control board which will be set as the MASTER A B GND A B GND 1 2 3 3P 4 5 7 2 CX CY CZ FCA CM1 FCC CM2 RSE A B GND A B GND 1 2 3 3P 4 5 7 2 CX CY CZ FCA CM1 FCC CM2 RSE UTP CAT 5 max 1000 m Pro...

Page 34: ...the devices and accessories please see the ELECTRICAL CONNECTIONS section The control and safety devices must be connected on both electronic boards A B GND A B GND 1 2 3 3P 4 5 7 2 CX CY CZ FCA CM1 F...

Page 35: ...21 CAME S p A The contents of this manual may be changed at any time and without notice Translation of the original instructions 2 ONLY OPEN command 2 3 on barrier B 3 OPEN CLOSE command 2 7 on barrie...

Page 36: ...oduct installation manual For information on choosing products and accessories please see our product catalogue If the barrier with an articulated joint is used check that the moving parts of the join...

Page 37: ...imum number of closing obstacles The maximum number of obstacles detected consecutively has been exceeded Maximum number of opening obstacles The maximum number of obstacles detected consecutively has...

Page 38: ...Page 38 Manual FA01556 EN 07 2021 CAME S p A The contents of this manual may be changed at any time and without notice Translation of the original instructions...

Page 39: ...Page 39 Manual FA01556 EN 07 2021 CAME S p A The contents of this manual may be changed at any time and without notice Translation of the original instructions...

Page 40: ...AME S p A The contents of this manual may be changed at any time and without notice Translation of the original instructions CAME S p A Via Martiri della Libert 15 31030 Dosson di Casier Treviso Italy...

Reviews: