background image

CVBS

AUDIO IN

ALARM OUT ALARM IN

AUDIO

OUT

DC12V

USB

LAN

VGA

A

4

3

2

1

VIDEO IN

16

8

12

4

2

1

15

7

11

3

14

6

10

13

5

9

G

N

D

G

N

D

1

C

O

M

N

O

2

3

4

RS485

ALARM OUT ALARM IN

CVBS

DC12V

USB

LAN

VGA

A

AUDIO IN

4

3

2

1

VIDEO IN

8

4

2

1

7

3

6

5

AUDIO OUT

G

N

D

G

N

D

1

C

O

M

N

O

2

3

4

RS485

AUDIO 

  OUT

CVBS

DC12V

USB

LAN

VGA

485

B   

AUDIO IN

A

VIDEO IN

4

3

2

1

4

3

2

1

1

2

3

4

GND

GND

COM

NO

RS

ALARM OUT

ALARM IN

CVBS

AUDIO IN

ALARM OUT ALARM IN

AUDIO

OUT

DC12V

USB

LAN

VGA

A

4

3

2

1

VIDEO IN

16

8

12

4

2

1

15

7

11

3

14

6

10

13

5

9

G

N

D

G

N

D

1

C

O

M

N

O

2

3

4

RS485

ALARM OUT ALARM IN

CVBS

DC12V

USB

LAN

VGA

A

AUDIO IN

4

3

2

1

VIDEO IN

8

4

2

1

7

3

6

5

AUDIO OUT

G

N

D

G

N

D

1

C

O

M

N

O

2

3

4

RS485

AUDIO 

  OUT

CVBS

DC12V

USB

LAN

VGA

485

B   

AUDIO IN

A

VIDEO IN

4

3

2

1

4

3

2

1

1

2

3

4

GND

GND

COM

NO

RS

ALARM OUT

ALARM IN

Page 

2

 - Manual: 

FA00744-EN

 - ver

1

 - 04/2017 - © C

AME S.p.A. - The data and information shown in this manual ar

e t

o be consider

ed subject t

o change at any time and without the need for any advance warning.

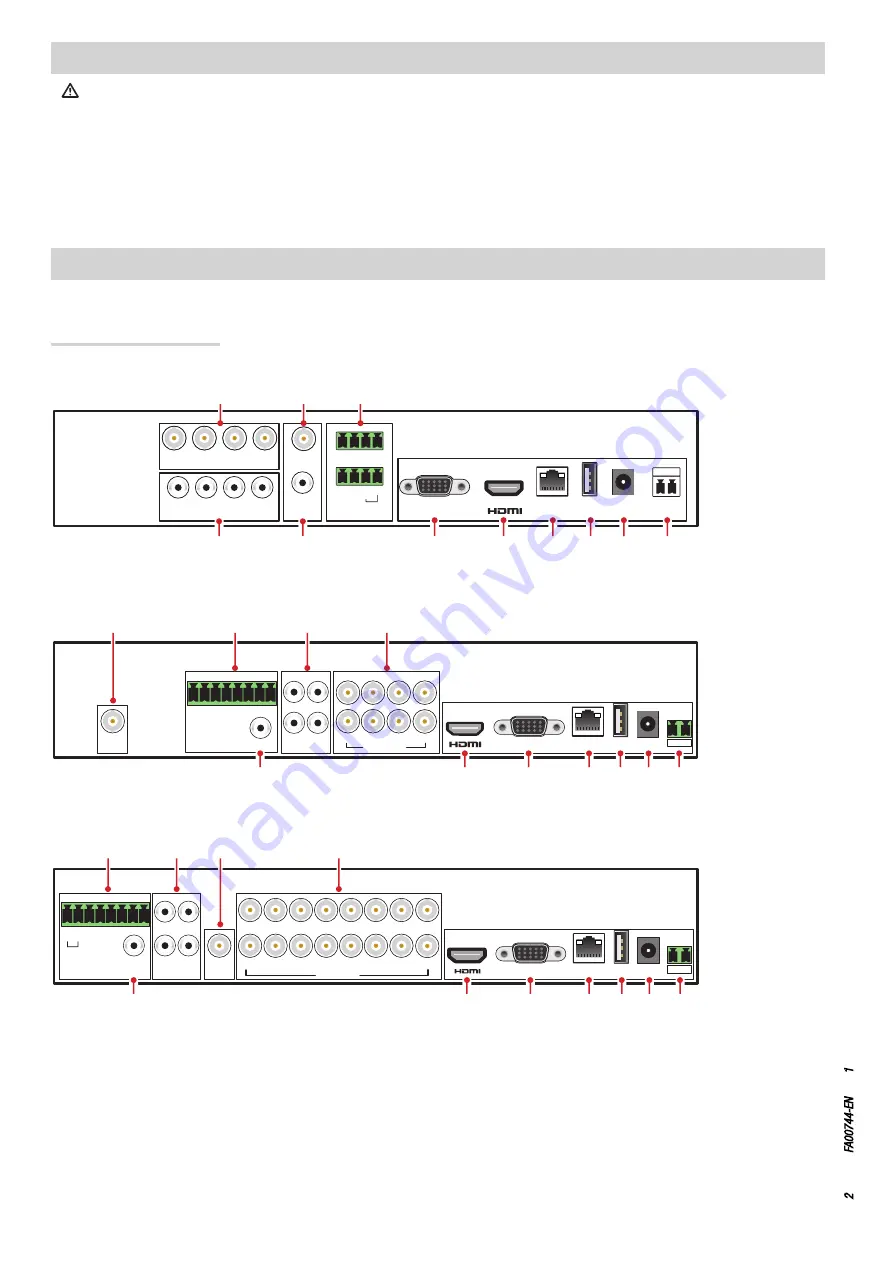
Rear panel XDHD2716H

Rear panel XDHD2708H

❶ 

HD - TVI - AHD or analogue video inputs,


CVBS video output,

❸ 

Alarm inputs and outputs,


Audio inputs,

❺ 

Audio output,

❻ 

VGA video output,

❼ 

HDMI video output,

❽ 

LAN port,

❾ 

USB port,

❿ 

Power input from 12 V DC power supply,

⓫ 

RS485 output for connection of PTZ video camera and keypad.

GENERAL PRECAUTIONS

• 

 Important safety instructions: READ CAREFULLY

• Installation, programming, commissioning and maintenance must only be carried out by qualified, expert staff and in full compliance with the 

applicable law.

• Always cut off the mains power when doing cleaning and maintenance jobs.

• This product must only be used for the purpose for which it was designed. 

• The manufacturer declines all liability for any damage as a result of improper, incorrect or unreasonable use.

DESCRIPTION

Digital video recorder with 4, 8, 16 inputs.

Description of parts

Rear panel XDHD2704H

❽ ❾ ❿ ⓫

❽ ❾ ❿ ⓫

❾ ❿

Summary of Contents for 848EA-0070

Page 1: ...English EN Deutsch DE Italiano IT Français FR FA00744M04 MANUALE DI CONFIGURAZIONE E USO XDHD2704H XDHD2708H XDHD2716H VIDEOREGISTRATORI DIGITALI ...

Page 2: ... LAN VGA 485 B AUDIO IN A VIDEO IN 4 3 2 1 4 3 2 1 1 2 3 4 GND GND COM NO RS ALARM OUT ALARM IN Pag 2 Manuale FA00744 IT ver 1 04 2017 CAME S p A I contenuti del manuale sono da ritenersi suscettibili di modifica in qualsiasi momento senza obbligo di preavviso AVVERTENZE GENERALI Importanti istruzioni per la sicurezza delle persone LEGGERE ATTENTAMENTE L installazione la programmazione la messa in...

Page 3: ...0 90 Dimensioni mm 300 x 248 x 52 300 x 248 x 52 380 x 268 x 52 USO DEL DISPOSITIVO Accendere e spegnere il DVR Accendere il dispositivo Connettere il monitor e l alimentatore il led blu frontale si accende ed il dispositivo esegue l avvio Una procedura guidata permette di eseguire il setup del dispositivo Spegnere il dispositivo Dal menù principale selezionare l icona Shutdown questa operazione p...

Page 4: ...i dati IP ADDRESS INDIRIZZO IP SUBNET MASK MASCHERA DI SOTTORETE GATEWAY GATEWAY PREFERRED DNS SERVER SERVER DNS PRIMARIO ALTERNATE DNS SERVER SERVER DNS SECONDARIO questa selezione permette l utilizzo visualizzazione del DVR da remoto Premere il pulsante NEXT PROSSIMO per proseguire il setup Scelta del tipo di telecamere connesse Il videoregistratore supporta telecamere con tecnologia AHD HDTVI e...

Page 5: ...LAZIONE per schedulare le registrazioni il rilevamento dei movimenti l allarme ALARM ALLARME per impostare il tipo di sensore l attivazione dell allarme e il buzzer NETWORK RETE per abilitare la funzione configurare l indirizzo IP il DDNS e i parametri di trasmissione video USERS UTENTI per aggiungere eliminare utenti o modificarne le autorizzazioni Tale operazione può essere effettuata solo dall ...

Page 6: ...La registrazione si attiva se la telecamera rileva un movimento all interno di un area predefinita dell immagine Dalla finestra SETUP CONFIGURAZIONE scegliere SCHEDULE SCHEDULAZIONE e in seguito scegliere MOTION MOVIMENTO Abilitare la rilevazione del movimento spuntando ENABLE ABILITA in corrispondenza del canale CH su cui si vuole attivare la registrazione su movimento Cliccare su APPLY APPLICA p...

Page 7: ...strate più recenti presenti nella memoria Usare i comandi nella parte inferiore dello schermo per cercare e riprodurre porzioni di video registrati presenti nella memoria del dispositivo Riproduzione con TIME SEARCH RICERCA TEMPORALE Dal MENU PRINCIPALE premere l icona SEARCH RICERCA Il tab TIME SEARCH RICERCA TEMPORALE permette di ricercare e riprodurre rapidamente le immagini registrate un deter...

Page 8: ...l backup ed i canali coinvolti La funzione ALL TUTTO esegue il backup di tutto l hard disk Premere il tasto START per avviare il back up CONTROLLO DA REMOTO Il controllo da remoto è possibile solo se il DVR è collegato alla LAN WAN Accesso al DVR via LAN Dal menu SETUP CONFIGURAZIONE scegliere l icona NETWORK rete Immettere i dati richiesti negli appositi campi IP ADDRESS INDIRIZZO IP SUBNET MASK ...

Page 9: ...tendina di DDNS Type Tipo DDNS Inserire il nome Host desiderato e premere il pulsante REGISTER REGISTRA se non viene accettato riprovare con un altro nome Host meno comune Una volta effettuata la registrazione salvare le impostazioni cliccando sul pulsante APPLY APPLICA A questo punto è possibile accedere remotamente al DVR utilizzando il nome del dominio via WAN Questo passaggio non è necessario ...

Page 10: ...rial No N di serie indirizzo MAC del DVR Per visualizzare l indirizzo MAC del DVR accedere a Menu Information Informazioni Network Rete User Name Nome utente nome dell utente del DVR il nome di default è admin Password password del DVR la password di default è 123456 L accesso da remoto può avvenire anche mediante il software NVMS1000 per PC o NVMS1200 per MAC OS Connessione tramite cloud Impostaz...

Page 11: ...azione seguire la sequenza illustrata nelle immagini che seguono Se si utilizza la connessione tramite DDNS Scrivere all interno della casella il nome Host seguito dal dominio per esempio came autoddns com Se si utilizza la connessione tramite cloud Toccare l icona e scansionare il QR code che si può trovare al menù informazioni del DVR alla voce QR code In alternativa è possibile scrivere diretta...

Page 12: ... p A I contenuti del manuale sono da ritenersi suscettibili di modifica in qualsiasi momento senza obbligo di preavviso Il dispositivo appena aggiunto viene mostrato in elenco l icona di colore verde indica che la connessione al videoregistratore è attiva Tornando nella schermata precedente è possibile visualizzare e selezionare i dispositivi connessi L icona permette di aprire la finestra mediant...

Page 13: ...English EN SETUP AND USER MANUAL XDHD2704H XDHD2708H XDHD2716H DIGITAL VIDEO RECORDERS FA00744 EN ...

Page 14: ... 7 3 6 5 AUDIO OUT GND GND 1 COM NO 2 3 4 RS485 AUDIO OUT CVBS DC12V USB LAN VGA 485 B AUDIO IN A VIDEO IN 4 3 2 1 4 3 2 1 1 2 3 4 GND GND COM NO RS ALARM OUT ALARM IN Page 2 Manual FA00744 EN ver 1 04 2017 CAME S p A The data and information shown in this manual are to be considered subject to change at any time and without the need for any advance warning Rear panel XDHD2716H Rear panel XDHD2708...

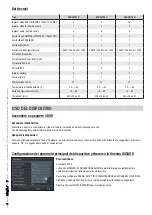
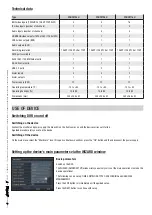
Page 15: ... up the device Switching off the device On the main menu select the Shutdown icon this opens a Shutdown window press the OK button and then disconnect the power supply Setting up the device s main parameters via the WIZARD window Technical data Type XDHD2704H XDHD2708H XDHD2716H BNC video inputs TVI AHD2 0 1080P 720P WD1 4 8 16 IP video inputs number of channels 1 1 4 Audio inputs number of channe...

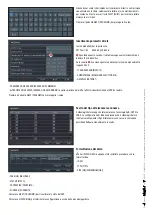
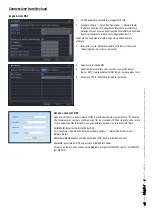
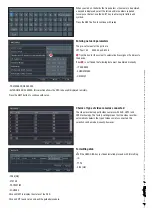
Page 16: ...o recorder automatically detects the type of video camera connected this selection can be made manually however PREFERRED DNS SERVER ALTERNATE DNS SERVER this selection allows the DVR to be used displayed remotely Press the NEXT button to continue with setup Entering network parameters The pre set values for the ports are HTTP port 80 SERVER port 6036 Tick this box for the system to automatically ...

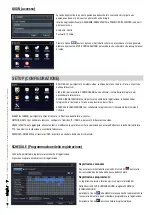
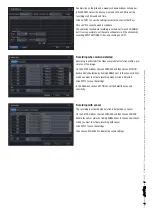
Page 17: ...ried out by the administrator P T Z pan tilt and zoom of the video camera ADVANCED to restart the DVR import or export data from to external disks BASIC to set the video system menu language audio time and authorisations check LIVE to set the NAME TIME to be displayed and the colour of the images and to hide the video cameras RECORD to set the recording quality frame frequency resolution times and...

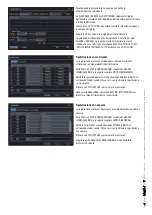
Page 18: ...a detects motion within a pre set area of the image On the SETUP window choose SCHEDULE and then choose MOTION Enable motion detection by ticking ENABLE next to the channel CH on which you want to activate recording when motion is detected Click APPLY to save the settings In the AREA box click on SETTING to set the detection area and sensitivity Double click on the grid and a weekly schedule windo...

Page 19: ... the search Click on SEARCH Indicate the recording playback start time Click the button to start playback On the MAIN MENU press the SEARCH icon Playback with TIME SEARCH The screen that is displayed shows the most recently recorded images there are in the memory Use the commands on the bottom of the screen to search for and play back sections of recorded videos present in the device s memory PLAY...

Page 20: ...r the DVR s IP address and press send BACKUP On the MAIN MENU press the BACKUP icon Backup can be carried out by connecting a hard disk to the USB port It is possible to set the backup start and end times and the channels concerned The ALL function backs up the whole of the hard disk Press the START key to start the backup REMOTE CONTROL Remote control is possible only if the DVR is connected to L...

Page 21: ...namic public IP 1 Access Main Menu Setup Network Other Settings 2 Enable DDNS and select www autoddns com in the DDNS Type drop down menu Enter the Host name you want and press REGISTER if it is not accepted retry with another less common Host name Once registration has been carried out save the settings by clicking the APPLY button At this point it is possible to access the DVR remotely using the...

Page 22: ...Cloud NAT settings Access to NAT server After completing the NAT settings it is possible to access the NAT server on PC enter http www autonat com to access the IE client If you are accessing NAT for the first time the network automatically downloads ActiveX After installing ActiveX the login window is opened Serial No MAC address of DVR To display the DVR s MAC address access the Menu Information...

Page 23: ...n via DDNS Type the Host name followed by the domain inside the box for example came autoddns com If you are using a connection via Cloud Touch the icon and scan the QR code that you can find in the DVR s information menu under the heading QR code Alternatively you can type the code directly into the Device box CONTROL FROM A MOBILE DEVICE Access via app For iOS or Android smartphones download the...

Page 24: ...ver 1 04 2017 CAME S p A The data and information shown in this manual are to be considered subject to change at any time and without the need for any advance warning The device just added is shown in the list the green icon indicates that the connection to the video recorder is on Go back to the previous screen to display and select the devices connected The icon lets you open the window through ...

Page 25: ...Français FR MANUEL DE CONFIGURATION ET D UTILISATION XDHD2704H XDHD2708H XDHD2716H ENREGISTREURS VIDÉO NUMÉRIQUES FA00744 FR ...

Page 26: ...S DC12V USB LAN VGA 485 B AUDIO IN A VIDEO IN 4 3 2 1 4 3 2 1 1 2 3 4 GND GND COM NO RS ALARM OUT ALARM IN Page 2 Manuel FA00744 FR vers 1 04 2017 CAME S p A Le contenu de ce manuel est susceptible de subir des modifications à tout moment et sans aucun préavis Panneau postérieur XDHD2716H Panneau postérieur XDHD2708H Entrées vidéo HD TVI AHD ou analogiques Sortie vidéo CVBS Entrées et sorties alar...

Page 27: ...dispositif Éteindre le dispositif Sélectionner dans le menu principal l icône Shutdown pour ouvrir une fenêtre dédiée à l extinction appuyer sur le bouton OK puis mettre hors tension Configuration des paramètres principaux du dispositif par le biais de la fenêtre de l assistant WIZARD Données techniques Type XDHD2704H XDHD2708H XDHD2716H Entrées vidéo BNC TVI AHD2 0 1080P 720P WD1 4 8 16 Entrées v...

Page 28: ...ce choix manuellement PREFERRED DNS SERVER SERVEUR DNS PRIMAIRE ALTERNATE DNS SERVER SERVEUR DNS SECONDAIRE cette sélection permet l utilisation visualisation du DVR à distance Cliquer sur le bouton NEXT SUIVANT pour poursuivre la configuration Saisie des paramètres de réseau Les valeurs prédéfinies pour les ports sont les suivantes HTTP port 80 SERVER port 6036 Cocher cette case pour que le systè...

Page 29: ...tilisateurs ou en modifier les autorisations Cette opération ne peut être effectuée que par l administrateur P T Z VPIZ panoramique inclinaison et zoom de la caméra ADVANCED AVANCÉE pour redémarrer le DVR importer ou exporter des données depuis sur des disques externes BASIC BASE pour configurer le système vidéo la langue du menu l audio l horaire et le contrôle des autorisations LIVE LIVE pour co...

Page 30: ...N puis MOTION MOUVEMENT Activer la détection du mouvement en cochant ENABLE ACTIVER près du canal CH sur lequel activer l enregistrement sur mouvement Cliquer sur APPLY APPLIQUER pour sauvegarder les configurations Dans le champ AREA ZONE cliquer sur SETTING CONFIGURATIONS pour configurer la zone de détection et la sensibilité Double cliquer sur la grille pour visualiser la fenêtre de programmatio...

Page 31: ...duction de l enregistrement Cliquer sur le bouton pour lancer la reproduction Dans le MENU PRINCIPAL appuyer sur l icône SEARCH RECHERCHE Reproduction avec TIME SEARCH RECHERCHE TEMPORELLE La page qui s affiche présente les dernières images enregistrées et sauvegardées dans la mémoire À l aide des commandes en bas de l écran chercher et reproduire des portions de vidéos enregistrées et sauvegardée...

Page 32: ... DHCP pour l adressage automatique du DVR par le routeur BACKUP COPIE DE SAUVEGARDE Dans le MENU PRINCIPAL appuyer sur l icône BACKUP COPIE DE SAUVEGARDE Il est possible d effectuer une copie de sauvegarde en connectant un disque dur au port USB Il est également possible de configurer l heure de début et de fin de la copie de sauvegarde ainsi que les canaux concernés La fonction ALL TOUT permet d ...

Page 33: ... le DDNS en cas d adresse IP publique dynamique 1 Accéder au Main Menu Menu principal Setup Configuration Network Réseau Other Settings Autres configurations 2 Activer le serveur DDNS et sélectionner www autoddns com dans le menu déroulant de DDNS Type Type DDNS Entrer le nom d hôte souhaité et cliquer sur le bouton REGISTER ENREGISTRER si ce nom n est pas accepté en entrer un autre moins commun A...

Page 34: ...T Au terme des configurations du NAT il est possible d accéder au serveur NAT sur le PC saisir http www autonat com pour accéder au client IE En cas de premier accès au serveur NAT le réseau télécharge automatiquement ActiveX Après avoir installé ActiveX la fenêtre de login suivante apparaît Serial No N de série adresse MAC du DVR Pour visualiser l adresse MAC du DVR accéder au menu Information In...

Page 35: ...m d hôte suivi du domaine ex came autoddns com En cas de connexion via le cloud Toucher l icône et scanner le code QR disponible dans le menu informations du DVR à l option QR code Il est également possible d écrire directement le code dans la case Dispositif CONTRÔLE DEPUIS UN DISPOSITIF MOBILE Accès par app Pour smartphone iOS ou Android télécharger l application Superlive PLUS pour tablette iOS...

Page 36: ... FR vers 1 04 2017 CAME S p A Le contenu de ce manuel est susceptible de subir des modifications à tout moment et sans aucun préavis La liste visualise le dispositif venant d être ajouté l icône verte indique que la connexion à l enregistreur vidéo est activée Revenir à la page précédente pour visualiser et sélectionner les dispositifs connectés L icône permet d ouvrir la fenêtre de sélection de l...

Page 37: ...Deutsch DE KONFIGURATIONS UND BEDIENUNGSANLEITUNG XDHD2704H XDHD2708H XDHD2716H DIGITALE VIDEOREKORDER FA00744 DE ...

Page 38: ...DIO OUT GND GND 1 COM NO 2 3 4 RS485 AUDIO OUT CVBS DC12V USB LAN VGA 485 B AUDIO IN A VIDEO IN 4 3 2 1 4 3 2 1 1 2 3 4 GND GND COM NO RS ALARM OUT ALARM IN S 2 Anleitung FA00744 DE Ver 1 04 2017 CAME S p A Der Inhalt dieser Anleitung kann jederzeit und ohne Vorankündigung geändert werden Hinterplatte XDHD2716H Hinterplatte XDHD2708H Videoeingänge HD TVI AHD oder analoge CVBS Videoausgang Alarm Ei...

Page 39: ...Gerät ausschalten Im Hauptmenü das Symbol Shutdown wählen danach öffnet sich das Ausschaltfenster auf OK drücken und danach die Stromzufuhr unterbrechen Einstellung der wichtigsten Parameter mit dem WIZARD Fenster Technische Daten Typ XDHD2704H XDHD2708H XDHD2716H BNC Videoeingänge TVI AHD2 0 1080P 720P WD1 4 8 16 IP Videoeingänge Anzahl der Kanäle 1 1 4 Audioeingänge Anzahl der Kanäle 4 4 4 HDMI ...

Page 40: ...sch wählen PREFERRED DNS SERVER BEVORZUGTER DNS SERVER ALTERNATE DNS SERVER ALTERNATIVER DNS SERVER ermöglicht die Verwendung Aufruf des DVR über Fernzugriff Durch Druck auf NEXT WEITER wird die Einstellung wieder aufgenommen Netzwerkparameter eingeben Die vorgegebenen Werte der Ports sind HTTP Port 80 SERVER Port 6036 Wenn Sie dieses Kontrollkästchen abhaken weist das System dem Gerät automatisch...

Page 41: ...hre Berechtigungsdaten werden geändert Dieser Vorgang kann nur vom Verwalter vorgenommen werden P T Z Schwenkung Neigung und Zoom der Überwachungskamera ADVANCED FORTGESCHRITTENE Neustart des DVR Import Export von Daten von auf externe Festplatten BASIC GRUNDEINSTELLUNG Videosystem Menü Sprache Audio Uhrzeit und Berechtigungsprüfung LIVE LIVE Einstellung der angezeigten NAME UHRZEIT der Farbe der ...

Page 42: ...ANUNG und anschließend MOTION BEWEGUNG wählen ENABLE AKTIVIEREN im entsprechenden Kanal CH in dem die Ereignisaufnahme aktiviert werden soll abhaken Auf APPLY ANWENDEN klicken und die Einstellungen speichern Im Feld AREA BEREICH auf SETTING EINSTELLUNGEN klicken und den Erfassungsbereich und die Empfindlichkeit einstellen Durch Doppelklick auf das Raster öffnet sich ein Fenster mit einem Wochenpla...

Page 43: ...ken Anfangsuhrzeit der Wiedergabe angeben Auf die Taste klicken um die Aufnahme abzuspielen Im HAUPTMENÜ auf die Symboltaste SEARCH SUCHEN klicken Wiedergabe mit TIME SEARCH ZEITSUCHE Im Bildschirm der sich nun öffnet sind die zuletzt gespeicherten Aufnahmen aufgelistet Mit den Befehlstasten unten im Bildschirm Teile der gespeicherten Aufnahmen abspielen ABSPIELEN 4 verschiedene Wiedergabeweisen s...

Page 44: ...tellungen des DVR können im Fenster INFORMATION INFO abgelesen werden BACKUP Im HAUPTMENÜ auf die Symboltaste BACKUP BACKUP klicken Das Backup erfolgt durch den Anschluss eines Hard Disksr Festplatte an das USB Port Sie können die Anfangs und Endzeit des Backups und die entsprechenden Kanäle festlegen Mit ALL ALLE erfolgt das Backup der La funzione ALL TUTTO esegue il backup di tutto l hard disk M...

Page 45: ...den 1 Main Menu Hauptmenü öffnen Setup Konfiguration Network Netzwerk Other Settings andere Einstellungen 2 DDNS aktivieren und im Dropdown Menü DDNS Type DDNS Typ www autoddns com wählen Den gewünschten HOST Namen eingeben und auf REGISTER ANMELDEN drücken wenn der Name nicht angenommen wird einen weniger üblichen HOST eingeben Nach der Anmeldung die Einstellungen mit APPLY ANWENDEN speichern Nun...

Page 46: ...Server Nachdem der NAT eingestellt wurde kann man über PC auf den NAT Server zugreifen http www autonat com eingeben um den IE Client aufzurufen Wenn man zum ersten Mal auf den NAT zugreift wird automatisch ActiveX heruntergeladen Nach der Installation von ActiveX öffnet sich das Anmeldefenster Serial No serielle Nummer MAC Adresse des DVR Um die MAC Adresse des DVR anzuzeigen öffnen Sie das Menü ...

Page 47: ...den Host und die Domain eintragen z B came autoddns com Bei Cloud Verbindung Tippen Sie auf die Symboltaste und tasten Sie den QR Code den Sie im Info Menü des DVR unter QR Code finden ab Sie können den Code auch einfach in das Geräte Feld eintragen STEUERUNG ÜBER MOBILGERÄT Zugriff über App Für Smartphone iOS oder Android die App Superlive PLUS herunterladen für Tablet iOS oder Android die App Su...

Page 48: ...FA00744 DE Ver 1 04 2017 CAME S p A Der Inhalt dieser Anleitung kann jederzeit ohne Vorankündigung geändert werden Das gerade hinzugefügte Gerät wird im Verzeichnis angezeigt wenn das Symbol grün ist wurde die Verbindung zum Videorekorder aktiviert Zurück zum vorherigen Bildschirm können Sie die eingebundenen Geräte aufrufen und auswählen Mit dem Symbol können Sie das Fenster in dem die Anzeigeart...

Reviews: