3.5 Setting up your Mac to share music over a network
If you use iTunes, we recommend placing all of your MP3's in your iTunes
folder (situated in your Music folder) before starting. If you don't, then
place all your MP3 content in your Music folder (situated in your Account
folder).
Turning on File Sharing
1. In the "Apple" menu on your desktop, select "System Preferences".
2. In the "Internet & Network" section, select "Sharing".
3. In the window that now appears, select the "Services" tab.
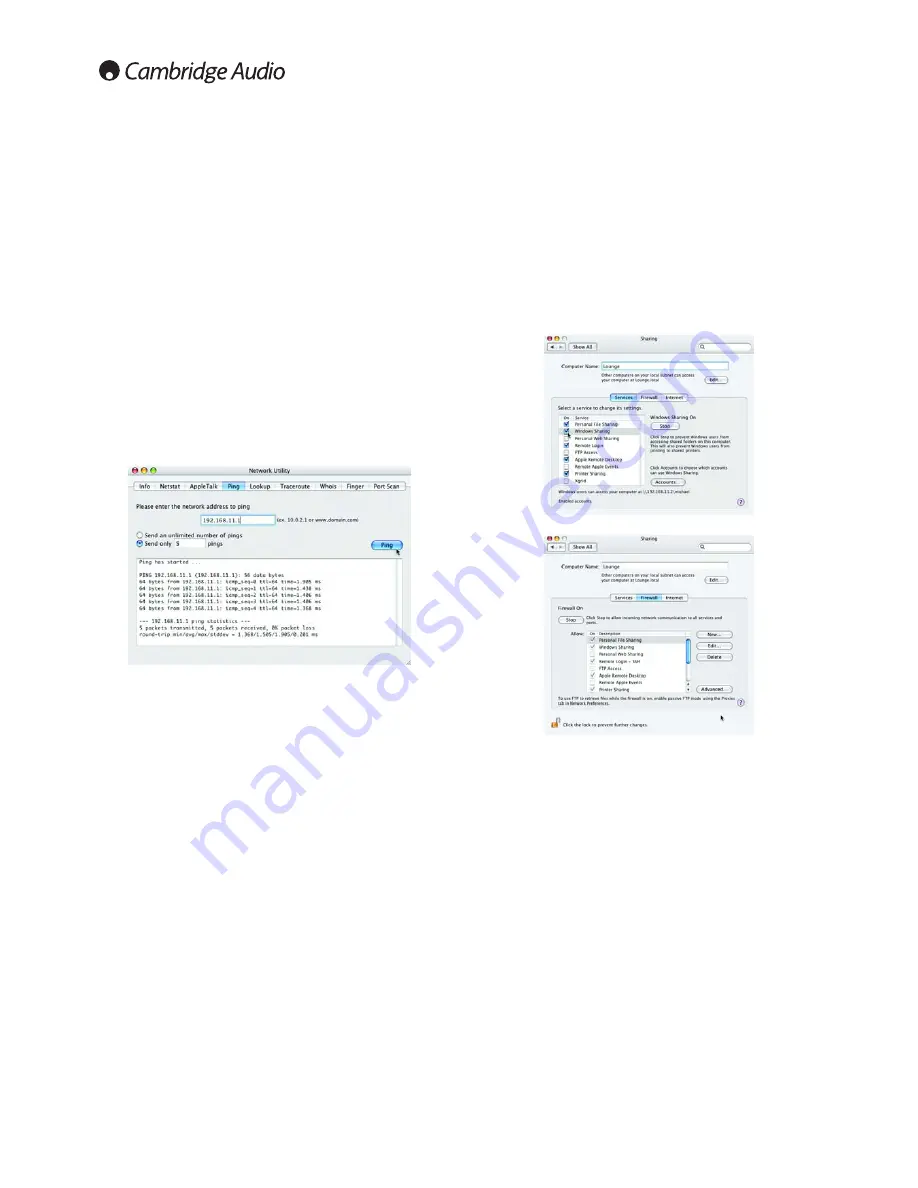
4. Tick the "Personal File Sharing" and "Windows Sharing" boxes:
5. This also changes your Firewall settings:
6. The "Computer Name" at the top of the window should be set as a
simple one word name with no spaces or special characters; we
recommend the room where your Mac is.
7. Once you have set the computer name, close the window.
8
3.4 Testing your Network Configuration
Now you have set up a basic network, it is strongly recommended to
make sure it is working before continuing. To do this you need to "ping"
(Packet InterNet Groper) the 640H from your Mac. Ping is the most basic
form of communication between two devices, as it is just a confirmation
tool that the link is working correctly.
Ping a 640H from a Mac
1. Double click on the hard drive icon on your desktop (by default this is
called Macintosh HD).
2. Double click on the "Application" folder.
3. Double click on the "Utilities" folder in the new window.
4. Double click on the "Network Utilities" folder in the new window.
5. Select the "Ping" menu in the new window.
6. Enter the IP address of the 640H in the input box.
7. Select the "Send Only" button and set the limit to 5 pings.
8. Select the "Ping" button.
9. You should see a response similar to the screenshot below:
Note: The time in ms may vary. If you do not see a response like this,
please check your leads and computer setup by going through the
procedures listed above again. If you do see a response similar to the
screenshot, then the network has been setup correctly.
10. Close the window.


