


XA4-240 Installation Guide
2
Apply power to GIG1/POE port only—other AP Gigabit ports will not draw power if connected to a
powered switch port, and AP LEDs will not light.
Access to a Web browser to configure the AP via the Cambium Xirrus XMS management system for APs or
directly via the AP’s interface.
NOTE: Leave protective plastic film on the AP until installation is complete, to avoid leaving marks on the AP.
Mounting
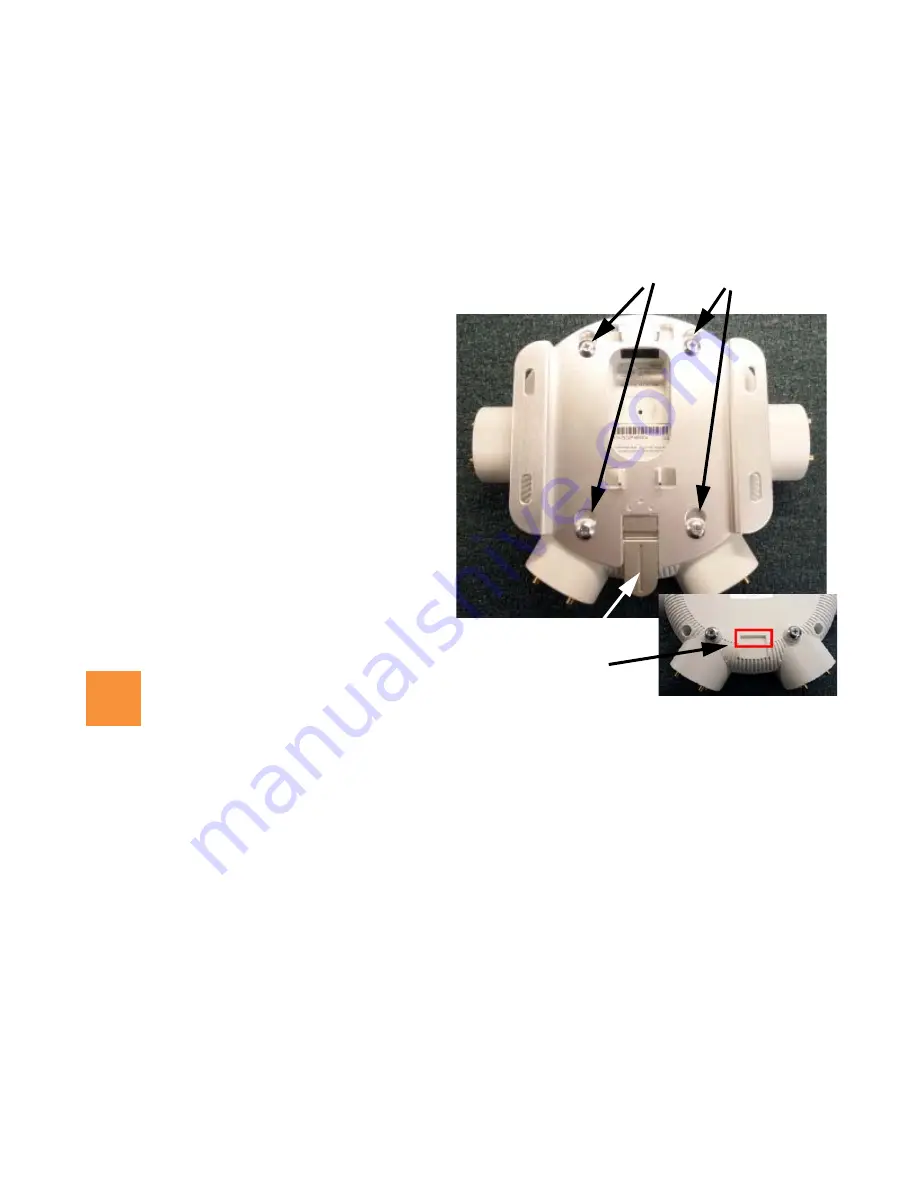
AP attachment
keyhole slots
Lock lever
Locking slot
Direct Ceiling or Wall Mount—use the furnished
mounting plate with four user-supplied screws
that are appropriate for the construction type of
the mounting site.
Pole Mount—may be attached with metal straps
as described in
.
The AP attaches to the mounting plate with four
supplied keyhole studs, as instructed on
. The
photo at right shows the correct seating of the AP on
the mounting plate.
The mounting plate should be
installed with the lock lever pointing down,
unless
you are mounting on a horizontal surface. The AP
slides onto the mount so that the lock lever latches
into the locking slot on the back of the AP, between the
two middle antenna connector arms. The lock lever
will be on the opposite side of the Ethernet ports.
Choose a Suitable Location
Choose an indoor location that is central to your users, and that is away from heat sources.
The location must be capable of supporting the weight of the AP and the mounting plate (about 5 lb total).
For optimal placement, we recommend that a predictive survey be performed by a qualified Cambium Xirrus
partner.
Maintain a distance of at least 50 feet between additional APs.
Keep the unit away from electrical devices or appliances that generate RF noise-at least 3 to 6 ft (1m - 2m).
The XA4 can operate from a Wireless Distribution System (WDS) link. However, the unit must be configured
via the Ethernet connection prior to mounting and power must be supplied via the GIG1 Ethernet connector.
2