


LOAD
LINE
110/220VAC
POWER
SOURCE
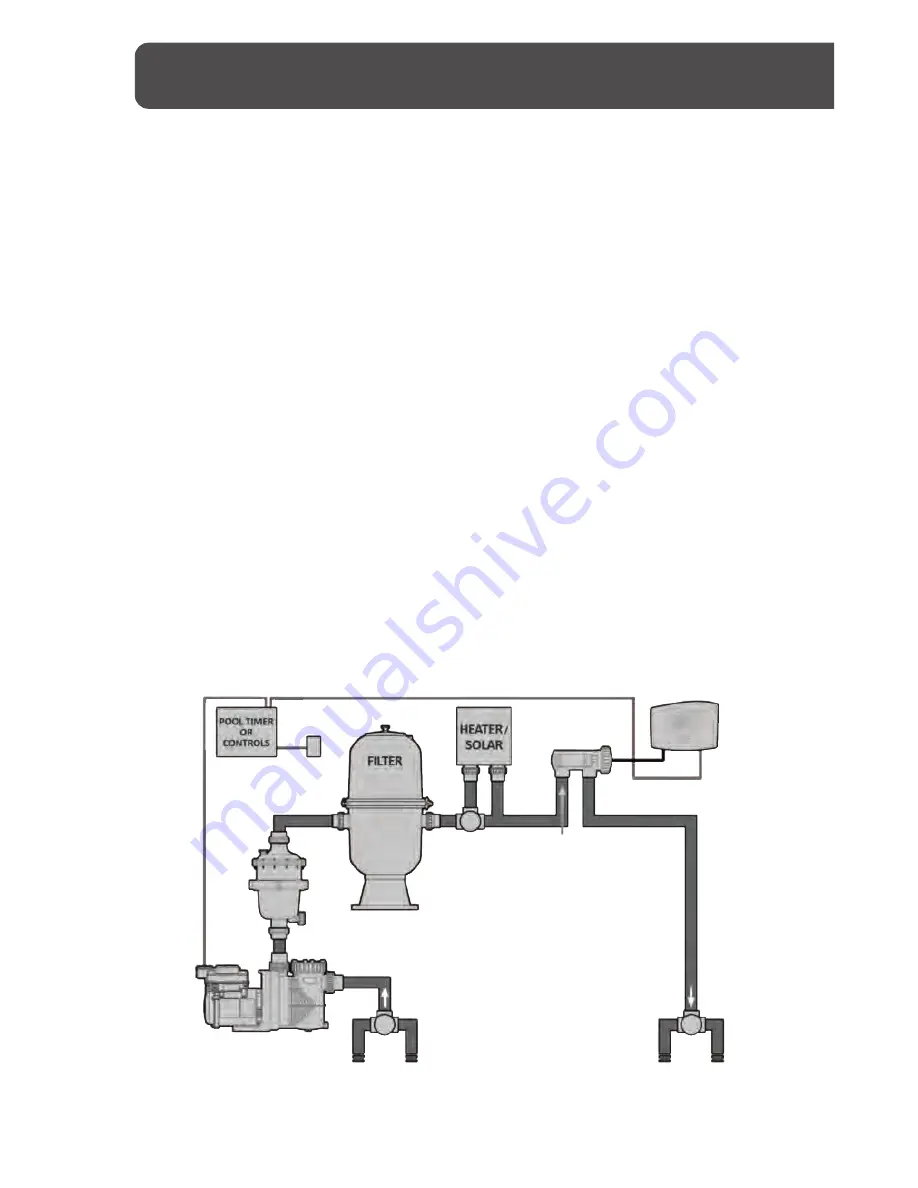
6” VERTICAL
CONTROL
CENTER
POOL
RETURN
SPA
RETURN
FROM
POOL
FROM
SPA
The
Platinum System cell MUST
be installed horizontally, with the ports down, as the last
piece of pool equipment in line, on the return to the pool, after the heater. (See illustration
on next page) the design of the cell forms a natural gas trap. Even though the Platinum
system has an internal flow sensor, this installation provides a secondary safety feature to
prevent gas build-up within the system.
Note
: The inlet is labeled on the cell housing with
an arrow pointing up. The cell housing should be located 6 inches above the height of
plumbing: in the event there is no heater, the cell should be located above the height of
the filter inlet and outlets. Any standard PVC cement may be used. Always use PVC cleaner
to prep all glue joints. Allow adequate drying time before turning on the pump. All of the
fittings are 2 inch PVC, and if necessary can be reduced to 1½ inch PVC. The cell has a 10
foot power cord, and cannot be modified; use precaution to place the cell housing within
reach of the Platinum Control Center.
The
Platinum Control Center is shipped wired for 220V
. The control center can be
converted to 120V in the field by a pool professional or certified electrician; a wiring
diagram for making the conversion in included with each Platinum system. Questions on
this process should be directed to CaliMar tech support at (888) 635-0330.
T
he Platinum system is designed to power on ONLY when the primary pump is
operating and should be wired to the load side of the time clock.
It must be grounded
with an 8AWG bonding wire from the lug (see illustration on page 15 ) on the bottom of
the Control Center to a grounding rod (this is necessary to protect the integrity of the
electronic systems).
Note: Platinum systems are not recommended to be installed on
pools using a stainless steel liner or stainless steel plumbing.
Installation Preperation
12


