1.
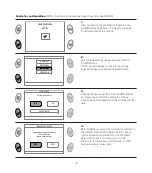
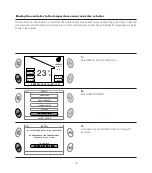
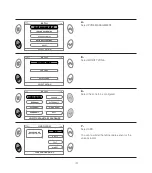
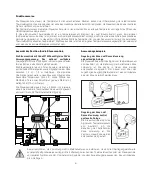
Select VALVE ACTuATOR from the ADD menu.
1a.
Press any button to start the binding procedure.
LIVING ROOM
DEVICE YOU WANT TO ADD
THU
24/04/14
14:48
WINDOW SENSOR
TEMPERATURE SENSOR
ACTUATOR
24/04/14
THU
TEMPERA
14:48
LIVING ROOM
WINDOW SENSOR
TOR
ACTUA
ATOR
TURE SENSOR
EMPERA
ATURE SENSOR
DEVICE YOU WANT TO ADD
DEVICE YOU W
2.
Hold down any button on the actuator for 2 seconds
within 2 minutes. You can use any one of the four
buttons on the top part of the
actuator.
The on-board red LED blinks
from 2 to 4 times to indicate
the correct binding
LIVING ROOM
THU
24/04/14
14:48
TOUCH A BUTTON OF THE ACTUATOR
FOR 2 SECONDS WITHIN 2 MINUTES
3.
Select the type of radiator on which the actuator was
installed in order to improve temperature regulation.
RADIATOR
SELECT OPTION
THU
24/04/14
14:48
ALUMINIUM
CAST IRON / STEEL
24/04/14
THU
CAST IRON / STEEL
14:48
TOR
RADIA
ATOR
CAST IRON / STEEL
ALUMINIUM
SELECT OPTION
Binding the controller to the valve actuator
15
Note:
The actuator must be installed on the radiator before binding it to the controller.
Note:
In order to easily identify the actuators and their position, it is advisable to use the space provided in
the section ACTuATOR INSTALLATION DIAGRAM at the end of this manual. This will make some operations
easier, such as identifying actuators with flat batteries (an identification number is assigned to each actuator,
e.g. VALVE 1).


