8
49-2001056 Rev. 0
Surface Units (Cont.)
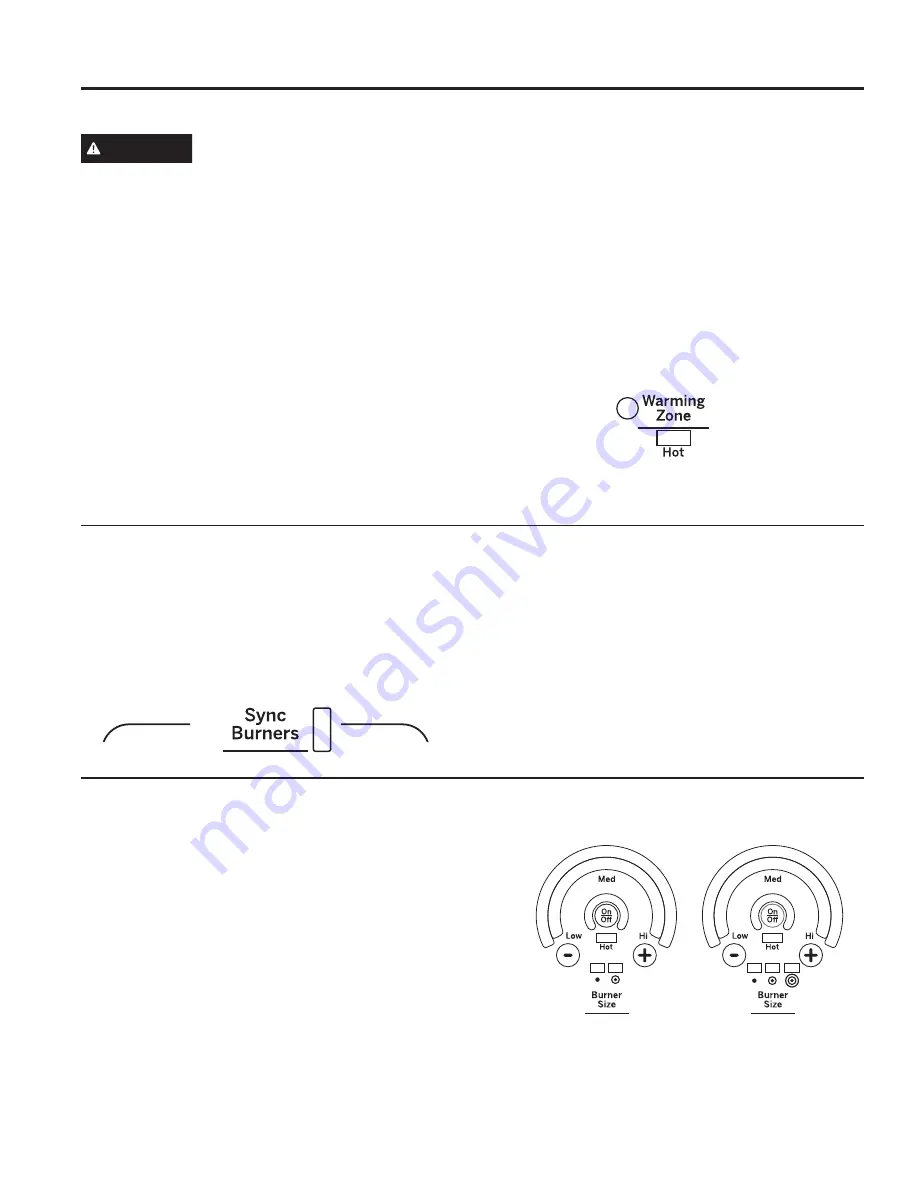
Using the Warming Zone
WARNING
FOOD POISON HAZARD:
Bacteria may grow in food at
temperatures below 140°F.
■
Always start with hot food. Do not use warm setting to
heat cold food.
■
Do not use warm setting for more than 2 hours.
The
WARMING ZONE
, located in the back center of
the glass surface, will keep hot, cooked food at serving
temperature. Always start with hot food. Do not use to
heat cold food. Placing uncooked or cold food on the
WARMING ZONE
could result in foodborne illness.
To use the WARMING ZONE:
Press the
WARMING ZONE
pad, select the desired level
(1, 2 or 3) using the number pads, and press start.
To turn off the WARMING ZONE:
Press the
WARMING ZONE
pad.
NOTE:
Cancel/Off will NOT turn off the warming zone.
For best results, all foods on the
WARMING ZONE
should be covered with a lid or aluminum foil. When
warming pastries or breads, the cover should be vented
to allow moisture to escape.
The initial temperature, type and amount of food, type of
pan, and the time held will affect the quality of the food.
Always use pot holders or oven mitts when removing
food from the
WARMING ZONE
, since cookware and
plates will be hot.
NOTE:
The surface warmer will not glow red.
How To Synchronize Left Elements
Multi-Ring Burner (Can be Dual or Triple)
To Turn On
Hold the
Sync Burners
pad for about half a second to
connect the two elements. Operate either element as
described in Operating the Cooktop Elements to adjust
power level.
To Turn Off
1. Touch the
On/Off
pad on either element to turn off
the Sync Burners.
or
2. Touch the
Sync Burners
to turn both elements off.
To Turn On/Off
1. Touch the
On/Off
pad for the surface unit.
2. Use the arc or
+
or
–
pad to choose the desired power
setting.
3. Touch the
Burner Size
pad as needed to select the desired
burner size.
The light next to the
Burner Size
pad indicates which
size the surface unit is on. To turn the surface unit off,
touch the
On/Off
pad.
USING THE RANGE:
Surface Units
Summary of Contents for CES700M
Page 32: ...32 49 2001056 Rev 0 Notes ...
Page 33: ...49 2001056 Rev 0 33 Notes ...


