Table of contents
NOTE
Battery, Scorecard holder and Wheels may vary from each market.
SAVE THIS MANUAL FOR FUTURE REFERENCE.
- 1 -
REMOTE CONTROL IMPORTANT
Read this manual before you start to use this trolley.
Do not operate around cars or buildings with remote control.
Do not operate in indoor with remote control.
Do not direct trolley towards to other peoples or carts with remote
control.
Always keep watch while operating remote control.
Use manual mode in car parks, down steep hills, confined space or
where there are lots of peoples.
It is recommend to use remote control within 50 meters, this trolley is
designed to operate within range of 50 meters, depending on
atmospheric and interference conditions, also hills and tree can be
effect the operating range.
Do not operate remote control while trolley is unattended.
The remote distance may be reduced by possible effected of
Interference on your remote golf trolley. Interference can be included
electromagnetic, high voltage power lines, cellular phones or CB
radios, or certain obstructions such as mounds, clusters of trees, will
possible reduce the distance of transmission.
Take extra care when operating up and down slopes with remote
control.
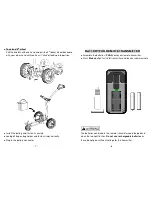
The batteries contained in the remote transmitter need be replaced
when the led light flashes. Do not use rechargeable batteries as
these do not give sufficient voltage for this transmitter.
- 2 -
Contents Pages
Remote Control Important - - - - - - - - - - - - - - - - - - - - - - - - - - -2
Electromagnetic Interference - - - - - - - - - - - - - - - - - - - - - - - - -3
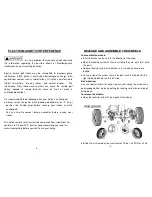
Release and Assemble the Wheels - - - - - - - - - - - - - - - - - - - - 4
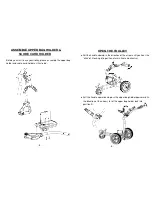
Assemble Upper Bag Holder & Score Card Holder - - - - - - - - - - - -5
Open the Trolley - - - - - - - - - - - - - - - - - - - - - - - - - - - - - - - - 6
Battery for Remote Transmitter - - - - - - - - - - - - - - - - - - - - - - - 8
Led Lights on Handle Grip - - - - - - - - - - - - - - - - - - - - - - - - - - 9
Led & Button on Transmitter- - - - - - - - - - - - - - - - - - - - - - - - - 10
Transmitter Information - - - - - - - - - - - - - - - - - - - - - - - - - - - - 11
Precaution - - - - - - - - - - - - - - - - - - - - - - - - - - - - - - - - - - - - - 12
Frequency Channel Change - - - - - - - - - - - - - - - - - - - - - - - - -13
Frequency Scan - - - - - - - - - - - - - - - - - - - - - - - - - - - - - - - - - 13
Trim Alignment for Moving Straight - - - - - - - - - - - - - - - - - - - - 14
Pairing for New Remote Transmitter - - - - - - - - - - - - - - - - - - - 14
Auto. Switch Off / Electronic System - - - - - - - - - - - - - - - -- - - 15
Button (Key) Lock - - - - - - - - - - - - - - - - - - - - - - - - - - - - - - - - 16
Guide to use Remote Transmitter - - - - - - - - - - - - - - - - - - - - - 16
Folding the Trolley - - - - - - - - - - - - - - - - - - - - - - - - - - - - - - -17
Battery and Charging- - - - - - - - - - - - - - - - - - - - - - - - - - - - - - 20
Battery Charger - - - - - - - - - - - - - - - - - - - - - - - - - - - - - - - - - 21
Battery Care & Maintenance - - - - - - - - - - - - - - - - - - - - - - - 22
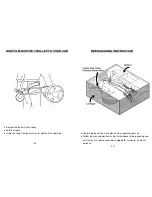
How to Move the Trolley to Your Car - - - - - - - - - - - - - - - - -- - 23
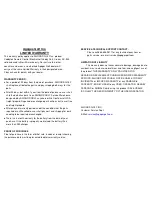
Repackaging Instruction - - - - - - - - - - - - - - - - - - - - - - - - - - - 24


