Basic Alarm Configuration
3-6
Viewing Alarm Status
The remainder of the window fields provide the means for configuring alarms for
each available interface. Note that the information provided in this screen is static
once it is displayed; for updated information, click on
. Adding or
modifying an alarm automatically updates the list.
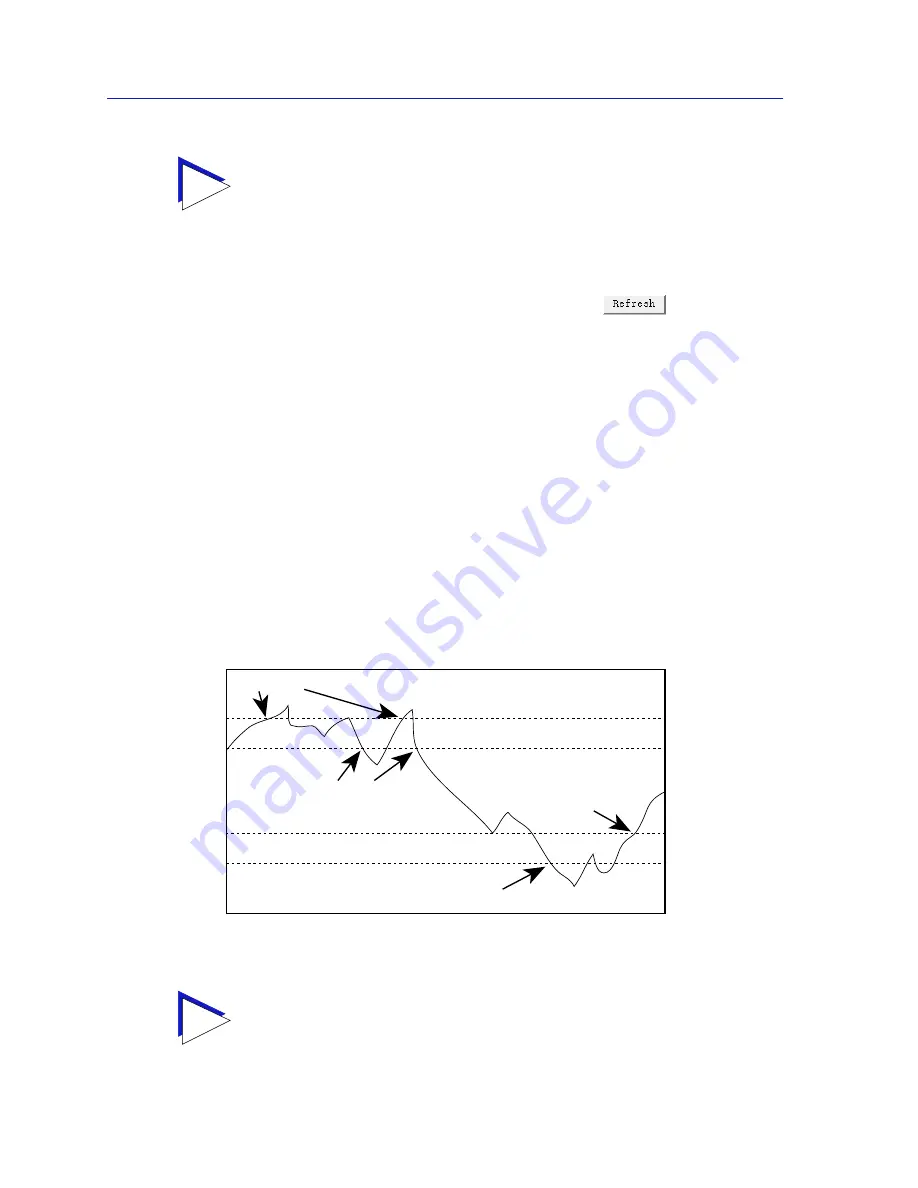
How Rising and Falling Thresholds Work
Rising and falling thresholds are intended to be used in pairs, and can be used to
provide notification of spikes or drops in a monitored value — either of which can
indicate a network problem. To make the best use of this powerful feature, pairs
of thresholds should not be set too far apart, or the alarm notification process may
be defeated: a built-in hysteresis function designed to limit the generation of
events specifies that, once a configured threshold is met or crossed in one
direction, no additional events will be generated until the opposite threshold is
met or crossed. Therefore, if your threshold pair spans a wide range of values,
and network performance is unstable around either threshold, you will only
receive one event in response to what may be several dramatic changes in value.
To monitor both ends of a wide range of values, set up two pairs of thresholds:
one set at the top end of the range, and one at the bottom.
Figure 3-2
illustrates
such a configuration.
Figure 3-2. Sample Rising and Falling Threshold Pairs
TIP
Before you decided whether or not to assign an action to a rising or falling alarm, it is
important to understand something about the hysteresis function built in to the RMON
alarm functionality. See How Rising and Falling Thresholds Work, below, for more
information.
TIP
The current version of the Basic Alarm application only allows you to configure a single
pair of thresholds for each alarm variable on each interface; be sure to keep this hysteresis
function in mind when configuring those threshold values.
Event
Event
Event
Event
Rising Threshold
Falling Threshold
Rising Threshold
Falling Threshold
Summary of Contents for 7C03 MMAC SmartSWITCH
Page 2: ......
Page 8: ...Contents vi...
Page 56: ...Using the 7C0x SmartSwitch Hub View 2 40 Managing the Hub...
Page 68: ...Basic Alarm Configuration 3 12 Viewing an Alarm Log...
Page 96: ...FDDI Management 4 28 Viewing the Station List...
Page 102: ...ATM Configuration 5 6 Configuring Connections...
Page 140: ...Using the 7C0x SmartSwitch Bridge View 6 38 Enabling and Disabling Ports...
Page 150: ...Index Index 6...


