


12
Multimedia Module
An optional multimedia A/V module (MAV108) is used to select
microphone, speaker and monitor signals from one out of eight or 16
computers. The A/V module is connected to the
LINK
port on the
rear panel via an mini-DIN-8 connector. When a computer is
selected, the microphone signal is directed to that computer, speaker
and monitor signal source from the same computer.
As an OSD option, the A/V module may select a computer different
from that of the KVM system. There are two options in
Audio Stick
function (<F4>:More\Audio Stick). When set to '
On
', A/V module
selection follows computer selection. When set to '
Off
', A/V module
selection stops following computer selection. It is useful if you want
to listen to one particular computer's audio signal while selecting
other computers during operation.
With extra VGA ports, the A/V module enables you to view multiple
monitors from one PC at the same time. Now you can extend your
Windows desktop for all your computers and switch accordingly.
13
------------------------
------------------------
------------------------
------------------------
Operation
Operation
Operation
Operation
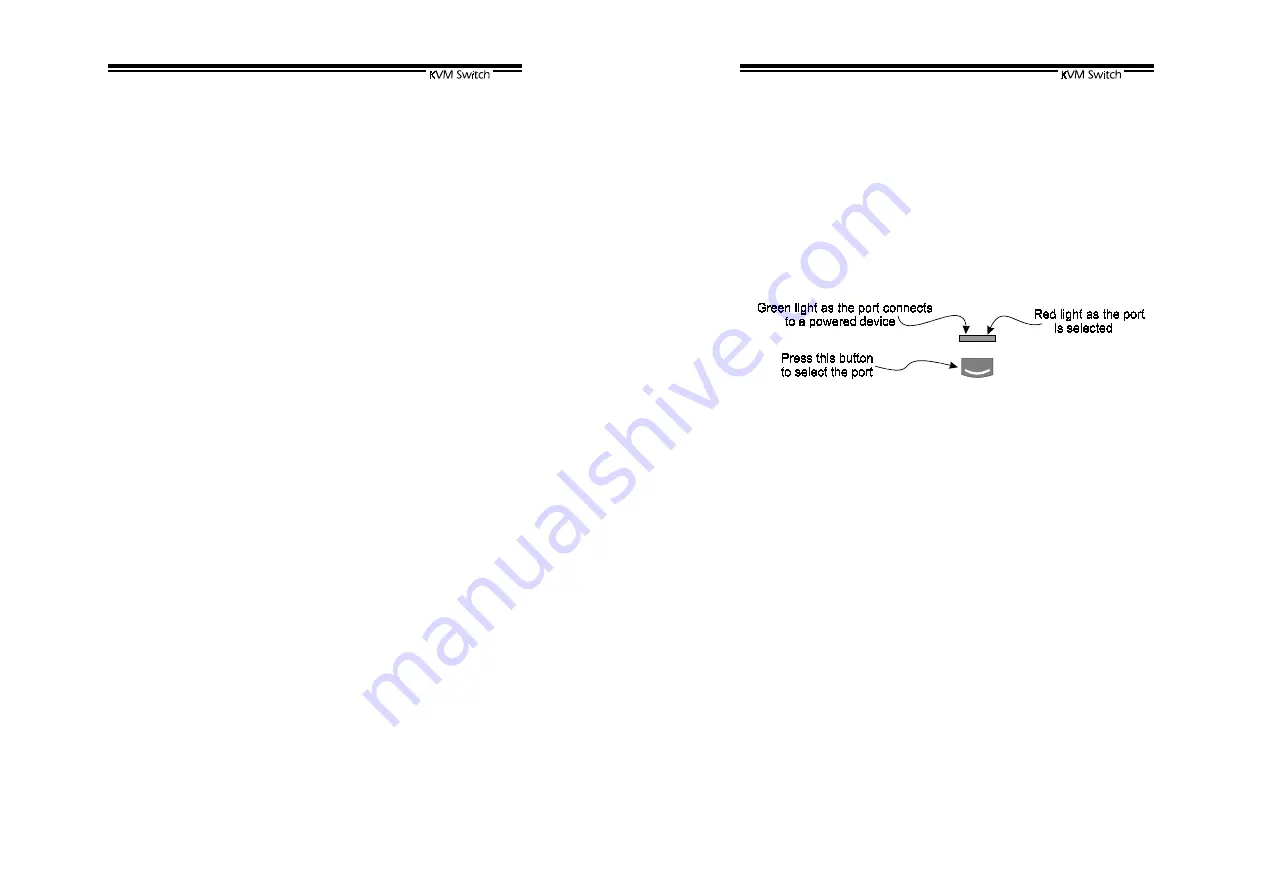
Front Panel Push Buttons
You may select a computer by pressing the front panel push button
directly, by issuing hot-key commands or by activating the OSD
window (for models with OSD support). The front panel indicator
changes to reflect the computer port selected (red) and whether the
port is connected to a powered computer (green). The indicator
flashes red when it is in either
Auto Scan
or
Manual Scan
mode.
Figure 8: Front panel indictor
Some computers support 'keyboard/mouse power up' function, i.e.,
press certain keys or mouse buttons to startup the computers. Their
corresponding green front indicators lit all the time even if the
computers are 'off'.
K/M RESET
K/M RESET
solves most problems developed by keyboard, mouse,
device replacement or change of configuration. Press down both
the front-panel number
1
and
2
push buttons for 2 seconds to
re-configure the whole system without turning either the KVM Switch
or any computer off.
AUTO SCAN
The KVM Switch provides an easy to use feature to start
Auto
Scan
ning. You can press down both the front-panel number
7
and
8
buttons for 2 seconds to start Auto Scanning.


