


22
cab Produkttechnik GmbH & Co KG
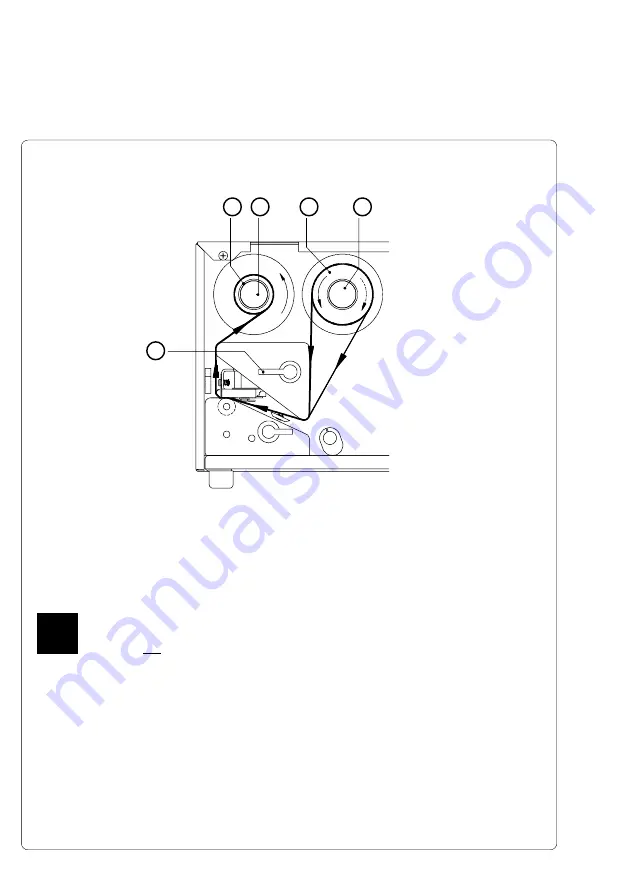
1. Raise the printhead b rotating the printhead lever (
1
) clockwise until it
stops.
2. Slide the roll of transfer ribbon (
4
) onto the ribbon supply hub (
5
) as far as
possible.
Note which side of the transfer ribbon is coated with ink ! the inked side is
generally the shinier side. When the ribbon is inserted, the inked side
must not be placed in contact with printhead ! In Figure 6c, the solid line
presents ribbon with ink on the inner side, and the broken line presents a
ribbon with ink on the outer side.
3. Slide a cardboard core (
2
) onto the ribbon take up hub (
3
).
4. From the side, slide the transfer ribbon along the path as shown in Figure
6c, than attach it to the cardboard core use adhesive tape or a label.
5. Rotate the printhead locking lever (
1
) counter-clockwise until the printhead
is lowered and is placing light pressure on the ribbon. Remove the slack in
the ribbon by turning the ribbon take up hub (
3
) counter-clockwise.
6. Continue to rotate the printhead locking lever (1) counter-clockwise until it
stops, to lock the printhead in the closed position.
Figure 6 c Ribbon Feed Path
1
Ribbon Loading
2
3
4
5
F


