11
4
Loading Material
i
Note!
For adjustments and simple installation work, use the accompanying Allen key located in the top section of
the print unit. No other tools are required for the work described here.
4.1
Loading Labels
5
6
2
1
7
8
11
12
9
13
14
10
4
3
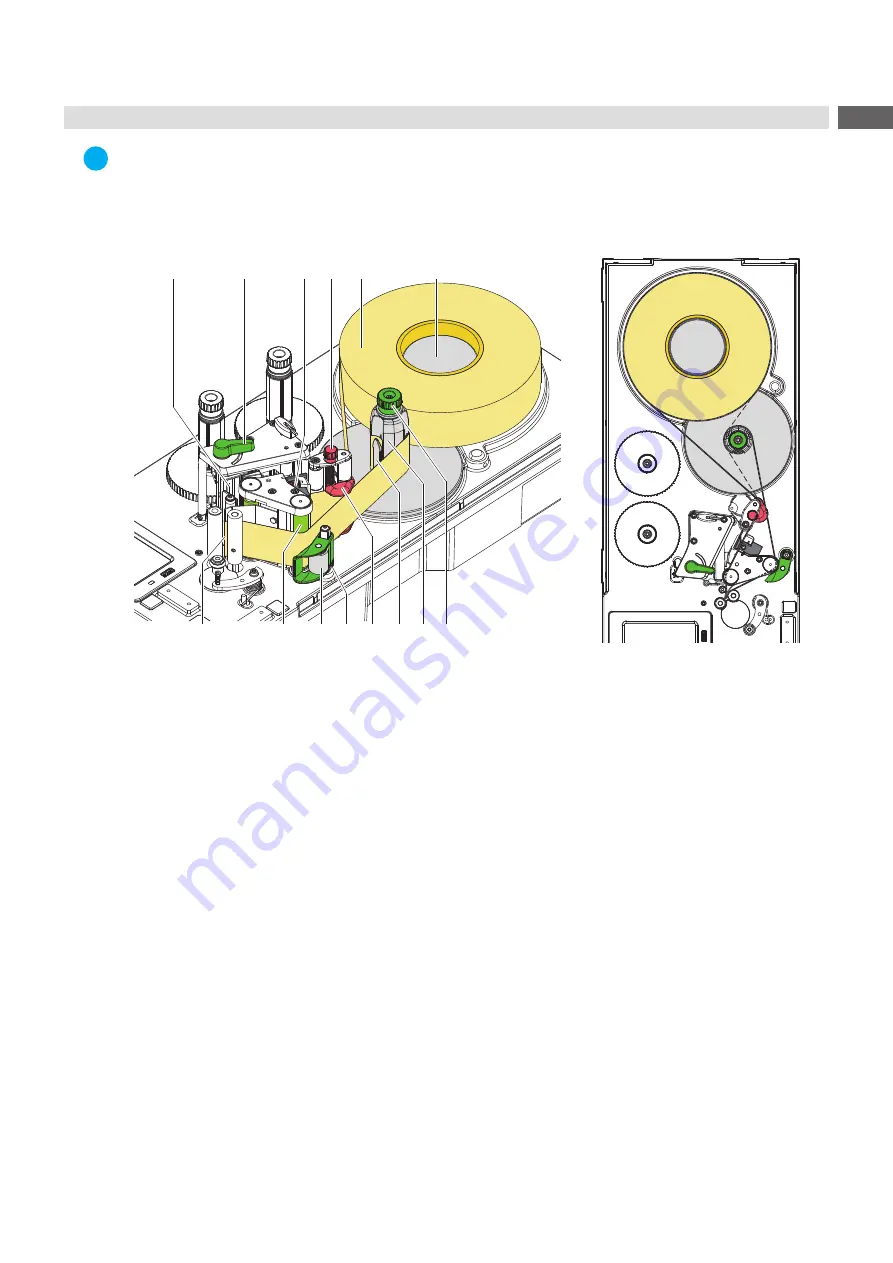
Figure 8
Loading media
Figure 9
Label feed path
1. Put the label roll (5) onto the roll retainer (6).
2. Unroll a label strip of approx. 60 cm.
3. Turn lever (2) counterclockwise to lift the printhead (1).
4. Unlock the pinch roller (12) from the rewind assist roller (13).
5. Remove the labels from the 30 cm of the label strip.
6. Guide the label strip as shown in Figure 9 trough the label sensor (3), around the dispense plate (14) and the
rewind assist roller (13) to the rewinder (8).
7. Adjust the guide (10) with the knob (4) in such a way that the label strip will be guided without clamping.
8.
Hold rewinder (8) firmly and turn knob (7) clockwise until it stops.
9. Push label strip under a bracket (9) of the rewinder (8) and align the outer edge of the label strip to the label roll.
10. Turn knob (7) counterclockwise until it stops.
The rewinder is fully spread, thus gripping the label strip firmly.
11. Turn rewinder (8) counterclockwise to tighten the label strip.
12. Align the locking system (12) to the middle of the liner.
13. Position the adjusting ring (11) directly below the locking system (12) and tighten it with the set screw.
14. Swing the pinch roller (12) to the rewind assist roller (13).
15. Turn lever (2) clockwise to lock the printhead.
4.2
Removing the Wound Roll
Cut the label strip.
Hold rewinder (8) firmly and turn knob (7) clockwise.
The rewinder spindle relaxes and the wound roll is released.
Remove wound roll from rewinder (8).


