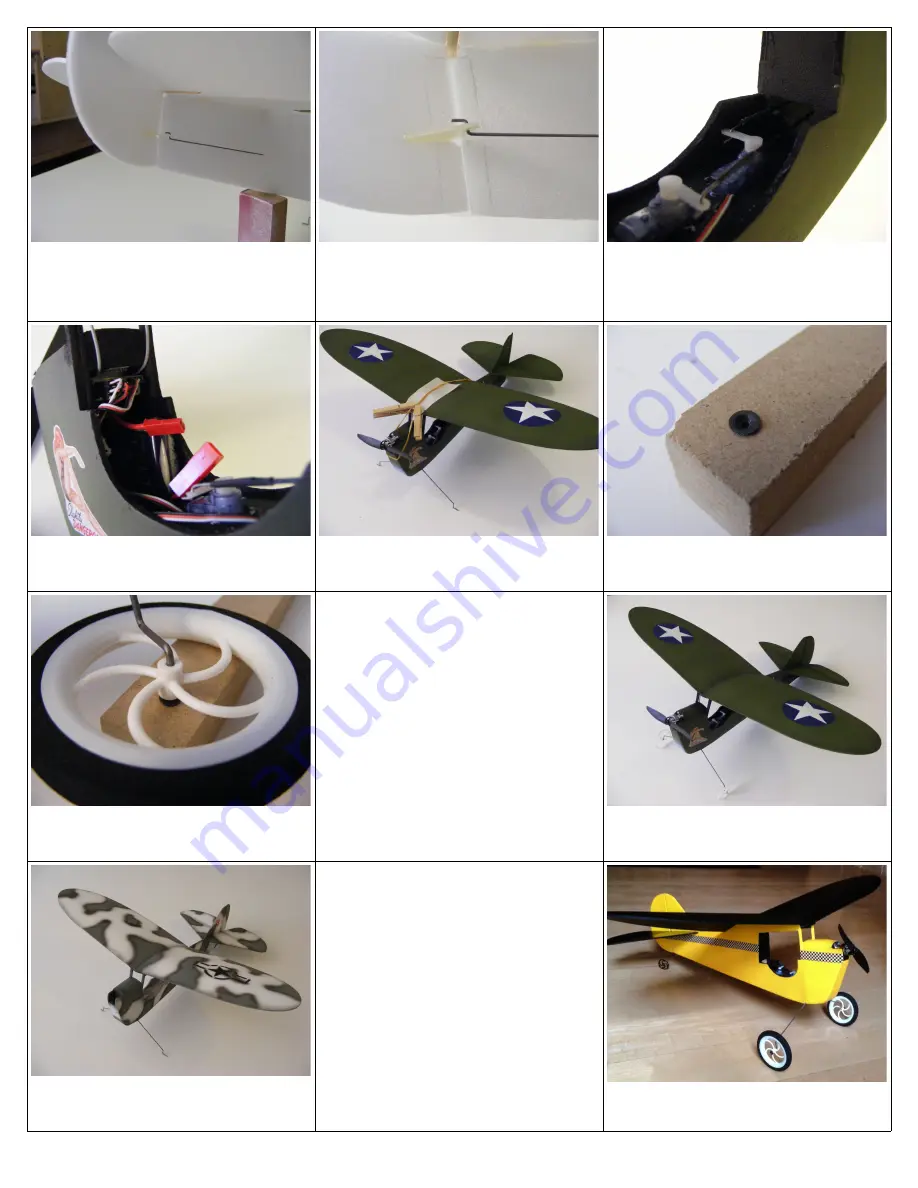
Insert pushrod wire into middle hole of
rudder control horn, slide pushrod back
into place and glue vertical stabilizer to
fuselage.
Finish tail installation by applying hinge
tape to both sides of the rudder bottom.
Connect servos to receiver, center trims
on transm and center control surfaces,
install pushrod ends with heat shrink
tubing and a drop of CA.
Battery attaches to RH side of fuselage
with velcro.
Glue wing into place, make sure it is
straight! Use epoxy.
To install
wheels, drill 1/8” hole in block of
wood, place push nut over hole as shown.
Place wheel on axle, and push down through
push nut, may need to wiggle push nut for fit.
Adjust control throws to around 20 degrees
for both elevator and rudder for new pilots
and up to 45 degrees for experienced pilots. If
your transmitter has exponential, use it, I
would recommend at least 50%. A good
starting point for the center of gravity is
around 2.5” behind the leading edge of the
wing. It is vital that the center of gravity is
checked before any flying is attempted. When
flying the aeronkish, be aware that you can
overload the wings. Sustained vertical dives
can cause wing flutter, and high G maneuvers
at high speed can break the wings. If you are
interested in such maneuvers, you will want to
reinforce the wing.
Any 2s 7.4v 300 to 500mah 25c lipo is
recommended, you can use larger capacity
batteries but weight will suffer. You can also
use a 3s battery, but be aware that this setup
exceeds the manufacturers recommended
amperage for the motor, so do not use full
throttle for extended periods of time. The
included propeller is a GWS style 5X3
standard rotation, 6X3 props will also work.
The aeronkish loves to be flown low and
slow! I have the most fun with mine below 5
feet! HAVE FUN
Ryan Underwood


