


IMPORTANT: When drilling into
walls always check that there
are no hidden wires or pipes etc.
Make sure that the screws and
wall plugs supplied are suitable
for supporting the unit. Consult
a qualified tradesperson if you
are not sure.
NOTE: It would be useful to ask
someone to help you at this
stage.
4. For the Wall Bracket - Refer to
the user instructions supplied
with the wall bracket (not
included).
See fig. 8.
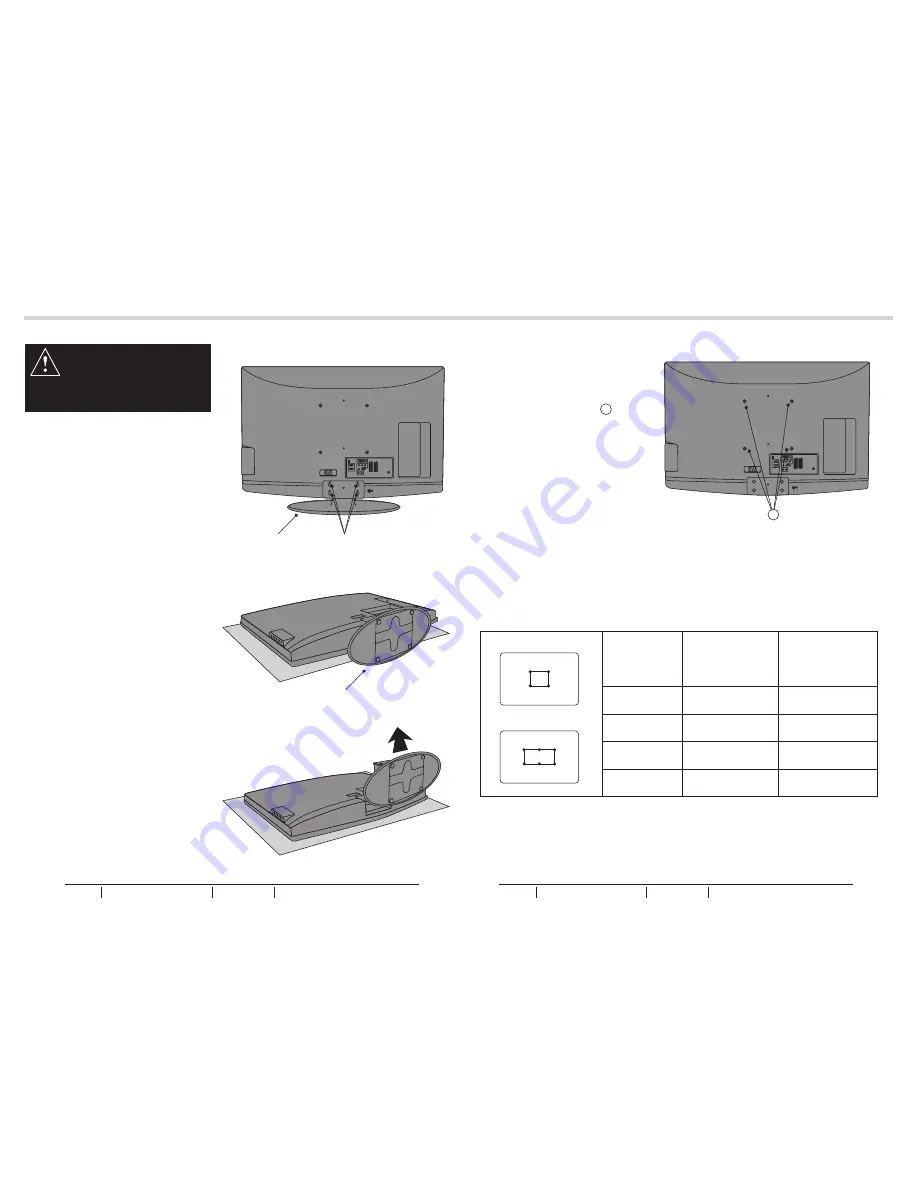
3. Use 4 Wall Mount Holes B and
Screws (not included) to mount the
TV on the Bracket (not included).
See fig. 7.
8
9
WALL MOUNTING
WALL MOUNTING
NOTES:
-
Please read the important safety
instructions before use.
1. Put the unit face down on a safe,
flat surface that is covered by a
smooth cloth.
See fig. 4 and 5.
fig. 5
fig. 6
Stand
Stand
fig. 4
Screws
fig. 7
fig. 8
WALL MOUNTING (Optional)
2. Unscrew the screws of the stand.
Then remove the Stand.
See fig. 4 - 6.
B
TV Screen
Size (inches)
VESA-Compatible
Wall bracket
(W x H mm)
Screw Type
32"-42"
47"
W
H
W
H
32"
37"
42"
47"
200 x 200 mm
200 x 200 mm
400 x 200 mm
400 x 200 mm
Metric 6 x 10 mm
Metric 6 x 10 mm
Metric 6 x 10 mm
Metric 6 x 10 mm
BUSH
HD Ready Digital LCDTV
User Manual
Customer Helpline 0845 604 0105
BUSH
HD Ready Digital LCDTV
User Manual
Customer Helpline 0845 604 0105


