background image

Version 1.0 

 
CONNECTING TO YOUR DEVICE DIRECTLY & 
ADDING IT TO WIFI 

In order to view your device remotely, you 
must complete the following two-part 
sequence of steps. 

1.


Hardwire the device into your electrical 
system or use the test plug to power 
your device. 


o


NOTE: You may have to reset the 
device and redo this process if 
you choose to use the test plug. 
Please see the 

Before You Start


section on page 4. 

2.


Turn on your phone’s Wi-Fi. 

o


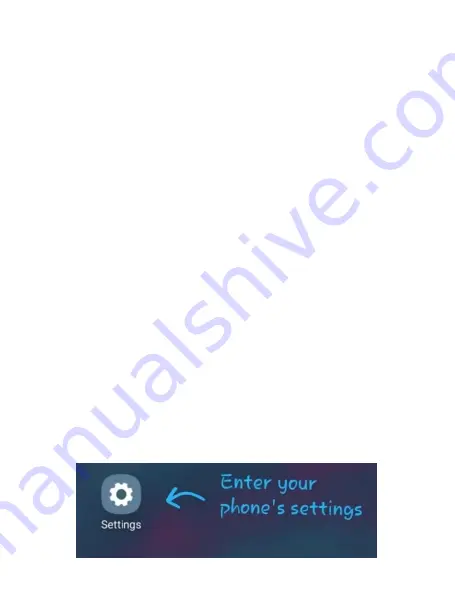
Go to your phone’s settings (see 
pictures below, follow them 
from the top – down)  


All manuals and user guides at all-guides.com

Summary of Contents for BBNESmoke

Page 1: ...1 Version 1 0 Bush Baby Night Eye Smoke Detector with Wi Fi Hidden Camera SKU BBNESmoke All manuals and user guides at all guides com ...

Page 2: ... THE BBNESMOKE Please read this manual before operating the BBNESmoke and keep it handy Your purchase should include 1 x BBNESmoke 1 x Manual this 1 x 128GB MicroSD Card 1 x MicroSD Card Reader All manuals and user guides at all guides com ...

Page 3: ...3 Version 1 0 GET FAMILIAR WITH YOUR BBNESMOKE All manuals and user guides at all guides com ...

Page 4: ...y google com store a pps details id com rtp2p tinyca m o iPhone https apps apple com us app tinycam id1444285114 2 If you ever need to move your device from one network connection to a different one you will need to reset the device before moving to the new network Otherwise the device will not connect to the new network All manuals and user guides at all guides com ...

Page 5: ...he US you will need to purchase a converter in order to use the AC wall plug in and avoid damaging the product Because different countries use different voltages in their electrical wiring you will need a converter that adapts to the current in your particular country IMPORTANT WARRANY INFORMATION If the warranty sticker on your device has been removed or tampered with your lifetime warranty will ...

Page 6: ...e device into your electrical system or use the test plug to power your device o NOTE You may have to reset the device and redo this process if you choose to use the test plug Please see the Before You Start section on page 4 2 Turn on your phone s Wi Fi o Go to your phone s settings see pictures below follow them from the top down All manuals and user guides at all guides com ...

Page 7: ...7 Version 1 0 3 After connecting to the device s Wi Fi signal it should display as Connected All manuals and user guides at all guides com ...

Page 8: ...duce a warning that the network has no internet access If you see this choose to connect to the network anyway o For iOS devices you must wait until the Wi Fi signal appears next to your Phone Carrier Name at the top of your phone screen All manuals and user guides at all guides com ...

Page 9: ... go ahead and open the TinyCam App on your phone 5 When you open the app it will automatically detect that you are connected to the unit s Wi Fi signal and ask if you would like to add the device to the TinyCam App Press OK All manuals and user guides at all guides com ...

Page 10: ...till need to add the camera to a Wi Fi network where it is staying in order to livestream it 7 You should now see your device listed on the home screen Let s continue and add the camera to a nearby Wi Fi network Tap the wrench icon on the bottom right of the device listing All manuals and user guides at all guides com ...

Page 11: ...he wrench a new menu will appear with a bunch of different Config or Setting selections For now we want to focus on Wi Fi Config Go ahead and select Wi Fi Config and a new menu should open All manuals and user guides at all guides com ...

Page 12: ...page where you can choose a network for the unit to connect to and then type in the password for that wi fi network Press Confirm when done to pair the unit with the router You should see something that says Set Success All manuals and user guides at all guides com ...

Page 13: ...amera added successfully to your router turn off your phones Wi Fi and then open the TinyCam app Using your cellular data you should be able to stream the device if you have cellular data enabled o If your device is still broadcasting its Wi Fi signal the unit has failed to pair with your Wi Fi Please attempt repeating the listed steps starting with connecting to the unit s Wi Fi from step 1 All m...

Page 14: ...e first time you access the livestream the unit will request that you change the password DO NOT FORGET THIS PASSWORD o The default password is 888888 HOW TO ADJUST THE VIDEO QUALITY OF THE STREAM 1 Open the TinyCam App 2 Open the livestream for your unit All manuals and user guides at all guides com ...

Page 15: ...en you should see three different options a 1080P Stream in 1920x1080P b 720P Stream in 1280x720 c 640P Stream in 1152x640 HOW TO SET UP MOTION DETECTION RECORDING 1 Open the TinyCam app 2 Tap the wrench icon on your device listing All manuals and user guides at all guides com ...

Page 16: ...arm Config 4 Turn Motion detection to any option besides Close 5 Hit the back button on your phone so you can see all the other Config Setting options again 6 Choose Micro SD Card Setting All manuals and user guides at all guides com ...

Page 17: ...ion recording a By turning the Alarms motion detection levels on the unit sends an Alarm once motion is detected This alarm triggers the unit to begin recording 9 For further information regarding the settings inside the Micro SD Card Setting please refer to the next section All manuals and user guides at all guides com ...

Page 18: ...18 Version 1 0 Micro SD Card Setting A Further Look All manuals and user guides at all guides com ...

Page 19: ...ace left b The number on the right is what size MicroSD card you have inside the unit b Uninstall SD Card This allows you to safely eject the MicroSD card for the unit Press this prior to removing the MicroSD card c Format SD Card This will format the MicroSD card and erase all data on it Only use this option if told to do so by Technical Support d Stop Recording If this box is checked the unit wi...

Page 20: ... unit will record video 24 7 and the videos will be in 3 minute segments g Alarm Recording If enabled this unit will record based off the Alarm Config settings aka in motion detection mode a You must also go into the Alarm Config and set the motion detection sensitivity for this option to work h Alarm Recording Length This is how long of a video clip the unit will record once motion is detected Al...

Page 21: ... Enable this to have your unit take elongated video recordings over 45 minutes j Time Lapse Video Recording This is how long of an elongated video your unit will record OTHER CONFIG OPTIONS All manuals and user guides at all guides com ...

Page 22: ...so known as PAL c Initialization You can choose to either remotely reboot the device or factory reset it a Device Reboot Device will reboot and come back online within 5 minutes b Device Reset The device will reset to factory settings and begin broadcasting its Wi Fi again d FTP Set These settings will allow the unit to upload its recordings to an FTP All manuals and user guides at all guides com ...

Page 23: ...tion Information regarding the SMTP settings etc can be found through your email provider Technical Support is not able to tell you what your SMTP settings are you will need to contact your email provider or domain host TRANSFERRING FILES TO YOUR PC 1 Safely remove the Micro SD card from the device 2 Insert the card into the included MicroSD Card Reader 3 Insert the MicroSD Card Reader into a USB ...

Page 24: ...le storage will appear under Removable Storage inside the Finder application 5 You can now move the files from your SD card to your PC Please see the next section for more information COPYING AND DELETING YOUR FILES The video and image files created on your device are just like any other file on your computer and can be managed in the exact same manner You can either use a file sharing All manuals...

Page 25: ...se then choose Paste This will copy and save the file to your computer To delete a file right click your mouse on the file name then choose Delete from the menu This will permanently delete the files from this location You can move multiple files at once by highlighting the ones you wish to move then following the instructions above If you are using MAC OS X you must empty the trashcan after you d...

Page 26: ...DINGS ON THE MICROSD CARD 1 Open the TinyCam App 2 Press the folder icon on the bottom left of your device listing 3 The new screen that opens shows all current recordings on your device s storage for the current day The top right corner clock icon allows you to All manuals and user guides at all guides com ...

Page 27: ...into the wall outlet Make sure the device has been hardwired correctly We suggest a professional installation CANNOT RECORD TO STORAGE Restart the unit via the app or unplug it and plug it back in THE DEVICE IS NOT BROADCASTING ITS WIFI SIGNAL Please unplug the device wait 30 seconds and then plug it back in All manuals and user guides at all guides com ...

Page 28: ...ort minigadgets com SPECIFICATIONS Stream Resolution 1080P Recording Resolution 720P Video Format H 264 Viewing Angle 110 Internal Storage 128GB Video Consumption 1 Min 50MB Playback Software VLC Loop Recording Yes Operating Systems Android iOS All manuals and user guides at all guides com ...

Page 29: ...29 Version 1 0 All manuals and user guides at all guides com ...

Page 30: ...30 Version 1 0 All manuals and user guides at all guides com ...

Page 31: ...31 Version 1 0 All manuals and user guides at all guides com ...

Page 32: ...TY CONTROL CHECKLIST Instruction Manual BBNESmoke ____GB MicroSD Card MicroSD Card Reader QC Technician ______________________________ Date ___________________________________ All manuals and user guides at all guides com ...

Reviews: