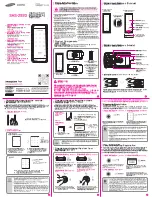
FITTING YOUR KEYGUARD.
To fit your Keyguard XL you will need
the following tools:
• Power Drill
•
12
mm Masonry Drill Bit
• Small Socket Driver
•
16
mm Socket Head
• Marker Pen
NOTE: Your Keyguard XL should be
fitted to a solid surface. We recommend
brickwork, stone, concrete or steelwork
• To start use the rubber cover as your
template to mark the fixing holes on the
wall. Ensure you choose a location that
allows the best possible fixing e.g. the
centre of a brick. N.B. You must never
fix into the mortar.
• Now use the
12
mm drill bit to make
a
hole 55mm deep in each of the
marked
fixing holes
•
Place the anchor bolt sleeve in the
holes
• Place the
Keyguard XL inside the
rubber case
•
Open the door of your Keyguard XL
and place the whole unit onto the wall
lining up the holes
• Push the
anchor
bolts that have been
supplied with your Keyguard XL into
each of the holes
• Tighten each bolt fully using a socket
set
TROUBLESHOOTING.
• Once the fitting is complete if the door
closes but does not lock, test locking it
when the door is in the open positon. If
it works, it is likely that the fixing bolts
are protruding too far into the Keyguard
XL. Try to secure them further into the
wall and close the door again
• If the buttons will not press, ensure
that the dial is in the vertical position
• If your code does not work, press the
‘CLEAR’ button and start again
INSTRUCTION BOOKLET
•
Anchor
fixing bolts•
Burton Safes Ltd.
Brockholes
Holmfirth
HD9 7BN
Tel: 01484 663388
In the event of a product malfunction
please contact Burton Safes Ltd
25/02/2019
V.
5
Page 2 of 2


