23
Instruction manual
© 22.02.2017 Bungard GmbH & Co. KG
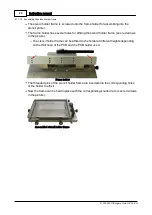
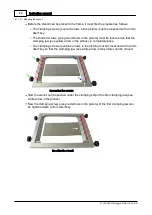
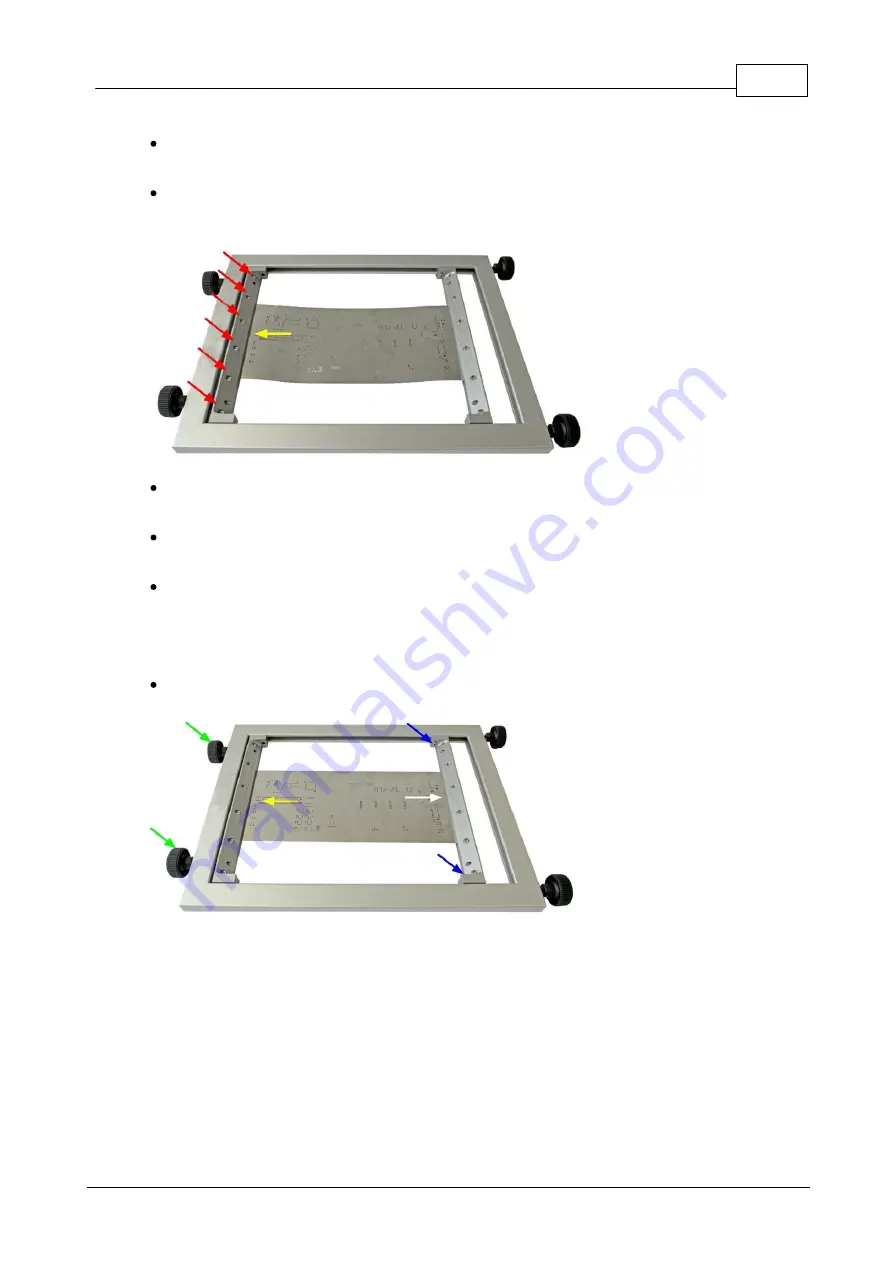
Next, the stencil needs to be pushed under the clamping strip of the second clamping
jaw (see yellow arrow in the picture).
Now the clamping screws (see red arrows in the picture) of the second clamping jaw
can be tightened with a 3mm Allen
®
key.
Clam ping the s tencil
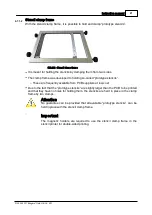
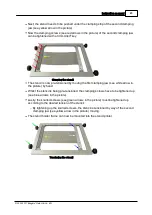
The stencil is now pre-tensioned by moving the first clamping jaw (see white arrow in
the picture) by hand.
Whilst the stencil is being pre-tensioned, the clamping screws have to be tightened up
(see blue arrows in the picture).
Lastly, the knurled screws (see green arrows in the picture) must be tightened up
according to the desired tension of the stencil.
o
By tightening up the knurled screws, the stencil is tensioned by way of the second
clamping jaw (see yellow arrow in the picture) moving.
The stencil holder frame can now be mounted into the stencil printer.
Tens ioning the s tencil


