background image

LPV-WL11G User’s Manual (Introduction)

3

For your safety, be sure to follow the instructions
given below.

Follow the instructions below to avoid harming yourself, other people and property, and to ensure
safe use of the product. 
For your, others and property safety be sure to read, understand and follow the instructions given
below thoroughly before using the product. This manual contains instructions concerning general
operation of the computer to which the product is connected in addition to those concerning the
product itself.
Please take note that our warranty will not cover any failures and problems of the computer, any
losses and failures of data, or failures and problems of the product caused by misuse.

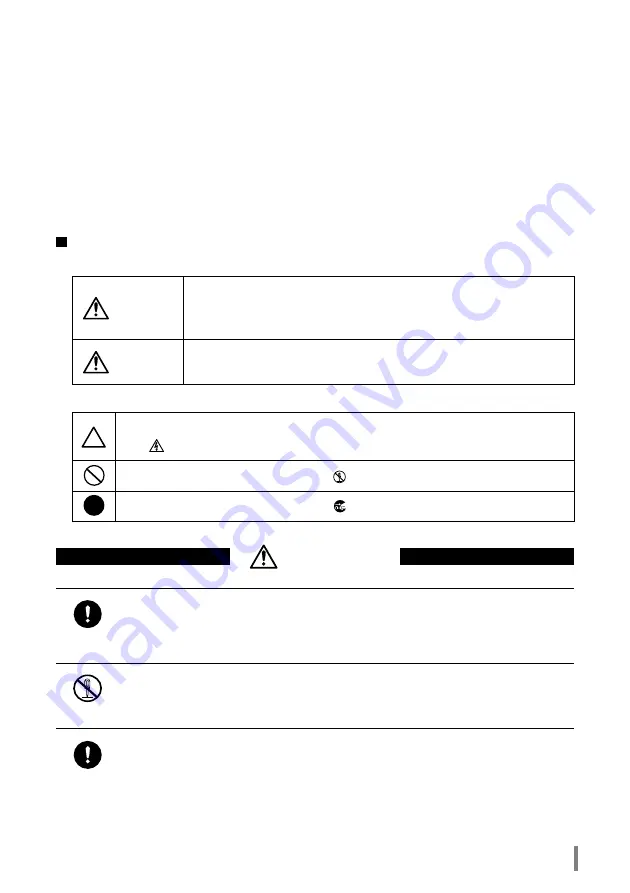
Signs and symbols used in this manual

Warning signs:

Symbols:

 WARNING

The instructions with this sign indicate prohibited actions. Failure to fol-
low the instructions shown with this sign may result in death or serious
injury to the user.

 CAUTION

Failure to follow the instructions shown with this sign may result in
injury to the user or property damage.

This indicates warnings and cautions.
 (Ex.

 Exercise care to avoid an electric shock.)

This indicates prohibiting actions.  (Ex. 

 Do not disassemble.)

This indicates what must be done. (Ex. 

 Disconnect the plug from the outlet.)

WARNING

Strongly

recommended

Follow the warning and caution instructions which are issued by the PC and
peripheral manufactures.

Prohibit

Do not attempt to disassemble or repair the LPV2-WS11GC.

This may result in fire or electric shock.

Strongly

recommended

Install this product away from children.

Failure to do so may result in injury.

Summary of Contents for LPV2-WS11GC

Page 1: ...Wireless Print Server LPV2 WS11GC User s Manual...

Page 2: ...al The preceding terminology is strictly for use in this manual for the sake of convenience and should not be construed as generally accepted terminology outside this context The personal computer to...

Page 3: ...isuse Signs and symbols used in this manual Warning signs Symbols WARNING The instructions with this sign indicate prohibited actions Failure to fol low the instructions shown with this sign may resul...

Page 4: ...ss overheat or attempt to repair the power supply cable as this may result in fire or electric shock When installing this product do not crimp the power supply cable Do not place heavy objects on the...

Page 5: ...r leakage or current may result in failure or electric shock Locations with excessive dust may result in failure Prohibit Using the device with different voltages such as overseas may result in a shor...

Page 6: ...any changes to your PC environment such as installing software or installing or removing hard ware Even if data is damaged or lost due to misuse or faults backup data can minimize the extent of such d...

Page 7: ...area networks LANs and their connections Operation procedures are described with screen shots A few possible actions when printing cannot be accomplished are described LPV2 WS11GC User s Manual This...

Page 8: ...802 11b and the baud rate of 11 Mbps over a wireless LAN Supports a printer port D sub 25 pin The maximum range is 115 m indoor or 550 m outdoor LOS The range may change depending on the baud rate as...

Page 9: ...bit WEP and 40 bit WEP encryption 128 bit WEP 13 ASCII charac ters or 26 Hex characters provides greater security For communications with wireless LAN products that only support 40 bit WEP 5 ASCII cha...

Page 10: ...LPV WL11G User s Manual Introduction 10 Top View Diagram Side View Diagram...

Page 11: ...with Windows98 1 Start LPV2 Manager If you don t not know about Channel please open Client Manager Program and refer to Manual Setting window by selecting File Manual Setting If you are using WEP Key...

Page 12: ...PV2 MANAGER Set the channel the same as Wireless LAN card setting to Channel Box If you are using a WEP Key put check mark on the USE WEP Key box and enter a WEP Key 2 3 Setup is completed Click Wirel...

Page 13: ...not work with LPV2 correctly xxxxxx is last 6 digits of LPV2 MAC address MAC address is 12 digits of numbers and is labeled on the side of back panel 5 Click PPD 6 Select Printer Description File 7 C...

Page 14: ...in the list box 13 Available printer server names will be listed Select WS xxxxxx P1 and click Add xxxxxx is last 6 digits of LPV2 MAC address MAC address is 12 digits of number and is labeled on the...

Page 15: ...tion 15 4 Enter the following items and click Add 5 If you see the printer server name on the printer list the setup is completed Enter LPV2 IP address Put check mark on Use Server s default que Click...

Page 16: ...LPV2 default setting Server Name WS xxxxxx xxxxxx is last 6 digit of MAC address Please Refer to Page 11 Printer Port Name WS xxxxxx P1 IP Address DHCP BOOTP RARP automatically allocated by Server 1...

Page 17: ...ine It specifies the LPV Host Name which should be defined in hosts file sd Spool Directory It specifies the directory where system spools print data The spool directory must be setup before printing...

Page 18: ...xxxx is last 6 digit of MAC address Please Refer to Page 11 Changing Workgroup Setting EX Workgroup Name WORKGROUP BUFFALO 1 Select Start Program BUFFALO AIRSTATION LPV2 MANAGER Windows XP Select Star...

Page 19: ...LPV WL11G User s Manual Introduction 19 4 5 6 Click OK The setting will be changed 7 Exit LPV2 MANAGER Click and Change the name WORKGROUP to BUFFALO Click OK Click OK OK...

Page 20: ...11 EX Changing AppleTalkZone BUFFALO 1 Select Start Program BUFFALO AIRSTATION LPV2 MANAGER Windows XP Select Start All Program BUFFALO AIRSTAION LPV2 MANAGER 2 If the Password BOX is showed please en...

Page 21: ...LPV WL11G User s Manual Introduction 21 5 6 Click OK The setting will be changed 7 Exit LPV2 MANAGER Click OK OK...

Page 22: ...sword None Port Name WS xxxxxx P1 High Speed Transfer Enabled Protocol Setup Get IP Address Automatically DHCP Enabled BOOTP Enabled RARP Enabled IP Address 1 1 1 1 Sub Set Mask 255 0 0 0 Gateway 0 0...

Page 23: ...ode Adhock Mode Frequency Range Mid Frequency 2412 2484MHz No confrict with Cell Phone Codeless phone Television and Radio C o m m u n i c a t i o n s Distance Depend ing on ambient con ditions 25m In...

Page 24: ...ata3 5 Data4 23 Signal Ground Data4 6 Data5 24 Signal Ground Data5 7 Data6 25 Signal Ground Data6 8 Data7 26 Signal Ground Data7 9 Data8 27 Signal Ground Data8 10 nAck 28 Signal Ground Paper Empty Sel...

Page 25: ...ween the equipment and receiver Connect the equipment into an outlet on a circuit different from that to which the receiver is connected Consult the dealer or an experienced radio TV technician for he...

Reviews: