


G E T T I N G S TA R T E D :
P S 4 P R O / S L I M
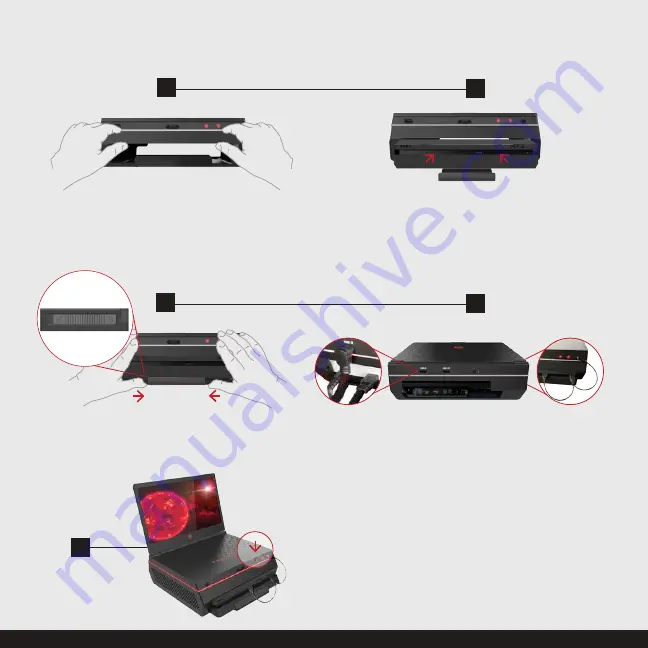
1
3
2
4
START
Install the Tight Fit Panel
Using both hands, place Tight Fit Panel into unit by pushing
evenly on the left and right ends and push with thumbs
firmly into place. (Note: To remove bar, reach underneath
with both hands and pull from the inside outward.)
Load the Playstation into ROVER 1.
Place one hand in back to stabilize the
ROVER 1. Line up and carefully push the
Playstation completely into open cavity
until it stops.
Lock in the Playstation.
Push the locking bar until it stops or rests
touching the front of the Playstation. Secure the
bar in place by pushing both locks inwards.
Attach HDMI and Dual USB Power Cable.
I
n the back of the unit, attach the HDMI Out of the Playstation to
the HDMI In of the ROVER 1. In the front, insert the dual USB cable
into both USB inputs on the Playstation and the other end of the
cable into the barrel jack power input on the front of the ROVER 1.
Power On.
Attach the PlayStation power cord into the PlayStation
and plug into wall outlet. Open the screen. Power on the
Playstation first, then the push the red power button to power
on the ROVER 1. The ROVER 1 indicates that it is on when
the red LED lights up around the entire unit.
PS4 Slim ONLY
(If loading a PS4 Pro,
skip to Step 2)
5
FINISH
BACK
FRONT


