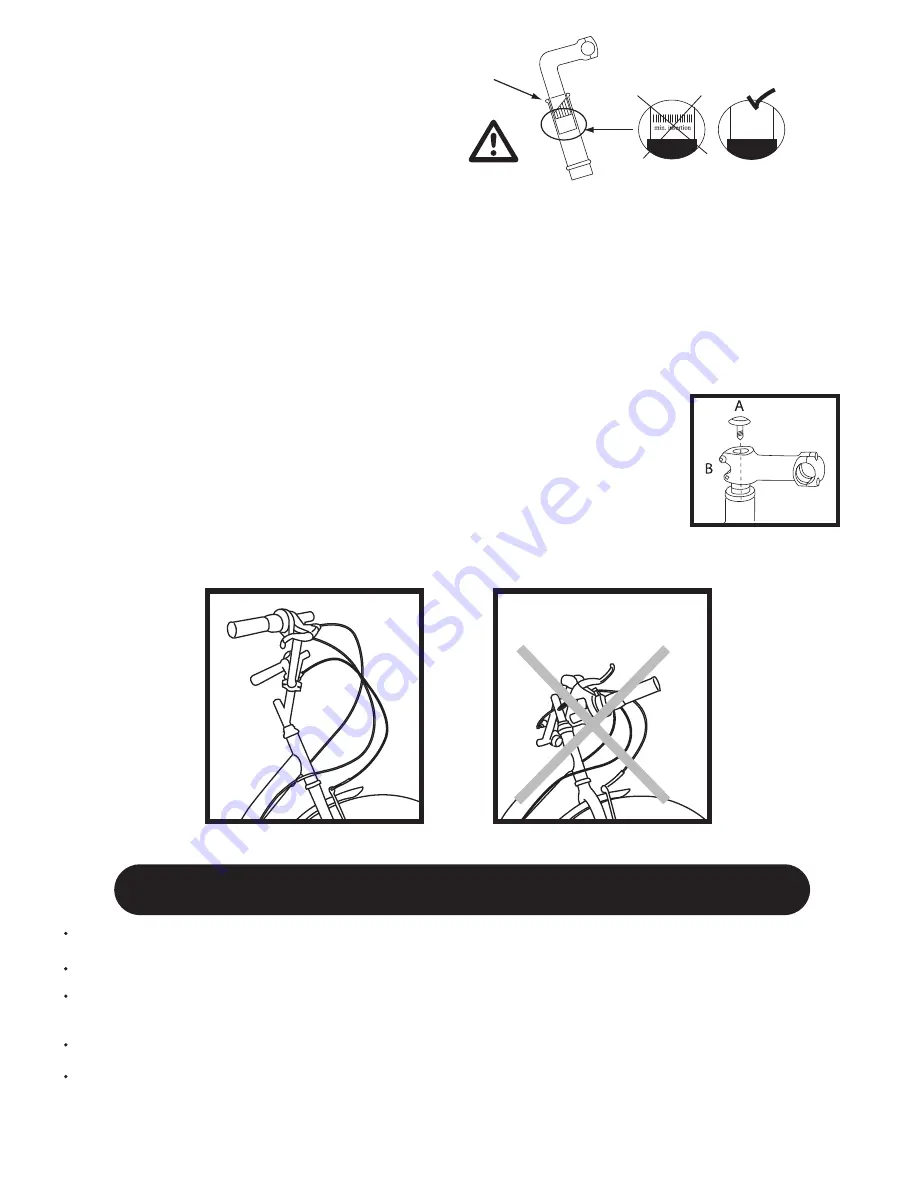
Adjusting handlebar height:
Quill stem:
Please note the quill stem insertion limit:
For your safety, the stem should not be pulled out further
than the mark shown on the stem: "min. insertion".
Headset stem:
All MTBs with aheadset stems are sold with setting rings. The handlebar height suggested in the shop is the highest. If you would
prefer to raise the handlebar position, you will need to choose a higher stem.
Adjusting aheadset stems on your bicycle:
To reduce the height you need to use appropriate tools (T-bars 5 or 6 depending on the model - see tools chapter).
- Completely unscrew screw A, then the two screws (B) on the stem.
- Remove the stem.
- Take 1 or more setting rings
- Replace the stem.
- Replace the setting rings above the stem.
- Tighten up screw A and tighten the screws (B).
Checking that aheadset stems are properly fitted to your bicycle:
To check the adjustment of your stem, close the front brake and rock forwards
and backwards on your bicycle.
If you feel any movement in the steering system, tighten up screw A.
Secondly, check by raising the front of the bicycle and turning the handlebars from left to right:
if you have any difficulty turning the handlebars, tighten up screw A.
If this procedure seems too complex, please ask the staff in the workshop at your nearest shop.
Checking that the handlebars are properly mounted in the stem
On Elops (1, 3, 5 and 7), b’Twin Pack and BMX bicycles, the handlebars are set at a significant angle. The angular position of the
handlebars should not be modified by more than 10° compared with the assembly position (see pictures below).
max
SAFETY CHECKS BEFORE USE
Adjusting the seat post and seat: check that the whole bicycle is solidly assembled and that the seat is solidly clamped in the frame, respecting the
minimum insertion point indicated on the tube.
Tightening the stem: before each use, check that the stem is properly adjusted using appropriate tools (see tools chapter) and tighten to the torque
indicated. Check the value in the stem/steering system torque table.
Tyre inflation, dimensions and mounting direction: Inflate your tyres to the correct pressure, referring to the pressure range indicated
on the side of the tyre by the manufacturer; your tyre’s resistance to wear depends on it. Mount the tyre in the direction indicated
on the side (the arrows indicating the rotation direction).
Always tighten fasteners to the correct torque. Bolts that are too tight can stretch and deform. Bolts that are too loose can move and fatigue. Either
mistake can lead to a sudden failure of the bolt, causing you to lose control and fall.
WARNING:
An insufficiently tightened stem clamp bolt, handlebar clamp bolt or bar end extension clamping bolt may compromise steering action,
which could cause you to lose control and fall. Place the front wheel of the bicycle between your legs and attempt to twist the handlebar/stem
assembly. If you can twist the stem in relation to the front wheel, turn the handlebars in relation to the stem, or turn the bar end extensions in
relation to the handlebar, the bolts are insufficiently tightened.
- 9 -
Summary of Contents for Bicycle
Page 1: ...User guide and terms of guarantee...
Page 23: ...23 2 2 3 h Hs Hg 2 3...


