


This section describes the jacks on the back panel of your MONITOR.
There are several ways to connect devices.
HDMI INPUT Lets you connect a device, with an HDMI or DVI output.
HDMI (High Definition Multimedia Interface) provides an uncompressed digital connection
that carries both video and audio data by way of an integrated mini-plug cable.
Since HDMI technology is based on Digital Visual Interface (DVI), the jack on the back of your
MONITOR is also compatible with DVI devices.
HDMI Input lets you connect a device, such as a digital cable box, with an HDMI output.
VGA Connect your computer, or other device with a VGA output, to this jack using
a15 pin D-sub cable.
Connecting the Monitor Cables to your recorder
You should be sure all cable connections are secure tighten all cable screws.
Shaking and vibration may dislodge cables that are improperly connected.
Route all wiring and cabling away from heat sources and sharp metal edges to avoid damage.
Also, keep the touch screen cable away from sources of electromagnetic and radiofrequency interference.
Testing the Monitor
After connection, turn on the power switch located on the rear (or side) bezel. Before you test your monitor, make sure all cables are connected properly and routed through the cable
management system.
Be sure to tighten all cable screws.
To test that the monitor is working properly:
1. Turn on your device
2. Make sure the video image is displayed. If it is not, turn on your monitor.
Ensure the LED is blue – red indicates power but no signal.
3. Make sure the video image is centered with in the screen area.
Use the monitor controls to adjust the image, if necessary perform an Auto Config first, then if you wish you can adjust the horizontal and vertical position, contrast, and brightness
to better suit your video card and your personal preference.
Refer to Basic OSD setup for more information on using the on-screen menu to adjust the video display.
Controls and functions
Remote control
Explanation of connectors
If you cannot locate your remote, you can use the side panel buttons of your monitor to operate many of the monitor’s features.
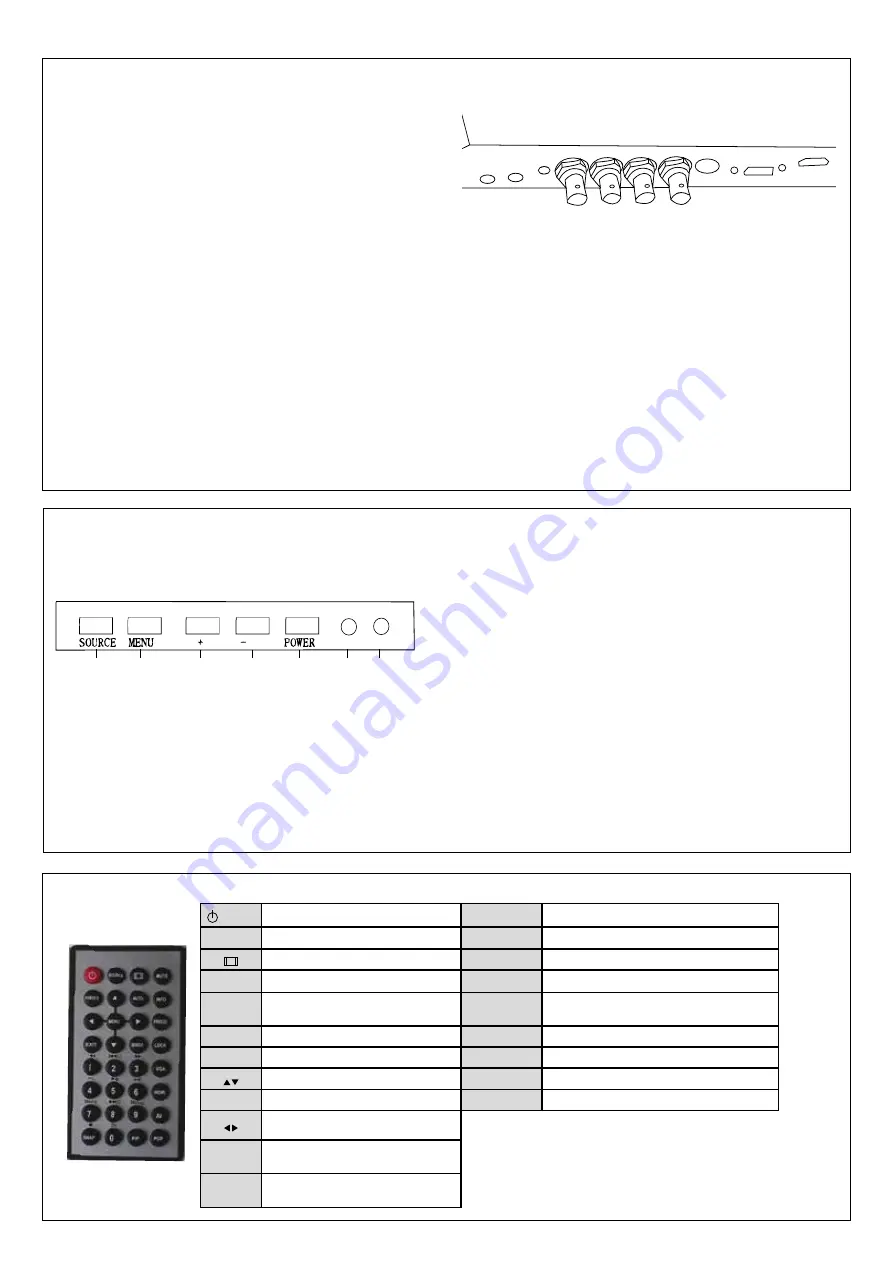
Buttons on the lower-right part of the panel
LED 1 LED 2
1. POWER Turn the monitor on or off.
2. SOURCE : Accesses the available video input signals (VGA - HDMI AV1-AV2 -S-VIDEO).
3. MENU : Brings up the MONITOR Main menu. When in the OSD system, press MENU button to return to the previous menu or exit.
4. + : Increases the volume. In the MONITOR menu system, acts like the right arrow button on the remote control and adjusts menu controls.
5. - : Decreases the volume. In the MONITOR menu system, acts like the left arrow button on the remote control and adjusts menu controls.
6. LED 1: Remote control signal receiver window.
7. LED 2: Remote indicator: In red when standby mode, in blue when display.
HOW to use buttons:
Use the buttons on the right side control panel to adjust the OSD:
1. Power on the LCD monitor.
2. Press source button to accesses the available video input signals, press + or - button to enter the video mode.
3. Press MENU button then press +/- button move highlight icon left / right.
4. Press SOURCE button to enter the submenu, then press +/- button corresponding to edit.
5. When you are satisfied with the setting, press MENU button to return to the previous menu or exit.
Ensure the remote control is pointed toward the remote control window on the display.
No obstacles should be placed between the remote control and the remote control
window.
The effective receiving scope for the signal is 3 meters to the front of the remote
control window.
Audio
R L
Audio
IN
Video 02
OUT IN
Video 01
OUT IN
S-Video
VGA
HDMI
1
2
3
4
5
6
7
POWER Turn ON or OFF the monitor
VGA
VGA signal
POWER-S Back light : high, mid, low
HDMI
HDMI signal
Scale: normal, center, full, 16:9
AV
AV input signal
Sensor
Available only built-in camera
PIP
Picture in picture
Freeze
Still: ON & OFF
Source
Press it to display and select the available video
signal
Mute
Switches the sound ON or OFF
POP
Picture on picture
Lock
Menu lock, un lock
0 ~ 9
Available only password entered
Move Up/Down highlight icon
SWAP
POP & PIP function
Menu
Display the main on-screen menu
EXIT
Press this button to exit the menu
Press them to turn up or turn down the
volume
Auto
Auto adjust (available only VGA mode)
INFO
Press it to display information on the
monitor screen


