background image

4  Getting Started

Getting

Started

Table of

Contents

Settings

Bryton App

Appendix

Getting Started

This section will guide you on the basic preparations before you start using your Rider 15 neo. 

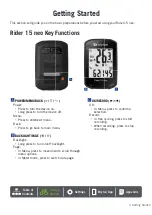
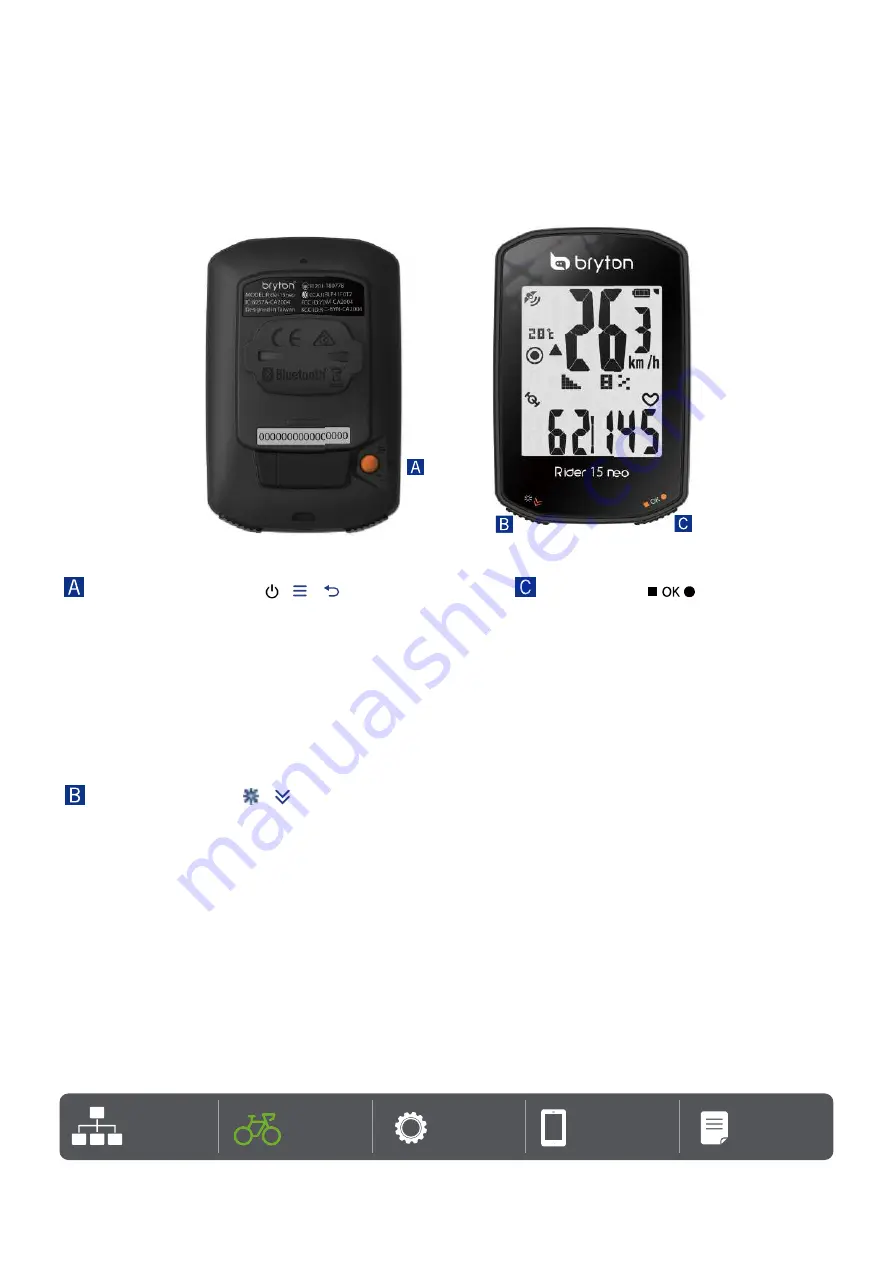
Rider 15 neo Key Functions


POWER/MENU/BACK

 (    /   /   )

Power: 


x

Press to turn the device on.


x

Long press to turn the device off.

Menu:


x

Press to enter/exit menu.

Back:


x

Press to go back to main menu.


BACKLIGHT/PAGE

 (   /   )

Backlight: 


x

Long press to turn on/off backlight.

Page:


x

In Menu, press to move down to scroll through 

menu options.


x

In Meter mode, press to switch data page.


OK/RECORD

 ( 

 )

OK:


x

In Menu, press to confirm a 

selection.

Record:


x

In free cycling, press to start 

recording.


x

When recording, press to stop 

recording.

Summary of Contents for Rider 15 neo

Page 1: ...Rider 15 neo User Manual...

Page 2: ...You are entitled to a replacement or refund for a majory failure and for compensation for any other reasonably forseeable loss or damage You are also entitled to have the goods repaired or replaced i...

Page 3: ...Signal 7 Step 4 Ride with Rider 15 neo 8 Step 5 Install on Bikes 9 Share Your Records 10 Bryton Update Tool 12 Settings 13 Bike Profiles 13 Calibrate Altitude 13 Sensor Pairing 14 Delete Data 15 Selec...

Page 4: ...ress to turn the device on x Long press to turn the device off Menu x Press to enter exit menu Back x Press to go back to main menu BACKLIGHT PAGE Backlight x Long press to turn on off backlight Page...

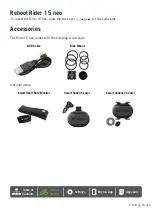
Page 5: ...on App Appendix Reboot Rider 15 neo To reboot the Rider 15 neo press the two keys at the same time Accessories The Rider 15 neo comes with the following accessories USB Cable Bike Mount Optional items...

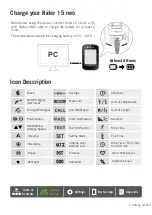
Page 6: ...ture suitable for charging battery is 0 C 40 C PC At least 4 Hours Power Status Above Below Average Speed Heading Strong GPS Signal Bike 2 No GPS Signal Not fixed Backlight Recording Pause Gradient Ri...

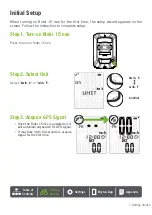
Page 7: ...appears on the screen Follow the instruction to complete setup Step1 Turn on Rider 15 neo Press to turn on Rider 15 neo Step2 Select Unit Select km h C or mi h F Step3 Acquire GPS Signal x Once the R...

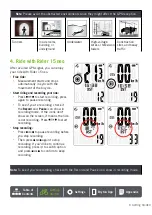
Page 8: ...s automatically in sync with the movement of the bicycle x Start riding and recording your ride x Press to start recording press again to pause recording x To see if you re recording check if the Reco...

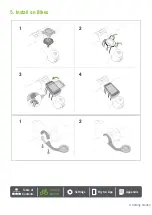
Page 9: ...9 Getting Started Getting Started Table of Contents Settings Bryton App Appendix 5 Install on Bikes 3 4 1 2 1 2...

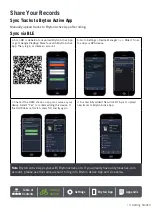
Page 10: ...en log in or create an account b Go to Settings Device Manager Rider 15 neo to add your GPS device c Check if the UUID shown on app is as same as your device Select Yes to confirm adding this device I...

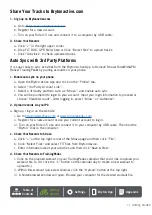
Page 11: ...ogin to your account Input your login information to proceed or choose Create Account After logging in select Allow or Authorize 2 Upload records via your PC a Sign up log in on the website i Go to ht...

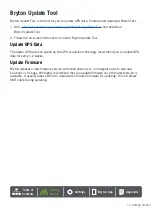
Page 12: ...screen instructions to install Bryton Update Tool Update GPS Data The newer GPS data can speed up the GPS acquisition We higly recommend you to update GPS data for every 1 2 weeks Update Firmware Bry...

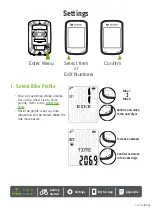
Page 13: ...ze 2 bike profiles Set up the wheel size to finish pairing Refer to the wheel size chart x Once the profile is set up bike infomation will be stored Make the ride more easier Enter Menu Select Item or...

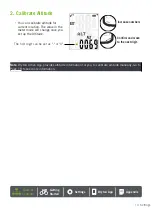
Page 14: ...altitude for current location The value in the meter mode will change once you set up the Altitude Note Bryton Active App provides altitude information for you to calibrate altitude manually Go to Pag...

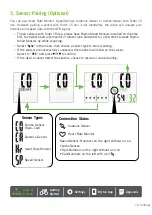
Page 15: ...art rate monitor or rotate crank and wheel for a few times to wake Bryton Smart Sensors up while scanning x Select Sync in the menu then choose a sensor type to start scanning x If the sensors are suc...

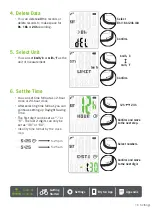
Page 16: ...urement 6 Set the Time x You can set time format as 12 hour clock or 24 hour clock x After selecting time format you can continue setting up Daylight Saving Time x The first digit can be set as or 0 T...

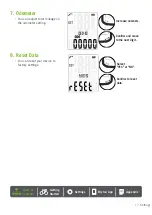
Page 17: ...Settings Bryton App Appendix 7 Odometer x You can adjust total mileage on the odometer setting 8 Reset Data x You can reset your device to factory settings Confirm and move to the next digit Increase...

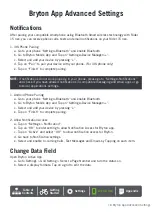
Page 18: ...nd enable Bluetooth b Go to Bryton Mobile App and Tap on Settings Device Manager c Select and add your device by pressing e Tap on Finish to complete pairing 2 Allow Notification Access a Tap on Setti...

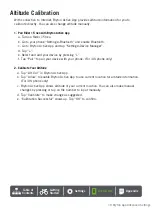
Page 19: ...th c Go to Bryton Active App and tap Settings Device Manager d Tap e Select and add your device by pressing f Tap Pair to pair your device with your phone For iOS phone only 2 Calibrate Your Altitude...

Page 20: ...ude over distance Distance Distance The distance travelled for current activity ODO The accumulated total distance until you reset it Speed Speed The current rate of change in distance Avg Speed The a...

Page 21: ...BLE Smart Bluetooth smart wireless technology with embedded antenna 2 4GHz band 0dBm Water Resistant Water resistant to a depth of 1 meter for up to 30 minutes Barometer Equipped with barometer Wirel...

Page 22: ...escription Physical Size 63 x 34 3 x 15 mm Weight 14 5 g sensor 31 5 g correa Water Resistance Incidental exposure to water of up to 1 meter for up to 30 minutes Transimission Range 3 m Battery Life U...

Page 23: ...ctor first the positive connector will easily deform and malfunction x Be careful not to damage or lose O ring gasket on the cover x Contact your local waste disposal department to properly dispose of...

Page 24: ...1 1 8 1795 24x1 1 4 1905 26 x 1 559 1913 26x1 25 1950 26x1 40 2005 26x1 50 2010 26x1 75 2023 26x1 95 2050 26x2 10 2068 26x2 125 2070 26x2 35 2083 Wheel Size L mm 26x3 00 2170 26x1 1 8 1970 26x1 3 8 20...

Page 25: ...e Sensor Smart Speed Sensor NOTE Once sensors are waken the LED blinks twice The LED continues to blink when you continue to pedal for pairing After around 15 times blink it stops blinking If not used...

Page 26: ...so that it will turn loose during the exercise x If the sensor cannot be detected or the reading is abnormal please warm up for about 5 minutes x If the heart rate belt is not used for a period of ti...

Page 27: ...severe shock x Do not expose your device to extreme temperatures and excessive moisture x The screen surface can easily be scratched Use the non adhesive generic screen protectors to help protect the...

Page 28: ...his equipment must be operated in a minimum of 20 cm separation distance to the user Hereby Bryton Inc declares that the radio equipment type Bryton product is in compliance with Directive 2014 53 EU...

Reviews: