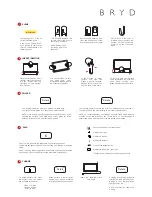
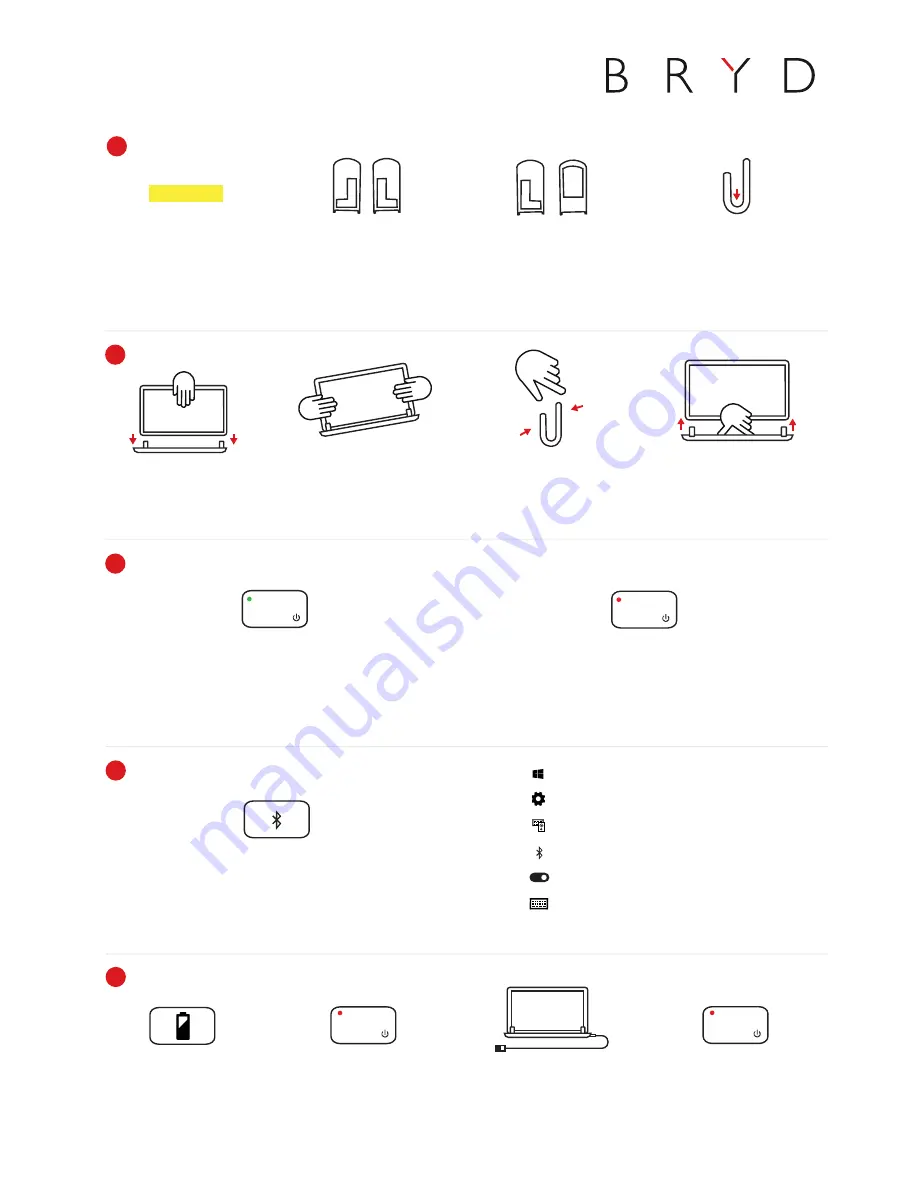
To check battery life, press
the battery key. The Delete
key will flash three times:
Green = 75-100%
Yellow = 25-74%
Red = 10-24%
Charging is confirmed by a solid
red light on the Delete key. Your
Brydge is fully charged when
the light turns off
NOTE: Charging can take up to
3 hours
Insert the supplied Micro
USB cable
CHARGE
5
When battery is 9% or lower,
backlit keys will be disabled
and light will flash continuously
4
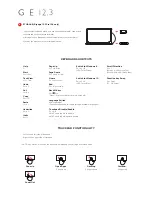
1) Select Windows icon (start menu)
2) Select ‘Settings’
3) Select ‘Devices’
4) Select ‘Bluetooth’
5) Confirm Bluetooth is on
6) Select ‘Brydge 12.3’, then ‘pair’
7) Enter the on-screen passcode and press enter
To manually power on, press and hold Fn + Delete keys
The light will turn green for 3 seconds to indicate power
NOTE: Once paired, your Brydge will automatically wake upon
opening the Surface. The Delete key will turn green for three
seconds to let you know your Brydge is awake
POWER
3
Delete
To pair, press and hold the Bluetooth key for three seconds.
The Delete key light will flash blue confirming your Brydge is in pairing
mode
NOTE: If pairing takes longer than one minute, the blue light will stop
flashing and you will need to press the Bluetooth button again
To manually power off, press and hold Fn + Delete keys for 3 seconds
The light will turn red momentarily to indicate it’s powered off
NOTE: To conserve battery, your Brydge will enter sleep mode after 20
minutes of non-use. Press any key to turn back on. Your Brydge will
enter sleep mode when both devices are closed like a laptop
F12
Delete
PAIR
Delete
Delete
To remove, hold your Surface
and pull straight up, with one
hand
firmly
holding
your
Brydge against a hard surface
Place your Brydge on a flat
surface, insert your Surface
into the hinges with the
kickstand at the bottom
(and closed)
If the Surface is loose,
remove and give the
hinges a gentle squeeze.
Repeat this process until
your Surface is held firmly
INSERT/REMOVE
2
Lift your Surface to test
the hinge grip. Your
Surface and Brydge should
be held firmly together
TO REPLACE: Remove the
current shims, and ensure
the surface is smooth
NOTE: Removing all
remaining glue is not
essential
NOTE: Ensure the shim is
pressed firmly against the
bottom of the hinge before
pressing on the front and
back
Remove tape backing from
front and back of new shims
and insert evenly into hinges
3M
M
SHIMS
1
IMPORTANT:
Your Brydge 12.3™ is set up
for the Surface® Pro 4
If you have a Surface Pro 3,
you will need to replace the
shims in the keyboard with
those in the box
3
Esc
F1
F2
F3
F4
F5
F6
F7
F9
F10
F11
F12
F8
PrtSc
Delete
Backspace
Tab
Caps Lock
Shift
Ctrl
Fn
€
Alt
Alt
Ctrl
Home
End
PgUp
PgDn
Enter
Shift