APPENDIX
——————————————————————————————————————————————————————————
182
7
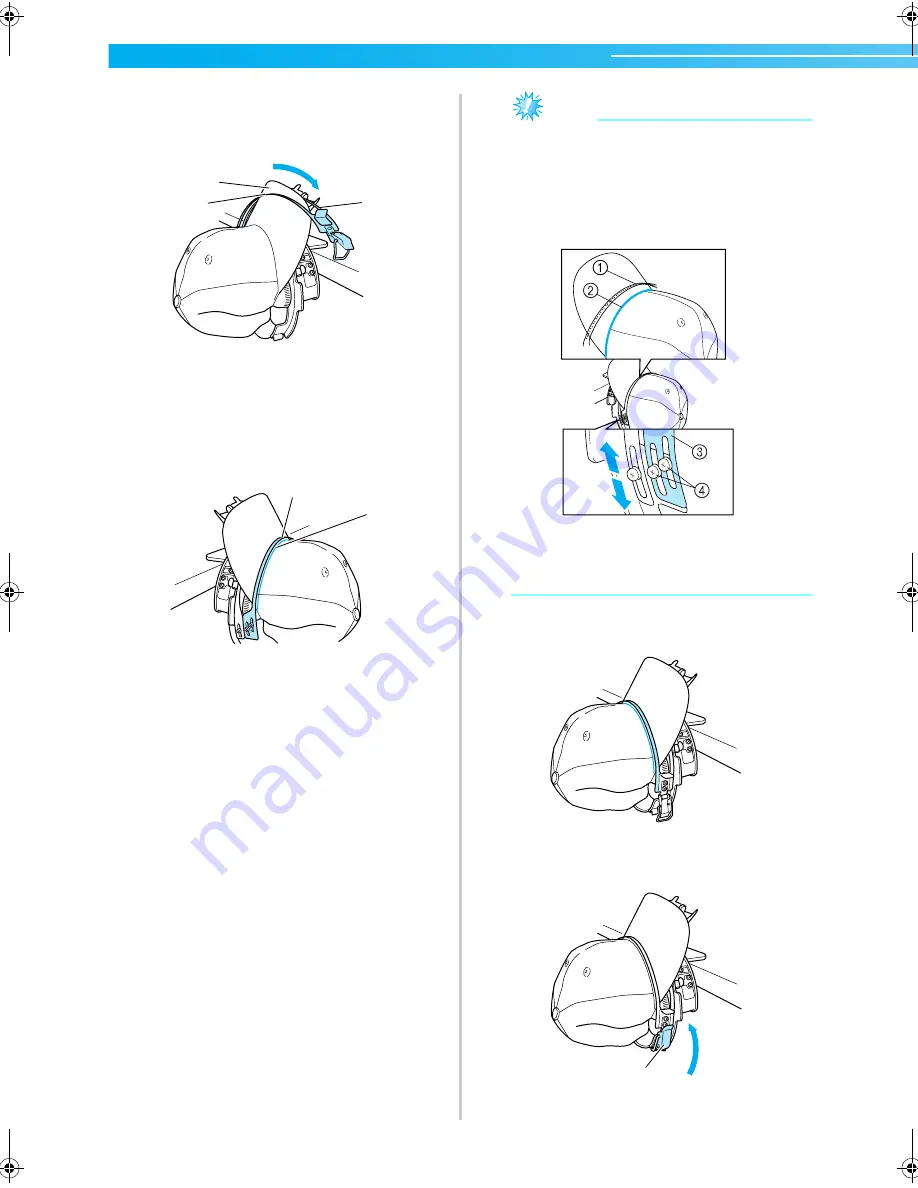
Close the clamping frame so that the brim of
the cap passes between the inside clamping
frame and the outside clamping frame.
1
Brim
2
Inside clamping frame
3
Outside clamping frame
8
Neatly align the teeth of the clamping frame
with the base of the brim.
1
Teeth of clamping frame
2
Base of brim
Note
●
Loosen the two screws for the outside
clamping frame, and then adjust the
position of the outside clamping frame so
that it conforms to the shape of the cap and
so that the teeth of the clamping frame
perfectly align with the base of the brim.
1
Teeth of clamping frame
2
Base of brim
3
Outside clamping frame
4
Screws for the outside clamping frame
9
Adjust the other side in the same way.
0
Close the lever of the snap lock.
1
Lever of the snap lock
2
3
1
1
2
1
Sapphire_chapt7.fm Page 182 Friday, November 18, 2005 12:10 PM
Summary of Contents for PR-620
Page 1: ...EMBROIDERY MACHINE O P E R A T I O N M A N U A L PR 620 ...
Page 77: ...EMBROIDERING TUTORIAL 60 ...
Page 115: ...EMBROIDERING SETTINGS 98 ...
Page 171: ...BASIC SETTINGS AND HELP FEATURE 154 ...
Page 229: ...APPENDIX 212 ...
Page 236: ...Index 219 7 ...
Page 237: ......


