background image

3. INSTALLATION 


BAS-341H, BAS-342H

3. INSTALLATION 

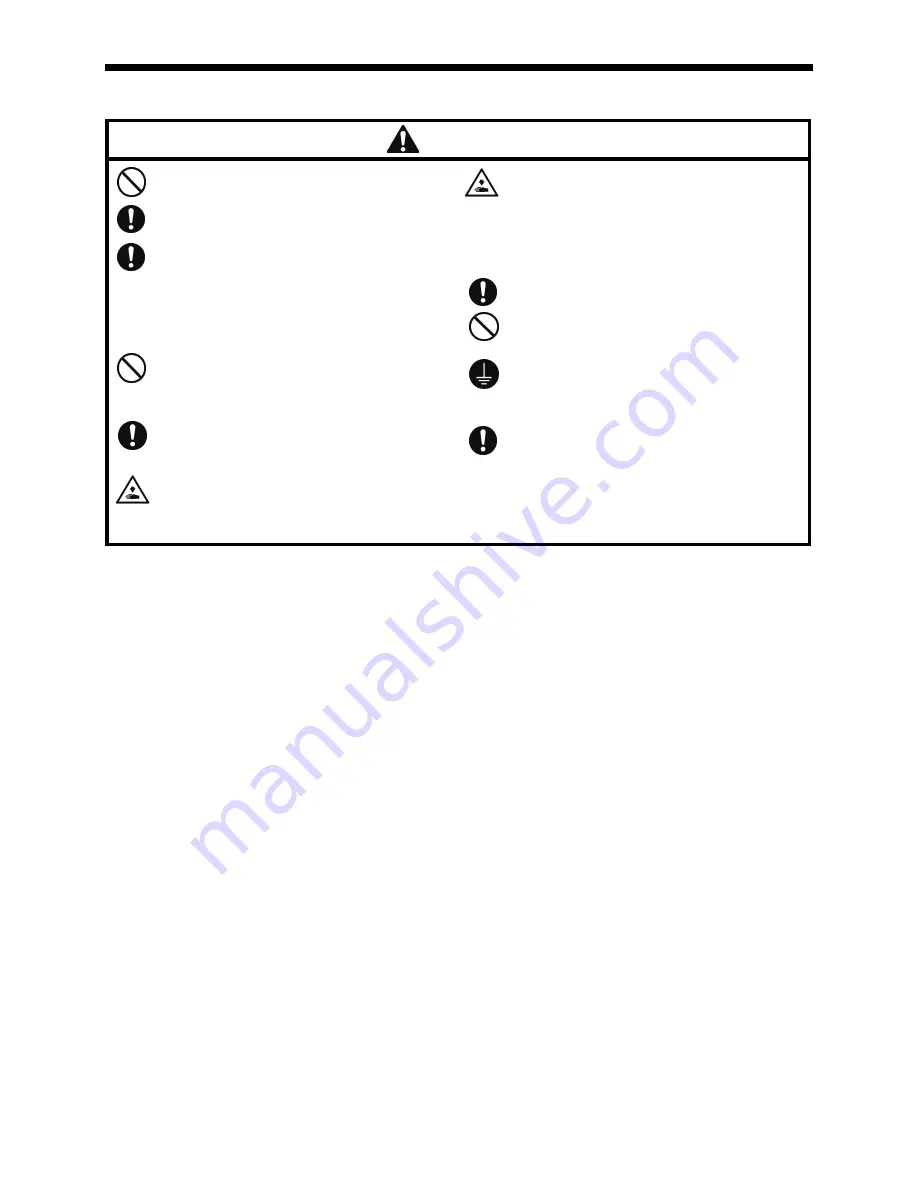
        CAUTION 

Machine installation should only be carried out by a 
qualified technician. 

Contact your Brother dealer or a qualified electrician 
for any electrical work that may need to be done. 

The sewing machine head weighs approximately 160 
kg. 
Use equipment such as a crane or hoist when 
installing the machine head and adjusting the height of 
the table.   
If you try to lift the machine head yourself, it may cause 
injuries such as back injury. 

Do not connect the power cord until installation is 
complete. 
If the foot switch is depressed by mistake, the sewing 
machine might start operating and injury could result. 

If using a work table which has casters, the casters 
should be secured in such a way so that they cannot 
move. 

Use a table with a height of 84 cm or less. If the table 
is too high, the machine head may become 
unbalanced and fall down, and serious injury or 
damage to the sewing machine may result. 

Hold the machine head with both hands when tilting it 
back or returning it to its original position. 
In addition, do not subject the machine head to extra 
force while it is tilted back. If this is not observed, the 
machine head may become unbalanced and fall down, 
and serious injury or damage to the sewing machine 
may result. 

All cords should be secured at least 25 mm away from 
any moving parts. Furthermore, do not excessively 
bend the cords or secure them too firmly staples, 
otherwise there is the danger that fire or electric 
shocks could occur. 

Be sure to connect the ground. If the ground 
connection is not secure, you run a high risk of 
receiving a serious electric shock, and problems with 
correct operation may also occur. 

Install the safety covers to the machine head and 
motor. 


Summary of Contents for BAS-341H

Page 1: ... BAS 342H Please read this manual before using the machine Please keep this manual within easy reach for quick reference DIRECT DRIVE PROGRAMMABLE ELECTRONIC PATTERN SEWER INSTRUCTION MANUAL INSTRUCTION MANUAL ...

Page 2: ...strial sewing machines it is normal to carry out work while positioned directly in front of moving parts such as the needle and thread take up lever and consequently there is always a danger of injury that can be caused by these parts Follow the instructions from training personnel and instructors regarding safe and correct operation before operating the machine so that you will know how to use it...

Page 3: ...ons which follow this term indicate situations where failure to follow the instructions could result in death or serious injury CAUTION The instructions which follow this term indicate situations where failure to follow the instructions may result in minor or moderate injury Symbols This symbol indicates something that you should be careful of The picture inside the triangle indicates the nature o...

Page 4: ...for the machine Voltage fluctuations which are greater than this may cause problems with correct operation The power supply capacity should be greater than the requirements for the sewing machine s power consumption Insufficient power supply capacity may cause problems with correct operation The pneumatic delivery capability should be greater than the requirements for the sewing machine s total ai...

Page 5: ...lammation can result Furthermore do not drink or eat the lubricating oil or grease They may cause diarrhea or vomiting Keep the oil out of the reach of children Sewing To prevent problems do not use objects with sharp points to operate the LCD panel This sewing machine should only be used by operators who have received the necessary training in safe use beforehand The sewing machine should not be ...

Page 6: ... head with both hands when tilting it back or returning it to its original position In addition do not subject the machine head to extra force while it is tilted back If this is not observed the machine head may become unbalanced and fall down and serious injury or damage to the sewing machine may result If the power switch needs to be left on when carrying out some adjustment be extremely careful...

Page 7: ...he ground If the ground connection is not secure you run a high risk of receiving a serious electric shock and problems with correct operation may also occur Direction of operation Be careful not to get your hand caught when tilting back the machine head and returning it to its original position Do not hold otherwise problems with operation or injury may occur Safety devices Devices such as eye gu...

Page 8: ...d cover Rear cover Inside cover L Outside cover Fixed cover X motor cover Motor cover 3461B Middle cover Thread take up cover Eye guard Finger guard Rear cover FL Rear cover FR Fixed cover Inside cover R Middle cover Outside cover ...

Page 9: ...2 step operation for the work clamp 31 5 SEWING 32 5 1 Sewing 32 5 2 Using the STOP switch 33 6 CLEANING 34 6 1 Cleaning the rotary hook 34 6 2 Draining the oil 34 6 3 Cleaning the regulator 35 6 4 Checking the control box air inlet ports 35 6 5 Cleaning the eye guard 35 6 6 Checking the needle 35 6 7 Lubrication 35 7 STANDARD ADJUSTMENTS 36 7 1 Adjusting the sensitivity of the thread breakage sen...

Page 10: ... 1 NAMES OF MAJOR PARTS 1 STOP switch Safety devices 2 Power switch 10 Finger guard 3 Work clamp switch 11 Eye guard 4 Start switch 12 Thread take up cover 5 Control box 13 Motor cover 6 Solenoid valve 7 LCD panel 8 Pulley 9 Cotton stand 3462B ...

Page 11: ...clamp Intermittent presser foot lift amount 22 mm Intermittent presser foot stroke 2 4 5 mm 4 5 10 mm or 0 Default setting 3 mm Hook Double capacity shuttle hook Wiper device Standard equipment Thread trimmer Standard equipment Digital tension Standard equipment Thread breakage detector Standard equipment Cycle programs 30 Motor 550 W AC servo motor Weights Machine head Approx 160 kg LCD panel App...

Page 12: ...ve Use a table with a height of 84 cm or less If the table is too high the machine head may become unbalanced and fall down and serious injury or damage to the sewing machine may result Hold the machine head with both hands when tilting it back or returning it to its original position In addition do not subject the machine head to extra force while it is tilted back If this is not observed the mac...

Page 13: ...be strong enough to bear the weight and vibration of the sewing machine If using casters use ones which can bear the total weight of sewing machine and table Check that the control box is at least 10 mm away from the leg If the control box and the leg are too close together it may result in incorrect sewing machine operation 3635B ...

Page 14: ... the control box may result 1 Control box 2 Bolts 4 pcs 3 Plain washers 4 pcs 4 Spring washers 4 pcs 5 Nuts 8 pcs NOTE Check that the control box 1 is at least 10 mm away from the leg If the control box 1 and the leg are too close together it may result in incorrect sewing machine operation 6 Power switch 7 Wood screws 2 pcs 8 Staples 7 pcs NOTE Take care when tapping in the staples 8 to make sure...

Page 15: ...st to install the sewing machine Be careful of the following when lowering the machine head onto the table Do not let any cords get clamped between the machine head and the table Do not place the machine head cushion c on top of the oil pan a or the support lever base b Do not let the side d of the machine head switch lever touch the support lever base b 1 Rubber bushes 2 pcs 2 Hinge holders 2 pcs...

Page 16: ...h 3 5 Tilting back and returning the machine head CAUTION Hold the machine head with both hands when tilting it back or returning it to its original position In addition do not subject the machine head to extra force while it is tilted back If this is not observed the machine head may become unbalanced and fall down and serious injury or damage to the sewing machine may result Always be sure to en...

Page 17: ...ing holders L and R 5 Spacer 6 Bolt 7 Nut 8 Gas spring 9 Shaft collars 2 pcs 10 Gas spring shaft D 11 Plain washers 2 pcs 12 Retaining rings E 2 pcs 13 Bolts 4 pcs 14 Plain washers 4 pcs 15 Spring washers 4 pcs 16 Nuts 4 pcs 17 Gas spring shaft U 18 Set screw After installing the gas spring 8 gently return the machine head to its original position Refer to 3 5 Tilting back and returning the machin...

Page 18: ...crews 4 pcs 4 Setting plate 5 Flat screws 4 pcs 6 LCD panel 7 Staples 2 pcs Pass the cord of the LCD panel 8 through the table hole and then insert it into the PANEL connector 9 on the side of the control box Tighten the four wood screws 3 so that the thickness of the rubber cushion 2 is 5 mm 3574B ...

Page 19: ... 3 9 Connecting the air tubes 3 10 Installing the air hose 1 Close the cock 1 2 Turn the nut 3 at the end of the air hose 2 and connect it to the valve 4 3 Open the cock at the compressor Check that no air is leaking from the connection of the valve 4 and air hose 2 4 Open the cock 1 The meter pointer will turn clockwise NOTE Turn the cock 1 gently to open it 5 Adjust the air pressure Refer to 7 1...

Page 20: ...art switch right is depressed the sewing machine starts sewing 3 12 Connecting the cords 1 Remove the cover of the control box 2 Loosen the two screws 1 and then open the cord presser plate 2 in the direction of the arrow 3 Pass the bundle of cords from the machine head through the hole in the table and then pass it through the hole in the control box together with the solenoid valve 4 Securely co...

Page 21: ...ead switch 3 pin P14 HEAD SW 2 Conversion harness 7 pin White P15 PEDAL 2 Machine head memory 6 pin P16 HEAD M 2 Thread trimmer solenoid 6 pin P2 SOL1 1 Digital tension solenoid Tension release solenoid 4 pin P3 SOL2 1 X pulse motor 4 pin White P21 XPM 1 Y pulse motor 4 pin Blue P22 YPM 1 Work clamp pulse motor 4 pin Black P23 PPM 1 Home position sensor 12 pin White P8 SENSOR1 2 3 STOP switch 6 pi...

Page 22: ...ser plate 6 in the direction of the white arrow and secure it by tightening the two screws 5 NOTE Close the cord presser plate 6 securely so that no foreign objects insects or small animals can get inside the control box 6 Check that the cords do not get pulled and then gently return the machine head to its original position 3538B Motor P C board Lock the cord clamps securely 3576B ...

Page 23: ...3 INSTALLATION 14 BAS 341H BAS 342H Connector D sub connector LCD panel 9 pin PANEL LCD panel 3578B PANEL ...

Page 24: ...ing a serious electric shock and problems with correct operation may also occur 1 Ground wire from the machine head 2 Ground wires from two pedal foot switch harnesses 2 wires Tighten the control box cover with the eight screws Check that the cords are not clamped by the cover at this time NOTE Make sure that the ground connections are secure in order to ensure safety 3579B ...

Page 25: ...ck that none of the cords are being pulled 3 Return the machine head to its original position 4 Close the cord presser plate 3 in the direction of the arrow and secure it by tightening the two screws 4 NOTE Close the cord presser plate 3 securely so that no foreign objects insects or small animals can get inside the control box 5 Secure the cover of the control box by tightening the eight screws 5...

Page 26: ...ge specifications EU specifications 1 Filter box 2 Screws 4 pcs 3 Staples 4 pcs 4 Power cord 1 Attach an appropriate switch and cable to the power cord 4 The green and yellow wire is the ground wire 2 Insert the power plug into a properly grounded electrical outlet NOTE Take care when tapping in the staples 3 to make sure that they do not pierce the cords Do not use extension cords otherwise machi...

Page 27: ...nd yellow wire is the ground wire 2 Insert the power plug into a properly grounded electrical outlet NOTE Take care when tapping in the staples 5 to make sure that they do not pierce the cords Do not use extension cords otherwise machine operation problems may result 3 Use the eight screws to tighten the cover of the control box Check that none of the cords are being clamped by the cover at this t...

Page 28: ...ounded electrical outlet The inside of the control box uses single phase power NOTE If the ground connection is not secure electric shocks operating errors or damage to electronic components such as P C boards may occur Take care when tapping in the staples 7 to make sure that they do not pierce the cords Do not use extension cords otherwise machine operation problems may result 3 Use the eight sc...

Page 29: ... Bolt loosen 2 Eye guard tilt forward 3 Eye guard assembly 4 Plain washers 2 pcs 5 Bolts 2 pcs After installing the eye guard assembly 3 return the eye guard 2 to its original angle and then tighten the bolt 1 to secure it in place 3 17 Installing the cotton stand 1 Cotton stand NOTE Securely tighten the nut 3 so that two washers 2 are securely clamped so that the cotton stand 1 does not move 3533...

Page 30: ...other If this type of lubricating oil is difficult to obtain the recommended oil to use is Exxon Mobil Essotex SM10 VG10 1 Fill the arm oil tank and the bed oil tank with oil NOTE Be sure to add more oil when the oil level drops down to about one third full in the oil gauge window 1 If the oil drops below the one third full level in the oil gauge window 1 there is the danger that the sewing machin...

Page 31: ...bers appear on the LCD panel If error E050 E051 or E055 is displayed If the machine head switch 1 is not turned on error E050 E051 or E055 will occur Adjust the installation position of the machine head switch 1 1 Turn off the power 2 Loosen the two screws 2 3 Push down the right side of the machine head switch 1 so that the machine head switch 1 turns on and then tighten the two screws 2 4 Turn o...

Page 32: ...en the set screw 1 2 Insert the needle 2 in a straight line as far as it will go making sure that the long groove on the needle is at the front and then securely tighten the set screw 1 4 2 2 pedal foot switch operation method When the work clamp switch left side is depressed the intermittent presser foot 1 and the work clamp 2 are lowered and when the start switch right side is then depressed the...

Page 33: ...e threading easier and it will prevent the thread from coming out at the sewing start When threading the thread through the needle allow a distance of approximately 42 mm between the needle hole and the end of the thread If it is too long the thread may become tangled and if it is too short the thread may pull out at the sewing start If you would like to adjust the sensitivity of the thread breaka...

Page 34: ...he start switch is depressed 1 Turn on the power 2 Touch the Thread key on the screen Work clamp will drop The tension discs will open 3 Threading the thread 4 Ending threading mode The display will return to the previous screen Touch the OK key on the screen The work clamp will return to where it was before threading mode was started 3055B ...

Page 35: ...g the start switch Home position detection will be carried out 5 Touch the Wind key 4 on the screen 6 The display will switch to the thread winding mode screen 7 Check that the needle does not touch the work clamp and then lower the work clamp before depressing the start switch 8 Keep depressing the start switch until the lower thread stops being wound onto the bobbin 9 Once winding of the set amo...

Page 36: ... switch is depressed by mistake the sewing machine might start operating and injury could result 1 Pull the shuttle race cover 1 downward to open it 2 While holding the bobbin so that the thread winds to the right insert the bobbin into the bobbin case 3 Pass the thread through the slot 2 and pull it out from the thread hole 3 4 Check that the bobbin turns in the direction of the arrow when the th...

Page 37: ...hread tension N 0 3 0 4 Pre tension N 0 2 0 4 Needle DP x 17 19 Normal sewing speed 2 000 sti min 1 This is the tension value when the pretension is 0 2 N 4 6 1 Lower thread tension Adjust the thread tension to the weakest possible tension by turning the thread tension nut 1 until the bobbin case will not drop by its own weight while the thread end coming out of the bobbin case is held 2536Q Stron...

Page 38: ... for the material being sewn Refer to Setting the tension value below Turn the tension nut 1 sub tension to adjust so that the upper thread trailing length is about 42 mm Setting the tension value Touch the and keys 2 on the sewing operation screen to increase or decrease the Tension value 3598B Weaker Stronger Sewing operation screen 2 ...

Page 39: ...he thread take up 2 is aligned with the index mark Turn on the power If a program has been registered the program number and a preview of the sewing pattern will be displayed No programs are registered at the time of shipment from the factory and so is displayed as the program number No For details on the sewing data reading method refer to 3 USING STORAGE MEDIA in the LCD Panel Operation Panel In...

Page 40: ...he work clamp switch 4 to the 1st step and check the intermediate position for the work clamp 5 Depress the work clamp switch 4 to the 2nd step to fully lower the work clamp 2 step work clamp operation is enabled when memory switch No 002 is set to 1 Do not set memory switch No 002 to 2 To return the work clamp to one step operation 1 Set memory switch No 002 to 0 Refer to 2 2 List of memory switc...

Page 41: ...le sewing as this may result in personal injury or damage to the machine 5 1 Sewing 1 Turn on the power 2 Touch the or key to select the number for the program to be sewn For details on reading sewing data from SD cards and USB memory devices refer to 3 4 Importing items of sewing data separately in the LCD panel Operation pane Instruction Manual 3 Lower the work clamp 2 and then depress the start...

Page 42: ...ns out during sewing you can then continue sewing from the point where the thread broke or ran out 1 Touch Yes 3 to return to the resewing standby screen 2 Touch the keys 5 and 6 on the screen to return to the position where sewing is to be resumed When you touch the key 5 the feed will move backward by 1 stitch and when you touch the key 6 the feed will move forward by 1 stitch 3 Depress the star...

Page 43: ... Furthermore do not drink or eat the lubricating oil or grease They may cause diarrhea or vomiting Keep the oil out of the reach of children 6 1 Cleaning the rotary hook 1 Pull the shuttle race cover downward to open it and then remove the bobbin case 2 Open the setting claw 1 in the direction indicated by the arrow and then remove the shuttle race base 2 and the shuttle hook 3 3 Clean all the dus...

Page 44: ...cuum cleaner to clean the filter in the air inlet ports 2 of the control box 1 at least once a month 6 5 Cleaning the eye guard Wipe the eye guard clean with a soft cloth NOTE Do not use solvents such as kerosene or thinner to clean the eye guard 6 6 Checking the needle Always check that the tip of the needle is not broken and also that the needle is not bent before starting sewing 6 7 Lubrication...

Page 45: ... If the oil and grease get into your eyes or onto your skin inflammation can result Furthermore do not drink or eat the lubricating oil or grease They may cause diarrhea or vomiting Keep the oil out of the reach of children If any safety devices have been removed be absolutely sure to re install them to their original positions and check that they operate correctly before using the machine 7 1 Adj...

Page 46: ...spring 3 3 Use a screwdriver to turn the tension stud 5 in order to adjust the tension of the thread take up spring 3 NOTE If the thread tension spring 3 is not adjusted correctly the upper thread trailing length will be uneven after thread trimming 7 3 Arm thread guide R The standard position of arm thread guide R 1 is when the screw 2 is aligned with the index mark Loosen the screw 2 and move th...

Page 47: ...ign with the highest reference line reference line a 7 5 Adjusting the needle and rotary hook timing 1 Turn the pulley 1 in the direction of the arrow to raise the needle bar from the lowest position until the lowest reference line on the needle bar reference line B is aligned with the lower edge of the needle bar bush 2 If using a DP X 5 needle align with the reference line b which is the second ...

Page 48: ...tip Turn the pulley in the direction of the arrow to align the tip of the rotary hook with the center of the needle and then loosen the set screw 1 and turn the adjusting stud 2 to adjust so that the clearance between the needle and the tip of the rotary hook is 0 01 to 0 08 mm 7 8 Adjusting the shuttle race thread guide Install the shuttle race thread guide 1 by pushing it in the direction of the...

Page 49: ...th the edge of the bed use the following method to make the adjustment Adjusting by changing the amount of oil supplied from the sub tank 1 Remove the four screws 1 and then remove the X motor cover 2 2 Tilt back the machine head 3 Insert a screwdriver into the holes in the left side of the sewing machine bed and loosen the two bolts 3 4 Move the sub tank 4 up or down to adjust its position and th...

Page 50: ...by hand to set the driving lever 5 to the reverse position when the thread take up 6 is close to its lowest position 4 Remove the rubber cap 7 5 Loosen the bolt 8 6 Move the movable knife connecting plate 10 back and forth to adjust so that the distance from the ridge on the right side of the needle plate to the ridge on the movable knife 9 is 9 5 to 9 9 mm 7 After tightening the bolt 8 check the ...

Page 51: ... Tighten the nut 11 and then check that the collar 3 is not touching the inside of the groove in the thread trimmer cam 4 In addition push the driving lever 5 by hand toward the thread trimmer cam until the collar 3 touches the groove of the thread trimmer cam 4 and then check that the driving lever 5 returns smoothly to its original position when it is released 11 Check that there is a gap of abo...

Page 52: ...h the thrust washer 10 and the movable knife spacer 11 6 Check that the movable knife 6 and fixed knife 7 cut the thread cleanly Replace the movable knife spacer with accessory spacers t 0 2 0 3 0 4 so that the knives trim the thread accurately If the knife pressure is too weak and the thread is not completely cut use a thinner movable knife spacer If the knife pressure is too strong and the movab...

Page 53: ...screws 3 and shift the entire solenoid setting plate 4 up or down to adjust so that the thread wiper 2 is 15 mm in front of the needle center when the plunger 1 of the thread wiper solenoid is driven to the full stroke 2 Loosen the screw 5 and adjust the position of the thread wiper 2 so that the distance from the thread wiper to the tip of the needle is approximately 2 mm and the tip of the threa...

Page 54: ...ng the installation position of stepping clamp link Changing the installation position of stepping clamp link 1 Remove the face plate 2 Remove the two screws 1 and the two shoulder screws 2 and then remove the stepping clamp link 3 3 Change the installation position for the stepping clamp link 3 to either A B or C above If the position of the stepping clamp connecting rod is adjusted as described ...

Page 55: ... If using a DP x 5 needle align with the second reference line from the top reference line b 4 Open the top cover and loosen the two set screws 6 5 Align the index marks of the stepping clamp cam 7 and the stepping clamp connecting rod 4 and then tighten the two set screws 6 Check the following after changing the intermittent presser foot stroke 1 With the intermittent presser foot 1 lowered turn ...

Page 56: ...en depress the work clamp switch 1 to raise the work clamp 2 2 Loosen the two bolts 4 of the work clamp lifter lever 3 and move the work clamp lifter lever 3 up or down to adjust 7 17 Adjusting the air pressure Lift up the handle 2 of the regulator 1 and then turn it to adjust the air pressure to 0 5 MPa After adjustment is complete push the handle 2 downward to lock it 5018Q 4052M Max 30mm 2565B ...

Page 57: ...ng speed becomes faster When the lower knob is tightened the lowering speed becomes slower When it is loosened the lowering speed becomes faster Reference adjustments Upper knob Fully tighten Valve 1 Lower knob Fully tighten and then loosen by 8 turns Upper knob Fully tighten and then loosen by 5 turns Valve 2 Lower knob Fully tighten You can operate the work clamp when the power is turned off by ...

Page 58: ...p and feed plate which match the sewing pattern while referring to the processing diagram below Values in are the recommended sizes when sewing using the maximum area BAS 341H 250x160 mm BAS 342H 300x200 mm BAS 341H Work clamp processing diagram Feed plate processing diagram Recommended thickness 1 5 mm 3523B 3524B Center of sewing area Center of sewing area mm ...

Page 59: ...7 STANDARD ADJUSTMENTS 50 BAS 341H BAS 342H BAS 342H Work clamp processing diagram Feed plate processing diagram Recommended thickness 1 5 mm 3525B 3526B Center of sewing area Center of sewing area mm ...

Page 60: ...k that connector P9 on the main P C board is properly connected E016 Problem with the stop switch connection Turn off the power and then check that connector P9 on the main P C board is properly connected E020 The start switch was pressed without the work clamp being lowered First lower the work clamp E025 Start switch was being depressed when power was turned on Release the switch E035 Work clamp...

Page 61: ...board and the 4 pin connector of the upper shaft motor on the motor P C board E131 Synchronizer is not connected correctly Turn off the power and then check that connector P11 on the motor P C board is properly connected E132 Problem detected with upper shaft motor operation Turn off the power and then check that connectors P11 and P1 on the motor P C board connector P6 on the main P C board and t...

Page 62: ...E211 Y feed motor stopped due to a problem Turn off the power and then check if there are any problems in the Y feed direction Turn off the power and then check that connectors P18 and P22 on the main P C board are properly connected E214 Y feed motor stopped due to a problem during sewing Turn off the power and then check if there are any problems in the Y feed direction Turn off the power and th...

Page 63: ...lear the error Insert the storage media and then try again E421 The program number is invalid or it has no corresponding data Press the RESET key to clear the error Check that data for this program number is present on the storage media E422 Error occurred while reading from storage media Check the data Press the RESET key to clear the error Check the data in the storage media E424 Insufficient sp...

Page 64: ...ption output number already exists Change the extended option output number If not using the extended option output initialize the data to clear the extended option output data E581 Memory switch file cannot be read correctly The model for the data which was read does not match the model being written to Press the RESET key to clear the error Read data for the same sewing machine model E582 Memory...

Page 65: ... main P C board is properly connected E741 X feed motor cooling fan does not operate Turn off the power and then check if the cooling fan is blocked with scraps of thread Check that connector P7 on the main P C board is properly connected E742 Y feed motor cooling fan does not operate Turn off the power and then check if the cooling fan is blocked with scraps of thread Check that connector P7 on t...

Page 66: ...e air cock P 10 Air pressure is too weak Adjust the regulator so that the air pressure is about 0 5 MPa P 47 Work clamp does not work Speed controller has been tightened too far Adjust the speed controller by loosening it 4 turns from the fully tightened position P 48 Thread wiper does not work Thread wiper setting is OFF Set the thread wiper setting to ON 1 Work clamp does not rise to the maximum...

Page 67: ...g amount to approximately 30 mm P 27 Thread unraveling at sewing start Sewing start speed is too fast Adjust the sewing start speed 1 Rotary hook tip is missing Replace the part Needle is too thin Needle is too thick Select a needle that is suitable for the sewing conditions P 28 Needle is bent Replace the needle P 23 Needle is not installed correctly Install the needle so that it faces correctly ...

Page 68: ...pair the respective part by buffing it Alternatively replace the part Lower thread is breaking Lower thread tension is too strong Reduce the lower thread tension P 28 Needle is bent Replace the needle P 23 Needle is too thin Select a needle that is suitable for the sewing conditions P 28 Adjust the driver needle guard P 39 Needle and rotary hook tip are touching Adjust the needle clearance P 39 Ne...

Page 69: ...s too fast Retard the feed timing Intermittent height of intermittent presser foot is too low Adjust the intermittent height of the intermittent presser foot 1 Adjust the driver needle guard P 39 Upper thread is not tight Needle and rotary hook tip are touching Adjust the needle clearance P 39 Lower thread tension is too weak Increase the lower thread tension P 28 Lower thread is not tight Upper t...

Page 70: ...ries Ltd All Rights Reserved This is the original instructions BAS 341H BAS 342H I5081061B E 2015 09 B 1 Please note that the contents of this manual may differ slightly from the actual product purchased as a result of product improvements ...

Reviews: