10
KNOWING YOUR SEWING MACHINE
———————————————————————————————————————————————————————————————————————————————————
Operation panel
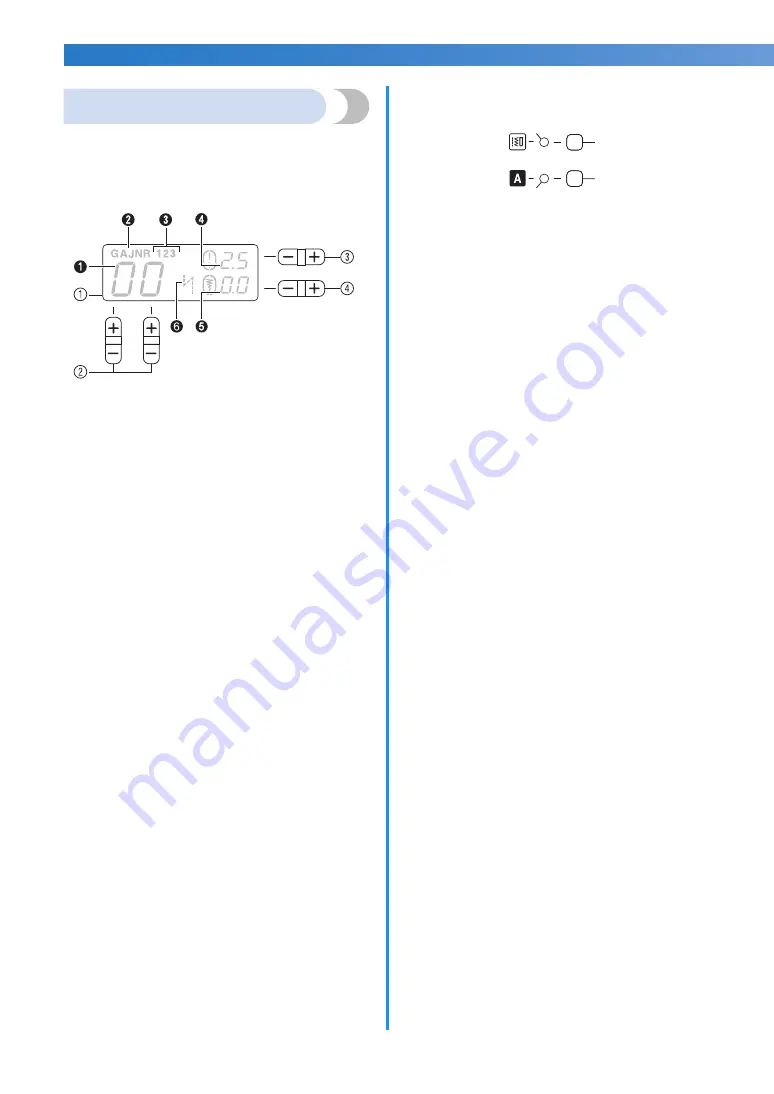
The operation panel, located on the front of the
sewing machine, allows you to select a stitch and
specify how the stitch will be sewn.
The operation panel differs depending on the sewing
machine model.
a
LCD (liquid crystal display)
1
The number of the selected stitch
2
The presser foot type to be used
3
The selected stitch type number
4
The stitch length (mm)
5
The stitch width (mm)
6
The auto reverse/reinforcement
b
Stitch selection keys
Press the stitch selection keys, and then select the
number for the stitch that you wish to use. For details,
refer to “Selecting a stitch” (page 39).
c
Stitch length adjustment key
Press this key to adjust the stitch length. (Press the “–”
side to reduce the stitch length; press the “+” side to
increase the stitch length.)
d
Stitch width adjustment key
Press this key to adjust the stitch width. (Press the “–”
side to reduce the stitch width; press the “+” side to
increase the stitch width.)
■
Keys and indicators
e
Utility stitch key
Press this key to select the desired type of utility stitches.
Press this key once or more until the desired stitch type
number is displayed on the LCD. For details, refer to
“Selecting a stitch” (page 39).
f
Utility stitch indicator
This indicator lights up when the utility stitch is selected.
g
Character stitch key
Press this key to select the desired font type of character
stitches. Press this key once or more until the desired
stitch type number is displayed on the LCD. For details,
refer to “Selecting characters” (page 76).
h
Character stitch indicator
This indicator lights up when the character stitch is
selected.
h
e
f
g


