background image

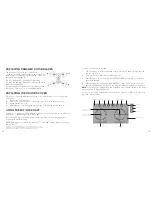
AUTOMATIC TRIM

Automatic Trim resets the drone to its default settings . Automatic Trim is useful in 

situations such as:

•  The aircraft has had an impact that has affected its gyroscope/electronic stabilizer .
•  You have transported the aircraft from one place to another . 
•  Your drone does not maintain its fixed position when hovering .

To reset using Automatic Trim:

1 . 

Switch the controller's Power button to the ON position .

2 . 

Move both left and right control sticks to the bottom-left . The LED lights will flash 

rapidly, indicating that the reset is in process . 


3 . 

After 10 seconds, return both control sticks to their initial position . The lights on the 

drone will stop flashing, indicating that the reset completed successfully .

It is advisable to perform an Automatic Trim to reset to default settings fairly often .

12

FLIGHT TIME

Your drone's flight time varies depending on a range of factors, such as:

•  The battery charge level

•  The speed at which you fly your aircraft .

•  The wind speed to which the aircraft is subjected .

As a general rule, with the battery fully charged you can expect a continuous hovering 

flight time of up to 7 minutes .

HEADLESS MODE FUNCTION

You can set the forward direction of your drone to a cardinal point . For example, if the 

drone is pointing north when you activate Headless Mode, north will be the forward 

direction, regardless of the position of the front and back of the drone .

To activate Headless Mode, before take-off press the Headless Mode button . You will 

hear tones from the controller, indicating that Headless Mode is activated . 

Headless 

Mode must be activated before take-off. 

To reset to a new direction, you must reboot the 

drone by disconnecting and reconnecting the drone's battery . To disable Headless Mode, 

press the Headless Mode button again . 

RETURN HOME FUNCTION

The Return Home function allows you to bring the drone back to its starting position, 

moving backward based on the direction that was set on take-off . 
NOTE: Using this feature is not recommended until you are fully experienced with 

controlling your drone .

To activate the Return Home function, press the Return Home Button . The drone will 

move in the backward direction, based on the direction set on take-off . 

To deactivate the Return Home function, perform any movement with the right control 

stick .

13

Summary of Contents for 324463

Page 1: ...324463_INS_Racing Drone with Obstacle Course Size 5 Wx4 75 H_Output 100 _Prints 1 1 Blk Flight Force RACING DRONE WITH OBSTACLE COURSE for ages 14...

Page 2: ...ance 21 Specifications 21 Warranty 24 CAUTION TO REDUCE THE RISK OF ELECTRIC SHOCK DO NOT REMOVE COVER THERE ARE NO SERVICEABLE PARTS INSIDE TO REDUCE THE RISK OF FIRE OR ELECTRIC SHOCK DO NOT EXPOSE...

Page 3: ...nings may be blocked 9 Do not carry this unit by charging cable or use cable as a handle 10 Never operate this unit if it has a damaged cable if it is not working properly or if it has been dropped or...

Page 4: ...and if not installed and used in accordance with the instructions may cause harmful interference to radio communications However there is no guarantee that interference will not occur in a particular...

Page 5: ...teries where a child or pet could play with or swallow them If the batteries are swallowed contact a physician immediately The batteries may explode if mistreated Do not attempt to recharge or disasse...

Page 6: ...n in the lower section you will hear another tone and the LED lights stop flashing The controller and drone are now synchronized SET YOUR SPEED The drone has three speed settings While learning to use...

Page 7: ...in flight NOTE It is best to make final trim adjustments when the craft is airborne 1 Left Right Rotate Trim Corrects unintentional movement in which the drone rotates left or right in a horizontal p...

Page 8: ...fully charged you can expect a continuous hovering flight time of up to 7 minutes HEADLESS MODE FUNCTION You can set the forward direction of your drone to a cardinal point For example if the drone i...

Page 9: ...th the slots in the bottom of Part 2 and push to attach To assemble the stunt ring 1 Bend the ends of Part 5 along the pre creased lines 2 Align the slots in Part 5 with the slots in Part 3 and push t...

Page 10: ...at the videos are stored as MP4 files If you are unable to open these standard formats you can convert the files or download appropriate software ELECTRONIC PROTECTION SYSTEM Your drone is equipped wi...

Page 11: ...reSM on an iPad change filters to Supports iPhone Only 18 App StoreSM is a service mark of Apple Inc registered in the U S and other countries iPad and iPhone are trademarks of Apple Inc registered in...

Page 12: ...Do not use harsh cleaning agents Do not submerge in water or other liquids Check components regularly such as the rotor blades chassis motors If any component is damaged or worn do not use the drone u...

Page 13: ...22 23 NOTES NOTES...

Page 14: ...t can be identified by the Brookstone trademark trade name or logo affixed to them or their packaging The Limited Warranty does not apply to any non Brookstone products Manufacturers or 24 suppliers o...

Page 15: ...324463 Rev 1 Brookstone 2017 Find thousands more great ideas online Brookstone com 1 800 846 3000 1 Innovation Way Merrimack NH 03054...

Reviews: