


Bidets of this
type
may:
a.
Be supplied with cold and / or hot water
through type AA, AB, AD or AUK1
backflow prevention arrangement or
type DC device serving the bidet only. See
Diagram 3: or
Type AA, AB, AD or AUK1 air gap with or
without blended water cistern or type DC
backflow Prevention device
.
b.
Be supplied with cold water from an
independent distributing pipe serving
the bidet only, or a common
distributing pipe serving the bidet and
which may also serve a WC or urinal
flushing cistern at a lower level. See
Diagram 4; or
Diagram 3
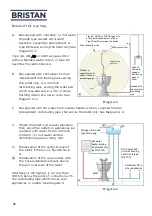
c.
Be supplied with hot water from a water heater, which is supplied from an
independent distributing pipe, that serves the bidet only. See Diagram 4: or
Diverter or
separate control
valves to hose or
ascending spray
Type AA, AB, AD or AUK1 air gap with
or without blended water cistern or
Type DC backflow prevention device
Zone of backflow risk
300mm minimum
Hot and
cold water
supply or
distributing
pipes to
mixer
Blended cold
and hot water
distributing
pipe
FL
d.
Where the bidet is at a lower elevation
than any other outlets or appliances, be
supplied with water from a common
cold and / or hot water vented
distribution pipe providing that;
(i)
the elevation of the spillover level of
the bidet, if there is no flexible hose;
or
(ii)
the elevation of the spray outlet, with
the hose extended vertically above
the spill over level of the bidet
Whichever is the highest, is not less than
300mm below the point of connection with
the distributing pipe which serves over
appliances or outlets. See Diagram 5.
SgV
WP
Storage cistern with
Type AGair gap
Hot water
heater serving
single bidet only
(see G15.10c)
FL
DP to serve WC
or urinal flushing
cistern only (see
G15.10b)
Cold water DP to
other appliances
Bidet
Diagram 4
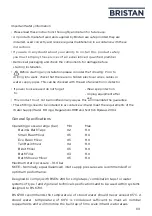
06
Summary of Contents for QD 1/2 C
Page 15: ...15...