


9
Operation
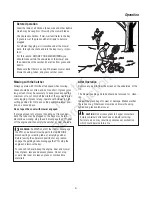
Before Operation
Clear the lawn of all sticks, stones, wire and other debris
which may be caught or thrown by the mower blades.
Check grass condition. If wet, wait until later in the day.
If grass is wet, the grass catcher is likely to become
plugged.
For ef
fi
cient bagging, air circulation under the mower
deck, through the chute and into the bag is very impor-
tant.
For this reason, BEFORE YOU BEGIN MOWING you
should make certain the underside of the mower and
the underside of the catcher lid are free from grass and
debris.
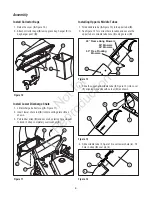
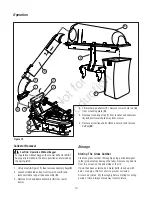
Make sure that there is a snug
fi
t between mower deck,
blower housing, tubes, and grass catcher cover.
Mowing with the Catcher
Always operate with throttle at full speed when mowing.
Grass should be cut often, and not too short. If grass is too
long or lush it may be necessary to keep ground speed to a
minimum or to cut only half the width of the mower to pre-
vent clogging. If grass is long, operate with mower in high
cutting position for
fi
rst pass, cutting again in a lower posi-
tion on a second pass.
Do not open the cover with mower engaged.
If a large amount of cut grass is spilling out from under
deck, the tube may be plugged or the bags may be full—
discontinue mowing, stop the unit, disengage the PTO, shut
off the engine and then empty the catcher or clear the tube.
After Operation
Remove any debris from the screen on the underside of the
lid.
The blower housing and tube should be removed for clean-
ing.
Inspect the grass bags for wear or damage. Make sure that
there is a snug
fi
t between mower deck, blower housing,
tubes, and grass catcher cover.
WARNING
: ALWAYS shut off the tractor. Disengage
the PTO, and allow all moving parts to stop BEFORE
disconnecting or clearing tube, or emptying catcher.
Before leaving the operator’s position for any reason,
engage the parking brake, disengage the PTO, stop the
engine and remove the key.
To reduce
fi
re hazard, keep the engine, rider and mower
free of grass, leaves and excess grease. Do not stop
or park rider over dry leaves, grass or combustible
materials.
CAUTION
: Do not leave grass in bagger containers.
Empty containers after each use and before storing.
Failure to do so may result in spontaneous combustion
which could develop into a
fi
re.
Not
for
Reproduction