Brickcom Fixed Dome FD-100Ae Easy Installation Manual Download Page 5


5

4) 

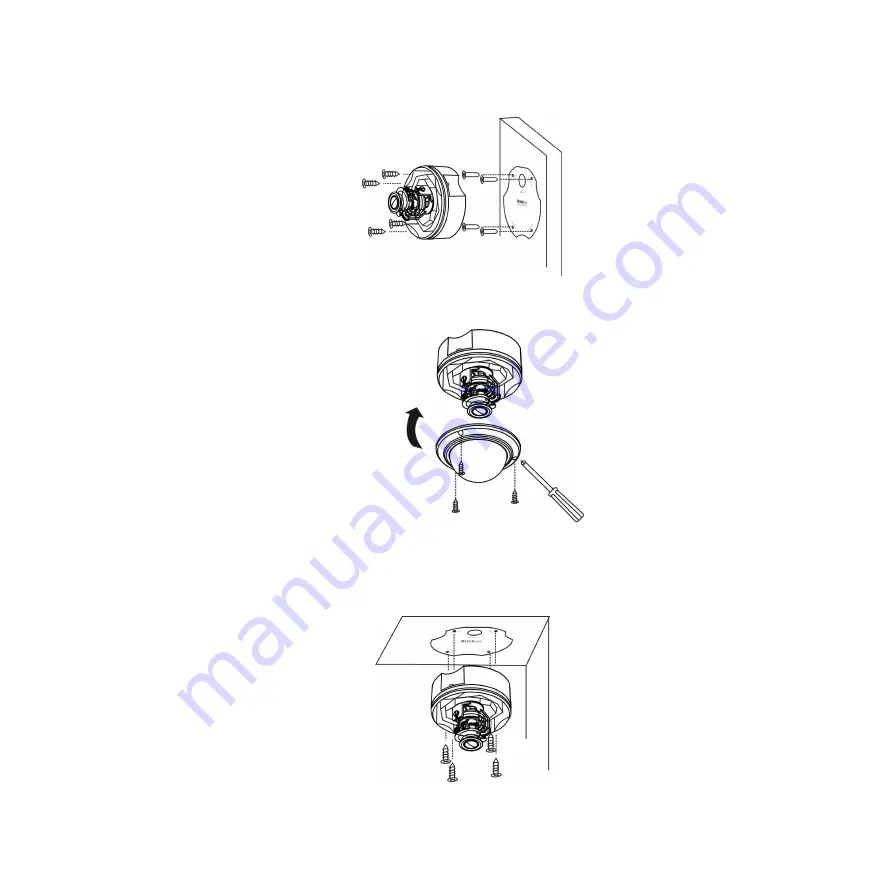
Mount the camera on the wall and position to four screw slots over the plastic anchors. Insert 
the screws into the holes and use the screwdriver to tighten the screws clockwise until they are 
secure. 


5) 

Place the dome cover back on the camera device. 


3.  For ceiling installation: 

The  user  needs  the  four  screws  which  are  included  in  the  product  package  and  a  screwdriver.   
Mount the camera on the desired location and use the screwdriver to tighten the screws clockwise 
through the four holes on each side of the device as shown below.    The best place to mount the 
camera is into a ceiling stud. 


Summary of Contents for Fixed Dome FD-100Ae

Page 1: ...1 Easy Installation Guide Megapixel Day Night Fixed Dome Network Camera Fixed Dome Series English...

Page 2: ...2 Step 1 Check Package Contents a Network Camera Fixed Dome series b Terminal Block c Product CD d Location Sticker e Warranty Card f Screw bag g Easy Installation Guide h L WM 01 Optional...

Page 3: ...mera may fall and be damaged This document is for easy installation purpose only please refer to the user manual for more details 1 Remove the dome cover from the camera device I PoE Power DIDO Audio...

Page 4: ...ocation on the wall to place the camera Attach the location sticker to the desired spot 2 Drill four holes through the center of the four location holes on the sticker 3 Hammer the four plastic anchor...

Page 5: ...secure 5 Place the dome cover back on the camera device 3 For ceiling installation The user needs the four screws which are included in the product package and a screwdriver Mount the camera on the d...

Page 6: ...crew and then rotate the lens to left or right After completion tighten the pan screw 2 Release the tilt screw on both side of the device and then rotate the lens to up or down After completion tighte...

Page 7: ...ghten the view angle controller 2 Release the focus controller and then moving the controller bar left or right to adjust the focus range After completion tighten the focus controller 5 Complete the I...

Page 8: ...Connect the power adaptor to the camera device 2 Connect the camera to the Ethernet hub using a RJ45 Ethernet cable II Power over Ethernet PoE Connection 1 Connect the camera to a PoE enabled hub via...

Page 9: ...d to finish installation Step 5 Launch EasyConfig Launch the EasyConfig software and click on the camera from the survey list to connect Follow the EasyConfig software to configure the camera s IP add...

Reviews: