Brickcom Fixed Dome FD-100Ae Easy Installation Manual Download Page 3


3

Step 2 .Hardware Installation 


WARNING  -  Do  not  mount  the  camera  on  a  soft  material. The  camera  may  fall 
and be damaged. 


This  document  is  for  easy  installation  purpose  only;  please  refer  to  the  user 
manual for more details. 

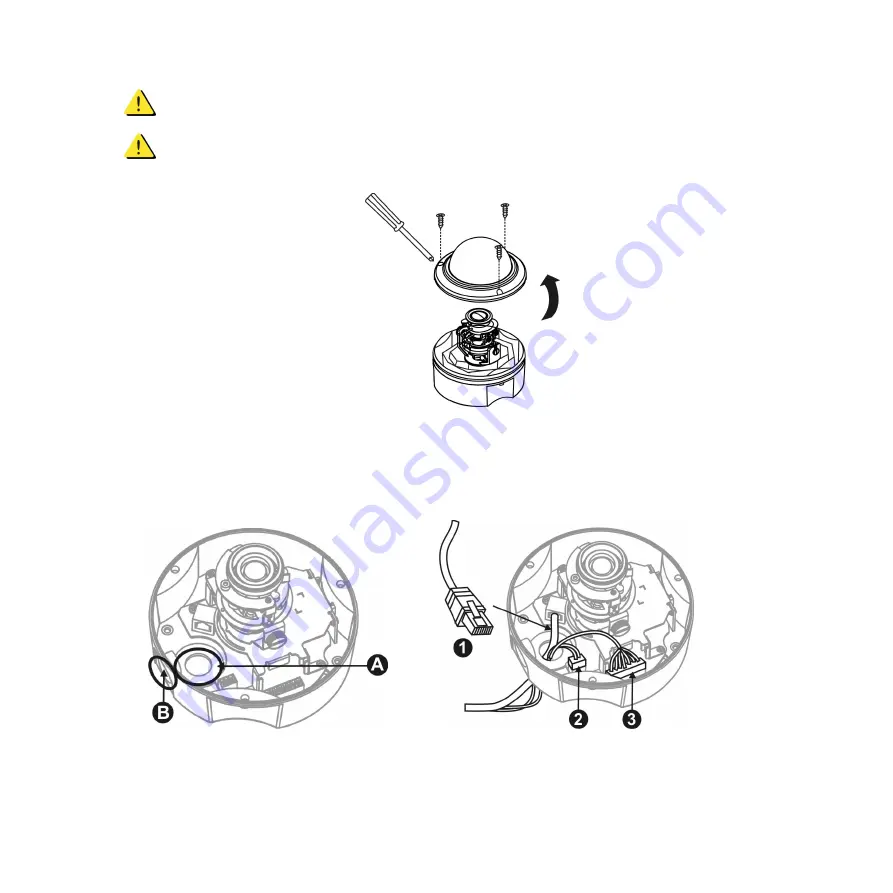
1.  Remove the dome cover from the camera device. 


I. PoE, Power, DIDO, Audio Connection 

1)  Insert the PoE(1) / DC12V(2), DIDO and Audio cable(3) through conduit hole A or B. 


Summary of Contents for Fixed Dome FD-100Ae

Page 1: ...1 Easy Installation Guide Megapixel Day Night Fixed Dome Network Camera Fixed Dome Series English...

Page 2: ...2 Step 1 Check Package Contents a Network Camera Fixed Dome series b Terminal Block c Product CD d Location Sticker e Warranty Card f Screw bag g Easy Installation Guide h L WM 01 Optional...

Page 3: ...mera may fall and be damaged This document is for easy installation purpose only please refer to the user manual for more details 1 Remove the dome cover from the camera device I PoE Power DIDO Audio...

Page 4: ...ocation on the wall to place the camera Attach the location sticker to the desired spot 2 Drill four holes through the center of the four location holes on the sticker 3 Hammer the four plastic anchor...

Page 5: ...secure 5 Place the dome cover back on the camera device 3 For ceiling installation The user needs the four screws which are included in the product package and a screwdriver Mount the camera on the d...

Page 6: ...crew and then rotate the lens to left or right After completion tighten the pan screw 2 Release the tilt screw on both side of the device and then rotate the lens to up or down After completion tighte...

Page 7: ...ghten the view angle controller 2 Release the focus controller and then moving the controller bar left or right to adjust the focus range After completion tighten the focus controller 5 Complete the I...

Page 8: ...Connect the power adaptor to the camera device 2 Connect the camera to the Ethernet hub using a RJ45 Ethernet cable II Power over Ethernet PoE Connection 1 Connect the camera to a PoE enabled hub via...

Page 9: ...d to finish installation Step 5 Launch EasyConfig Launch the EasyConfig software and click on the camera from the survey list to connect Follow the EasyConfig software to configure the camera s IP add...

Reviews: