Brickcom Economy Outdoor Bullet Series Easy Installation Manual Download Page 3


Step 2.Hardware Installation


WARNING  -  Do  not  mount  the  camera  on  a  soft  material.  The  camera  may  fall  and  be 

damaged.


A.  Wall Installation


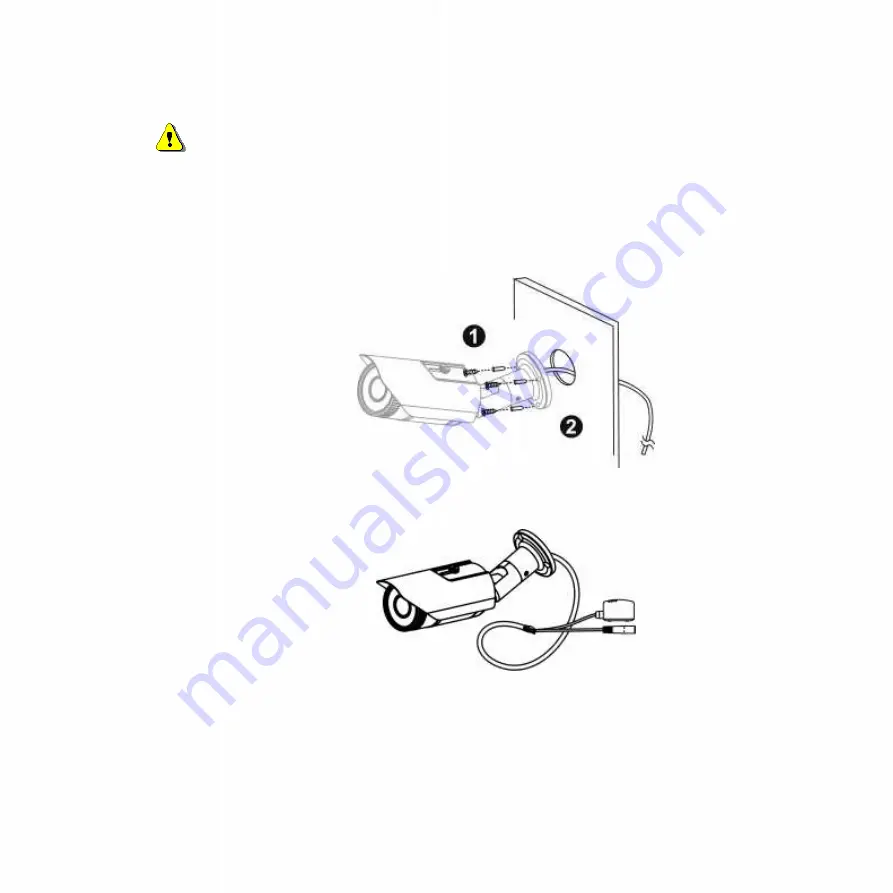
a.  Drill three holes into the wall and (2) hammer the supplied plastic anchors into the three holes. 

(3) Use a screwdriver and the supplied screws to secure the plate to the wall. 


b.  Connect the POE cable. 


Summary of Contents for Economy Outdoor Bullet Series

Page 1: ...1 Easy Installation Guide Megapixel Day Night Bullet Network Camera Economy Outdoor Bullet Series English ...

Page 2: ...ntents Please check to make sure the product package contains all the accessories listed below a Network Camera b Screw bag c Warranty Card d Dry Bag e Power Adapter Optional f Product CD g POE Optional H Terminal Block 1 ...

Page 3: ... soft material The camera may fall and be damaged A Wall Installation a Drill three holes into the wall and 2 hammer the supplied plastic anchors into the three holes 3 Use a screwdriver and the supplied screws to secure the plate to the wall b Connect the POE cable 2 ...

Page 4: ...nnector pass the RJ 45 cable from the camera through the bracket and connect it to the PoE cable RJ45 Connector Pin No Function Pin 1 Transmit Out Tx Pin 2 Transmit Out Tx Pin 3 Receive In Rx Pin 4 DC 48V Pin 5 DC 48V Pin 6 Receive In Rx Pin 7 48V_GND Pin 8 48V_GND Step 2 2 Camera Connection The Bullet Series PoE compliant The camera can be connected to a PoE enabled switch a If using a PoE enable...

Page 5: ...Use a standard RJ 45 cable to connect the PoE Injector to the non PoE switch iii Use a standard power cable to connect the PoE Injector to a power outlet Step 3 Install the EasyConfig Software Insert the CD into the CD ROM and follow the instructions of the InstallShield Wizard to finish installation 4 ...

Page 6: ...ftware and click on the camera from the survey list to connect Follow the EasyConfig software to configure the camera s IP address and EasyLinkTM settings Step 5 Installation Completed Click Live View to view the live video feed of the network camera 5 ...

Reviews: