Operating the M10
The M10 is designed as a remote control for one or more M7 processors. The majority of the functions of
the M10 are identical to the M7, and in simple terms, when an M7 is selected to be controlled, the M10 is
simply reflecting the state of that M7. Please refer to your M7 user manual for complete operational
instructions for the M7 as we will not re-print that information in this manual.
General overview of the M10 keys and the displays
:
Level Meters
8 sections display the input level of 4 stereo
machines at a time, in 2 banks, with the
channel/bank legends below them showing
which bank and machine is selected.
Channel/Bank indicator Displays
2 rows of 8 back lit text displays indicate what
bank has been selected, following the level
meters, and which machine is selected to control
the top row is for machines 1-4 in stereo pairs
and the bottom row is for machines 5-8 in stereo
pairs. The active bank with be lit and the selected
machine will be highlighted.
Display Section
Like the M7, there are displays for the program,
edit parameters, system parameters that are being
adjusted or selected, and in addition a display
section has been added to the lower right to
display what machine is being controlled.
Cursor Up/Down Keys
.
When in machine edit mode, controls lower
display, selects reverb effect parameters,
program banks, system parameter types, register
banks. When in machine mode selects upper and
lower machine banks for machines 1-4 or 5-8.
Program Select and Effect Adjust Wheel
Controls upper display and scrolls though
programs in the program mode, adjusts effect
parameters in edit mode
.
System Key
Takes you to the system menu on the selected
machine to select system setup parameters
Edit Key
This selects the effect edit page of the selected
machine, of the current running program.
Enter Key
Press to confirm operations like loading a
selected program on the selected machine
Store Key
Press to store a edited program in a register on
the selected machine.
Program Key
Takes you the program select mode, use the
adjust knob to scroll through programs, enter to
select.
Reg Key
Takes you to the user register bank on the
selected machine were edited presets are stored
and labeled.
Mach Key
This selects the M7 that you wish to control.
When one M7 is connected to the M10 this key
has no function.
Quick Keys
In program mode, for quick saves of presets, in
setup system wide setups.
Setup Key
For saving complete multi machine setups and
other setup adjustments for the M10
Tap Key
(Reserved for future enhancements)
3
Summary of Contents for Bricasti M10 Owner's
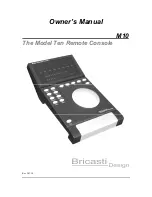
Page 1: ...Owner s Manual M10 The Model Ten Remote Console Rev 2 03 10...
Page 2: ......
Page 14: ...Notes 9...
Page 15: ......
Page 16: ...M10 The Model Ten Bricasti Design Ltd Bricasti Design com All rights reserved...

